
How to get Google API from Google Developers console
Hi! Are you going to creating an application that requires Google data for it? For this purpose, you need Google APIs. Google Developers Console is a site that is used by the developers for managing and viewing traffic data, authentication, and billing information for Google APIs. To access the Google APIs our project must be registered on Google Developers Console with your Gmail.
When we creating a project on the Google Dev console, Google keeps track of which applications are making requests to their APIs and make sure that the API is not being extremely spammed by one application.
How to get Google API from Google Developers console
Let’s start to play with the Google Developers console for achieving the Google APIs.
In this tutorial, I’m going to add the Analytics API for our project but you can get any API to follow this tutorial.
After register at the Google Developers Console, the below screen will be appearing.

If you have created projects in the Google Developers console before, you’ll see the list of created projects.
Now click on the ‘Create Project’ button. A popup will appear, where you enter your ‘Project Name’

Click on the ‘Create’ button. Your project will be created and enqueue in the Console project list.
Select your project from the top-right drop-down list and set the “Credentials”.
Check your Mailing address and set the name of your project that is showing to the user.
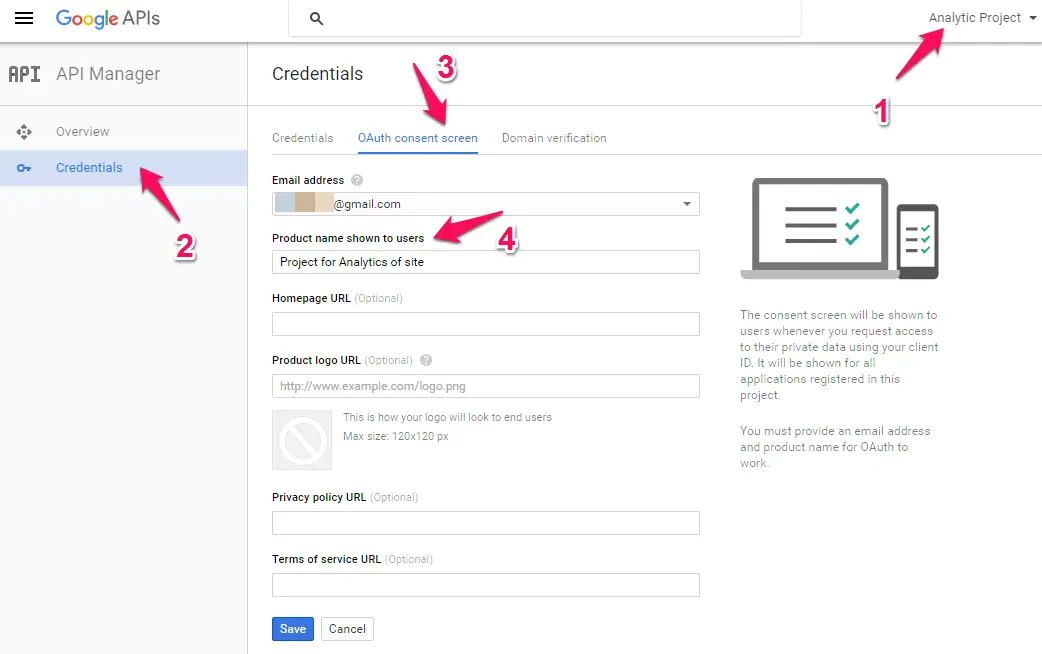
We have now created our 1st project on the Google Developers console successfully.
After creating a project let’s discuss something about Google APIs. Google has a list of APIs in Google API Console that they open for the community to use them. Most of them are free while few are paid, you’ll have to pay for use of them.
In the Google Developers console under the API Manager -> overview
You can see the list of all popular Google APIs that you can be accessed. At the start of the tutorial, I’m saying that I’ll use the Analytics API, but you can use any other API for your project along with this tutorial.
Awesome?
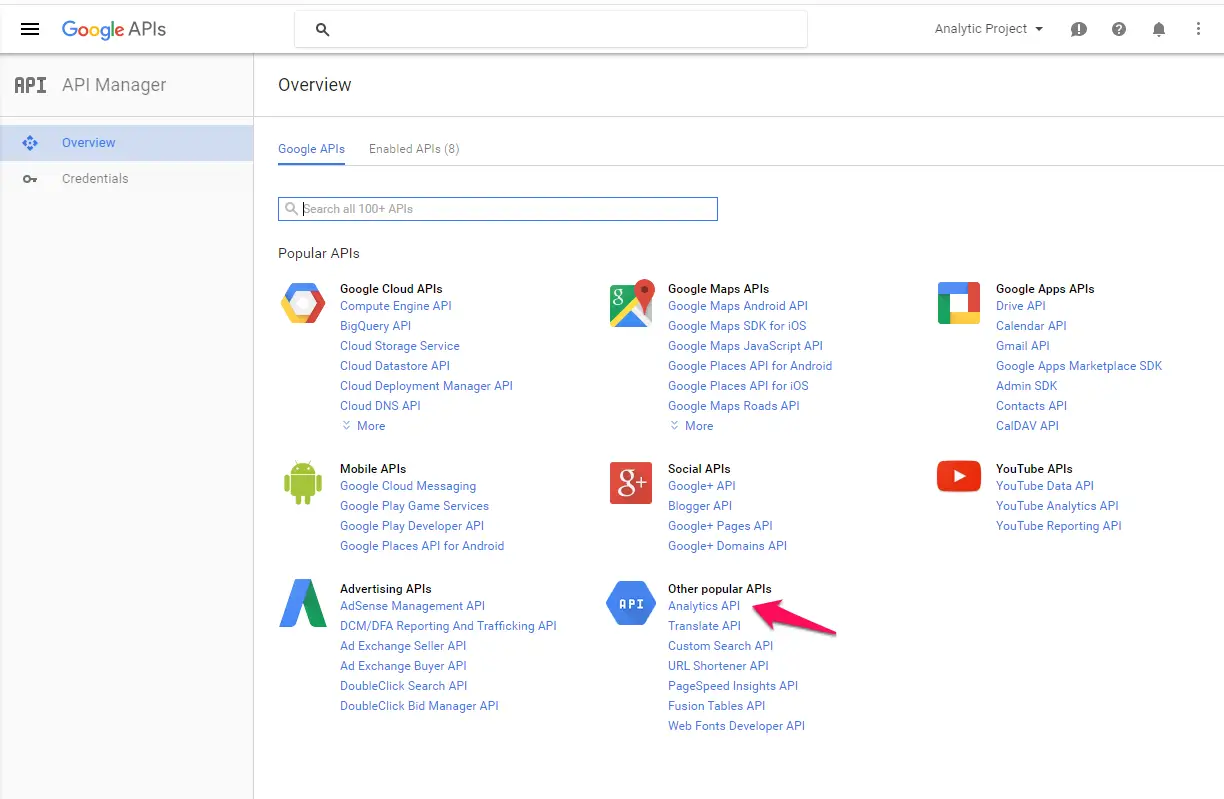
I’m writing another post about adding Analytics API to your website. Enabling Analytics API with your website
After Enable API. That API is adding to your project. There you can see a tab with Overview, Usage, and Quotes option.
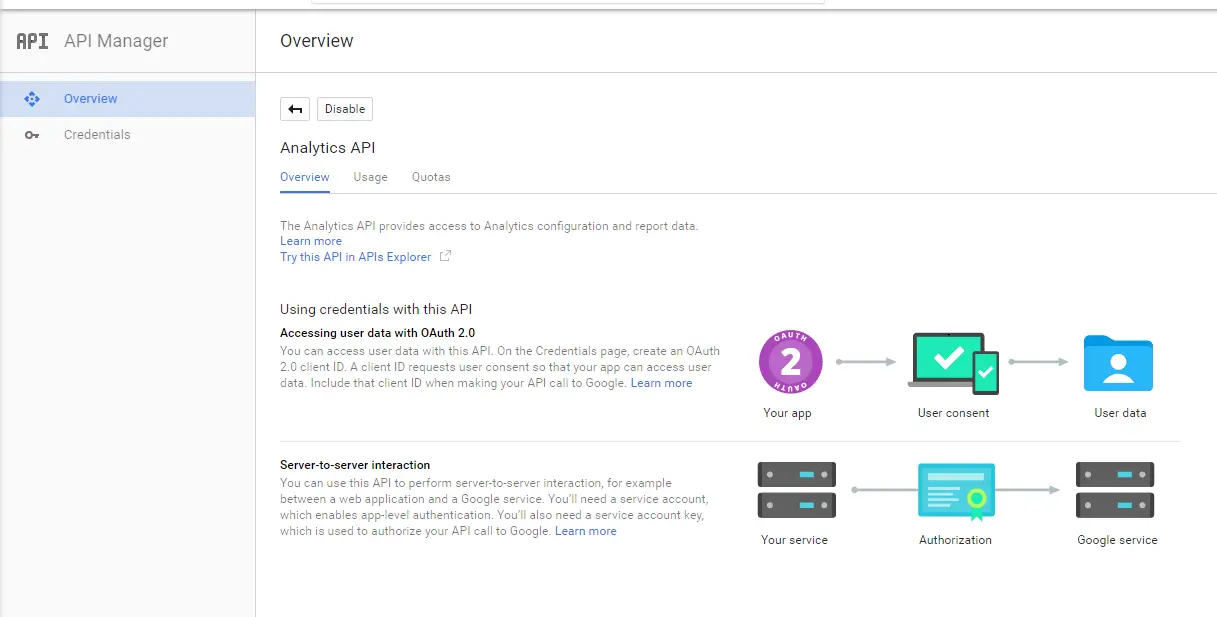
Overview: This gives you the information about that API. You can read more about Google APIs
Usage: tells you how many requests you’re have made to the API
Quotas: gives you information about the default quota for the API. By default, you’re allowed a limited number of requests with respect to the API per each day.
A request is any message sent to the API. APIs normally return a max result set per request let’s 100 rows, if there are more than 100 rows then a second request must be made to get the next 100. Each request to get the next set of rows is requested. 1000 rows at the 100-row chunks at 10 quota cost.
The Quota is the number of requests you are allowed to make a Google API without requesting permission to access more. In the Analytics API, you have access to 50000 requests per day. You can extend your Quota by requesting.
Read more about Analytics API limits and Quota.
Warning: If you apply for an extension of your Quota and you disable that API you’ll lose the quota extension and have to reapply for it again. Don’t disable an API and re-enable it. It’s a seriously dangerous button.


