How To Integrate Analytify Pro With WordPress Listify Theme
WordPress Analytify is a powerful Google Analytics plugin to track website traffic and get all your website stats on your WordPress Dashboard. It not only shows stats on the dashboard but the admin has the authority to show stats on the front-end for every single page and post and even for custom post types.
WordPress Listify is a theme on which every user wants to know how many visitors visit their listing. For second this task is functionality is difficult for the website owner as there is no such functionality in theme but with WordPress Analytify it can be done in seconds.
Steps to Integrate Analytify Pro With Listify Theme WordPress Dashboard
1) Activate Your Analytify Pro and set up the plugin.
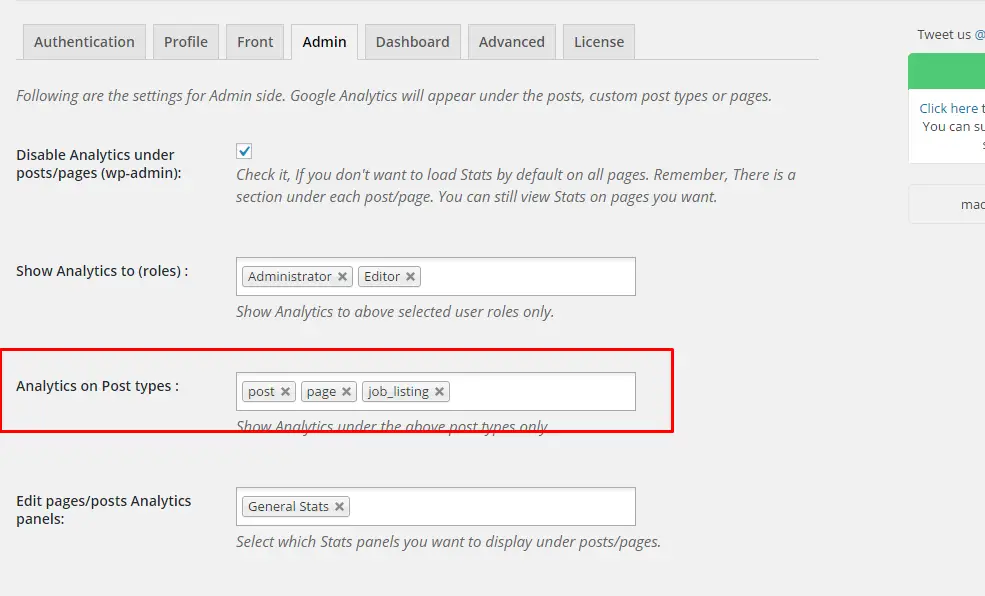
2) Go to Analytify -> Setting ->Admin.
3) Select job_listing from the “Analytics on Post types“ setting and click on the save setting button.

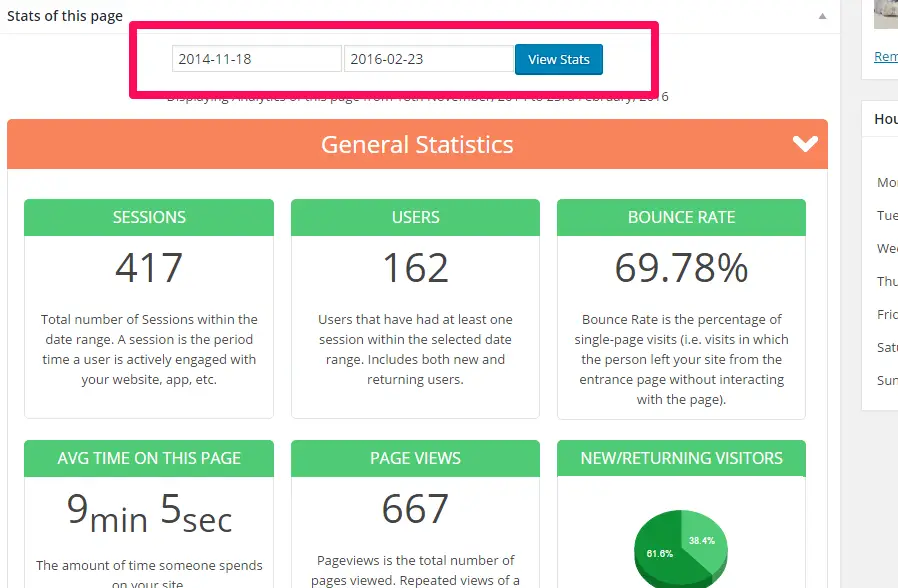
4) To see the stats go to a specific listing and edit it. Click on the “View Stats” button at listing publish panel.

5) Select the Start and End date for the stats and hit the view stats button again. That’s it stats will be shown on your listing.

Steps to Show Stats For Listing on Front End by using Analytify
1) Go to Analytify -> Setting -> Front.
2) Uncheck the “Disable front-end” option.
3) Select the user from the “Show Analytics to” setting to whom you want to show the front end stats.
4) Select job_listing form “Analytics on Post types “ setting.
5) Select the type of stats you want to show user from the “Front-end Analytics panels” setting
6) Save the Setting and that’s it, Stats will be shown on the user listing page.

Conclusion
These are the steps that you need to follow to integrate your Listify theme with Analytify Google Analytics Plugin for more authentic and specific stats for your custom type posts including other blog posts, Website pages, etc.


