
How to Add a User to Google Analytics Easily (2026)

To add a user to Google Analytics, open Admin and choose Account access management or Property access management. Click Add users, enter their email address, and pick a role. The person gets access without ever seeing your login credentials (Google Analytics Help: add, edit, and delete users).
My advice: give each person the lowest role that lets them do the job. Use Viewer for reporting, and grant Editor or Administrator only when someone needs to change settings.
GA4 allows you to add users using its built-in access management feature. Adding users means each person can view or manage only what they need. That covers accessing reports, analyzing traffic, or configuring account settings.
Instead of giving away full access, you can assign specific roles, such as Viewer, Editor, Analyst, or Admin. This allows better control over your data, improves collaboration, and prevents unauthorized changes.
This guide shows how to add a user to Google Analytics, manage permissions, and streamline account access in a few clicks.
Let’s get started!
Add User to Google Analytics (TOC):
Why You Need to Add Users to Google Analytics
Add users to GA4 so your team can share reports without sharing passwords. You also control who can view or edit what. Adding users to your Google Analytics 4 (GA4) property brings several advantages, especially when managing analytics across a team:
- Collaboration with Team Members: Sharing access lets multiple team members view reports, set up events, or analyze performance. Nobody needs to share login credentials.
- Control Over Sensitive Data: You can limit who sees or edits specific reports and configurations. Only authorized users access sensitive business information.
- Role-Based Access: GA4 lets you assign different roles, such as Viewer, Editor, or Admin. The right people get the right level of access for their responsibilities.
- Secure Data Sharing: Skip emailing reports or manually exporting data. Add a user in GA4 who can access real-time analytics directly in the platform, securely and efficiently.
- User Permission Management: Built-in user management tools make it easy to update access as your team changes. That prevents unauthorized access.
GA4 Access Levels
GA4 controls access at two levels: the account and the property. These are the two main levels of access control:
1. Account Level Access
Account level access applies to the overall GA4 account. It is typically granted to users who need control over high-level settings. This includes managing users across all properties within the account, creating or deleting properties, and accessing account-wide configurations. It’s best suited for administrators or those overseeing multiple properties.
2. Property Level Access
Property level access is specific to individual GA4 properties. This type of access lets users configure property-specific settings and manage data streams. They can also create conversions and view or analyze reports for that specific property. Property-level access is ideal for marketers, analysts, or developers. They are responsible for one or more specific projects within the account.
Analytify lets you manage user roles and permissions from your WordPress dashboard. It gives secure, role-based access to your analytics data.
Understanding Standard User Roles
When you add Google Analytics users at the account or property level, you can assign different roles. Base each role on the access the user needs. Each role controls what users can view, edit, or manage within your analytics property:
- Administrator
This is the highest level of access. Administrators can manage all settings, including adding or removing users, configuring properties, and adjusting tracking settings. - Editor
Editors can modify property settings, set up conversions, manage integrations (like Google Ads), and build reports. However, they cannot manage user access. - Analyst
Analysts can explore and analyze data using tools like Explorations, create segments, and share insights. They do not have access to change settings or manage users. - Viewer
Viewers have read-only access. They can view all reports and settings but cannot make any changes. This suits stakeholders who only need visibility into performance. - Marketer
Marketers often need access to view reports, create audiences, and measure campaign performance.
How to Add a User to Google Analytics 4 (Step by Step)
To add a user in Google Analytics 4, open Admin and go to Access Management. Click Add, enter the email, and set the role. Follow these step-by-step instructions:
Step 1: Log in to the Google Analytics Account
Go to Google Analytics and sign in with your Google account. Select the GA4 property you want to add a user to.
Step 2: Go to the Admin Panel
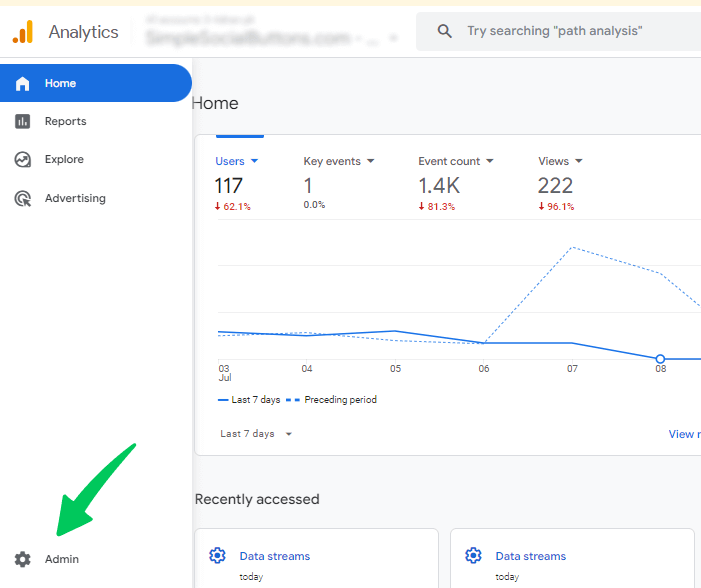
Click the Admin gear icon located at the bottom-left corner of the screen.
Step 3: Select Account or Property
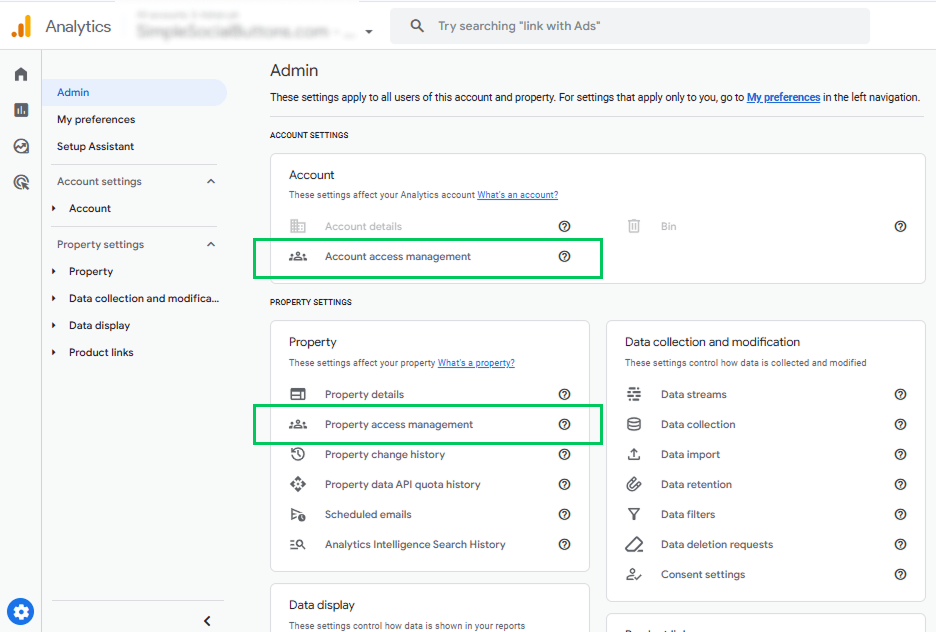
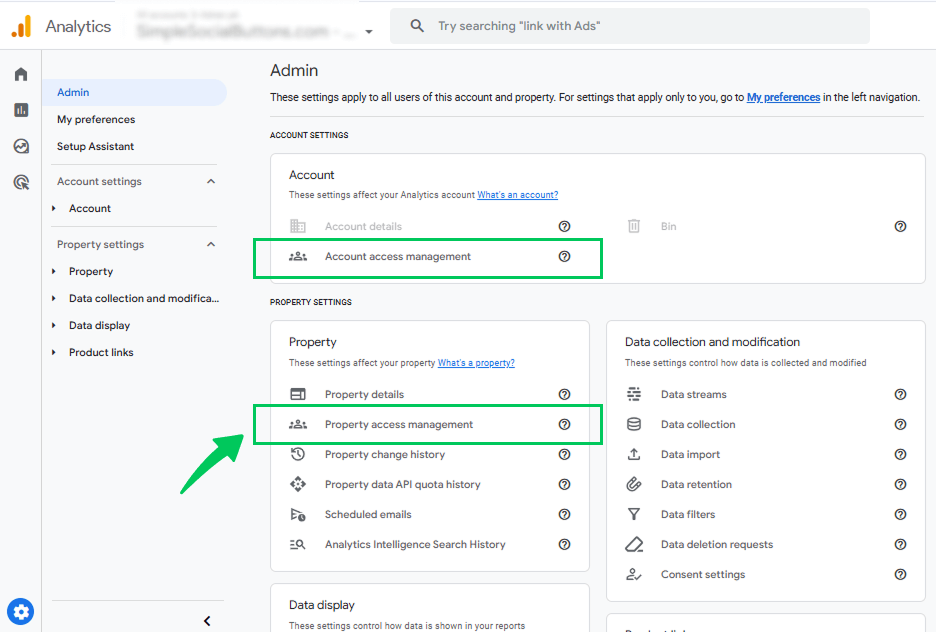
In the Admin panel, select whether to add a user in Google Analytics at the Account or Property level. Choose based on the level of access you want to grant.
Step 4: Click “Access Management”
Next, under the selected column (Account or Property), click on Access Management.
Step 5: Add New User
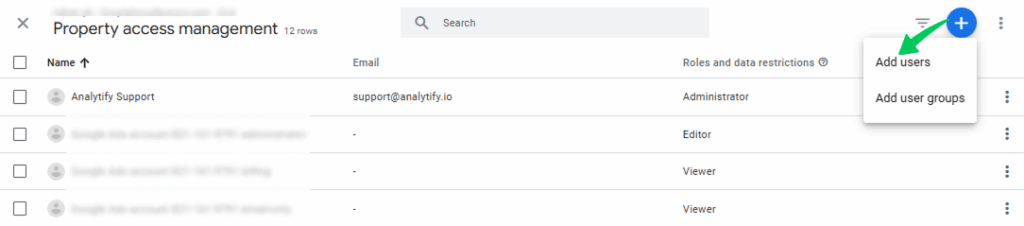
Now, click the + (plus icon) in the top-right corner and select Add Users from the dropdown.
Step 6: Enter the User’s Email Address
Then, type the email address of the person you want to grant access to.
Step 7: Notify User
Check the box to send a notification email to the user (recommended).
Step 8: Set User Permissions
Next, select the appropriate role: Viewer, Analyst, Editor, or Administrator, based on the user’s needs.
Step 9: Click Add
Finally, click Add to confirm and complete the process.
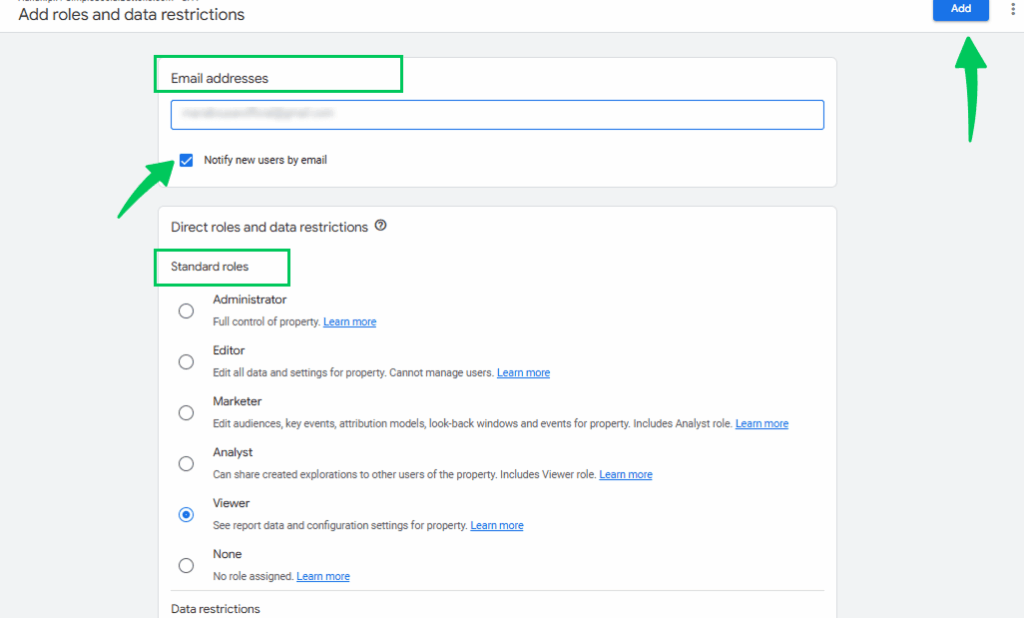
Congratulations! A new user is added here.
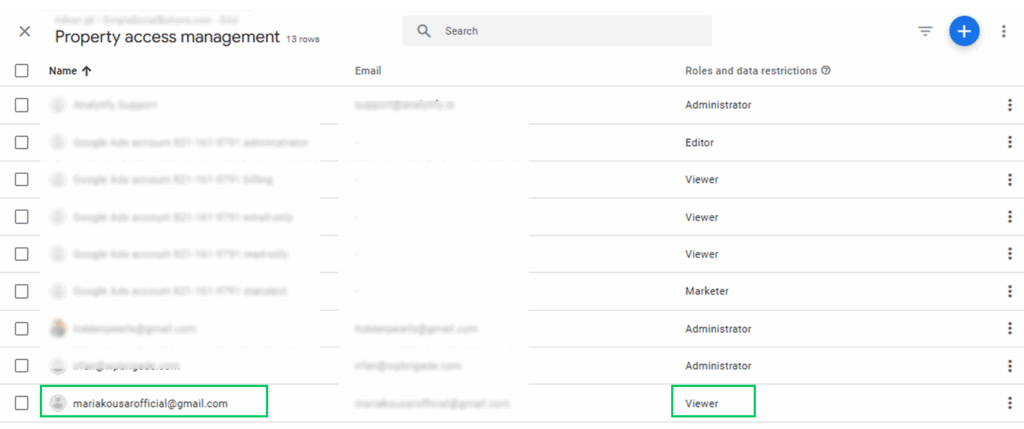
Steps to Remove User Access
To remove access, follow these steps :
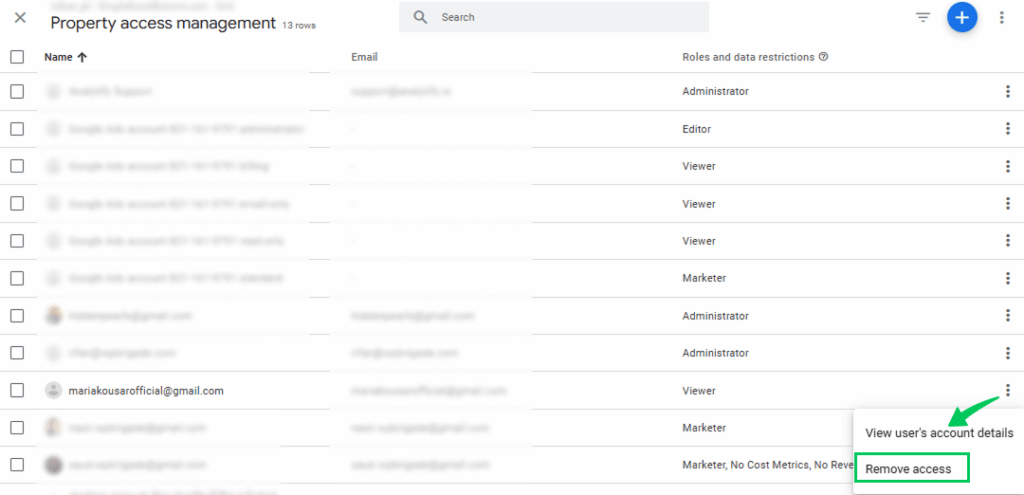
- Scroll through the list or use the search bar to locate the user’s email address. Next to the user’s email, click the three-dot icon and choose Remove Access.
- Now, click Remove to confirm the removal of the user’s access.
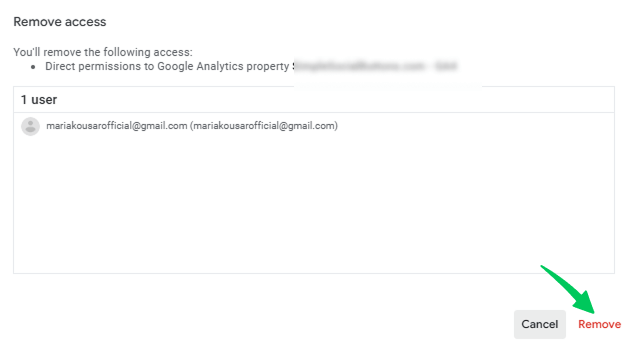
Then, the user’s access will be permanently removed.
How Analytify Can Help Google Analytics Users
Join 50,000+ beginners & professionals who use Analytify to simplify their Website Analytics!
Analytify is the best Google Analytics plugin for WordPress. It integrates with Google Analytics 4 to simplify data analysis and user management.
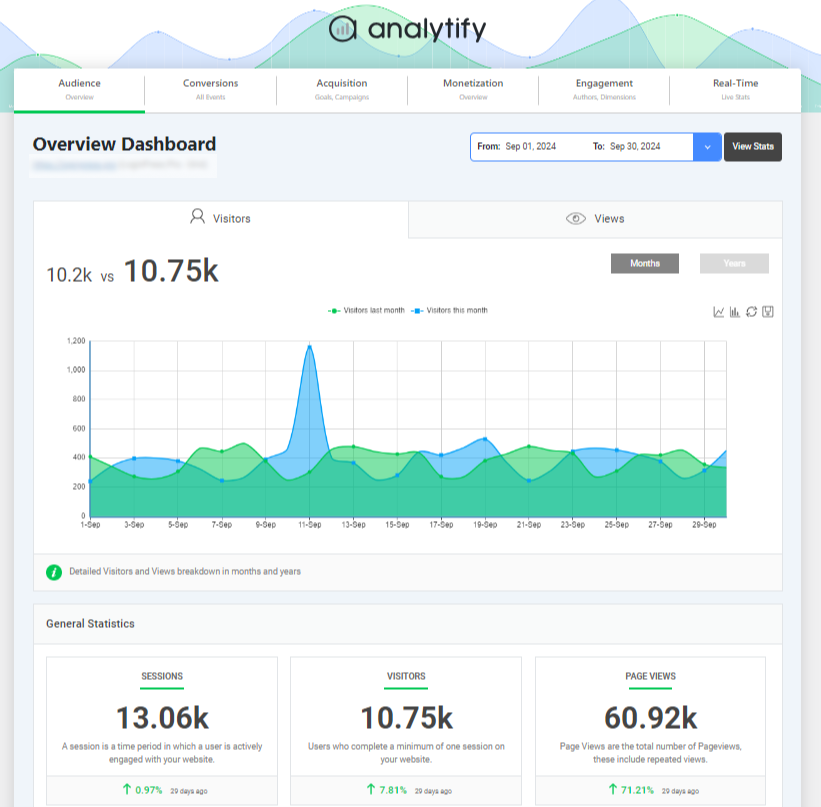
You skip the complex GA4 interface. View key analytics data, such as sessions, bounce rates, and conversions, directly from your WordPress dashboard. This enables teams to make faster decisions without requiring technical expertise.
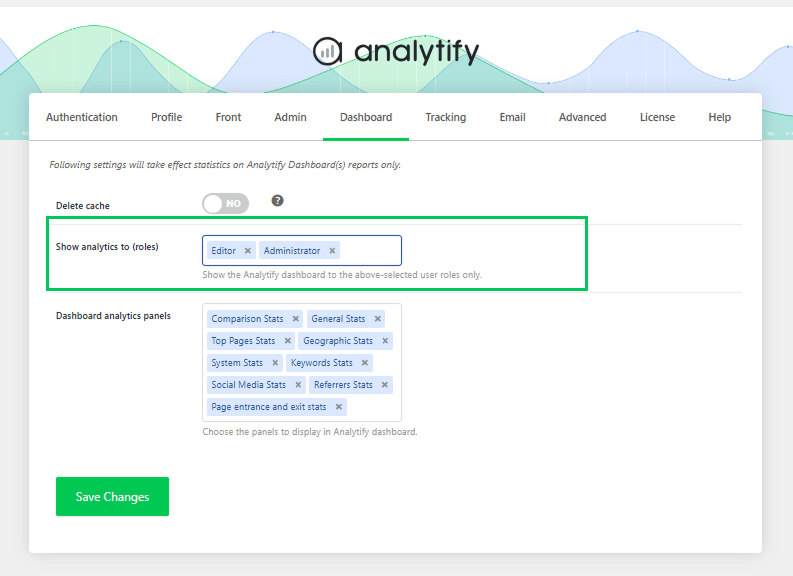
One key capability is role-based access control. It lets you assign who can view analytics data based on their WordPress user role (e.g., Administrator, Editor, Author). As shown in the settings, you can restrict dashboard access to specific roles. Options include Administrator, Editor, Author, Contributor, and Subscriber. This protects sensitive data.
Another standout feature is Author Level Tracking, which breaks down analytics per content creator. You can monitor traffic, bounce rate, and user behavior for each author. That suits teams and multi-author blogs that want to assess individual performance.
These features make Analytify a strong companion to GA4. Insights become easier to understand and your data stays secure. You also improve your content strategy.
Frequently Asked Questions
1. How to add users to Google Analytics 4?
Go to the Admin panel in your GA4 property, select Access Management under the Account or Property column, click the + icon, choose Add users, enter their email address, assign a role (like Viewer, Editor, or Admin), and click Add to confirm.
2. Why should I add users to Google Analytics instead of sharing credentials?
Adding users provides secure, role-based access, allowing you to control what each person can see or do, while keeping your account and data safe from unauthorized changes.
3. What permissions can I set when I add a user in GA4?
In GA4, you can assign roles such as Admin, Editor, Analyst, or Viewer. Each role offers different levels of access, allowing you to match permissions with the user’s responsibilities while maintaining data security.
4. How do I grant access to Google Analytics reports?
To share Google Analytics access, navigate to the Admin panel in GA4, click Access Management, and add the user’s email address. Assign them the Viewer or Analyst role. This allows them to see reports without making changes to settings or configurations.
5. How do I add a user ID to Google Analytics?
To set up User ID tracking in GA4, assign a unique ID to each logged-in user and pass it using a custom parameter. Configure your data stream in the Admin panel, define internal traffic, and set a custom dimension for user_id in your tagging setup (e.g., GTM). Then, send the ID via user_properties. This helps GA4 track users across devices and sessions.
Final Thoughts: Add User to Google Analytics
We covered why you should add users to Google Analytics rather than share credentials. We also covered the different types of permissions in GA4. The full step-by-step process for granting or removing access is above. You also learned how to manage access levels, such as Admin, Editor, Viewer, and Analyst. The right people then get the right permissions.
GA4’s built-in Access Management and tools like Analytify make it easier to add a user in GA4. You track roles and keep control of sensitive analytics data from a central dashboard. If you are choosing a tool for managing GA4 users, see the best GA4 plugins for WordPress. You may manage a large marketing team or collaborate with a few clients. Setting up user access in Google Analytics helps with data sharing, secure collaboration, and access management.
For further guidance, you can read:
- 13 Easy Ways to Learn Google Analytics 4
- How to Delete a Google Analytics Account, Property, or Data Stream
Still unsure about how to manage permissions in GA4? Drop your questions in the comments. We’re here to help!