Have you ever wanted to monitor your website analytics right from your WordPress dashboard?
Chances are, you’re juggling many tasks, and checking website statistics through multiple platforms can become overwhelming. Analytify comes to your rescue with its Google Analytics Dashboard Widget, which allows you to view essential analytics directly from your WordPress dashboard. In this knowledge-base article, we will guide you through the installation and customization process of this Analytify dashboard widget.
Requirements
Before diving into the installation and setup process, make sure you have:
- An existing WordPress website
- Administrator access to your WordPress dashboard
- Analytify, the best Google Analytics WordPress Plugin
- A Google Analytics account integrated with Analytify
We assume that you must have installed and activated Analytify. After this, you just need to connect Analytify with Google Analytics 4.
How to Install Analytify WordPress Dashboard Widget
Step 1 – Navigate to Your WordPress Dashboard: Log in to your WordPress admin area.
Step 2 – Go to Plugins: On the left sidebar, hover over Plugins and click Add New.
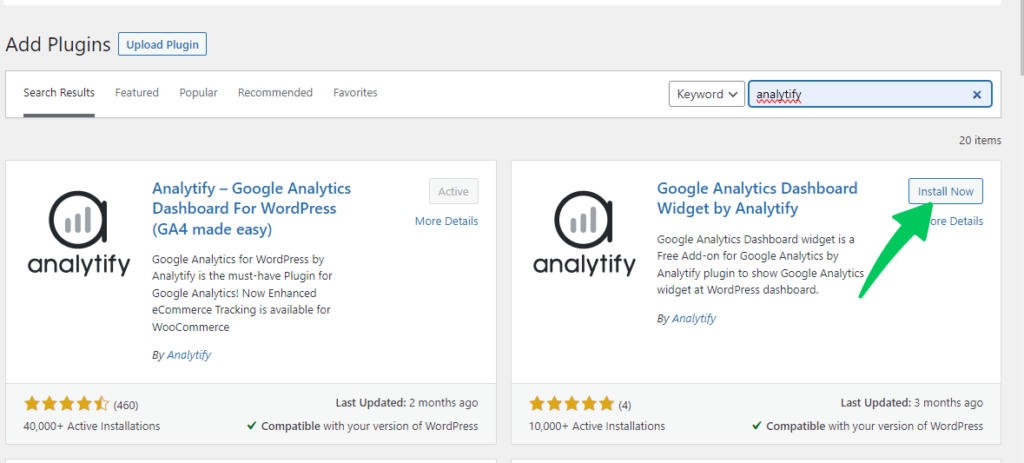
Step 3 – Search for Analytify: In the search bar, type in Analytify. You’ll find the Google Analytics Dashboard Widget by Analytify.
Step 4 – Install: Click the Install Now button next to the Analytify widget plugin.
Step 5 – Activate: Once installed, the button will change to Activate. Click on Google Analytics Dashboard Widget by Analytify.
You’ve successfully installed and activated Google Analytics Dashboard Widget by Analytify.
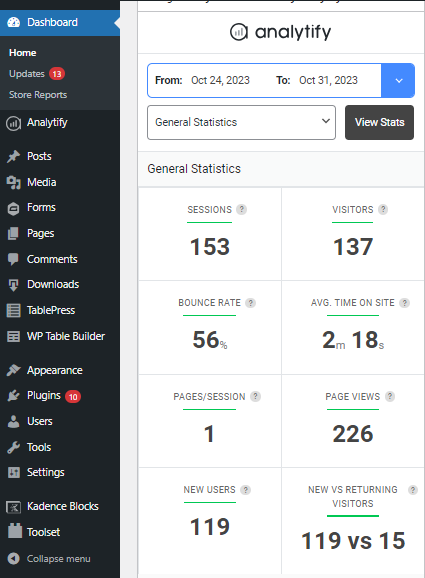
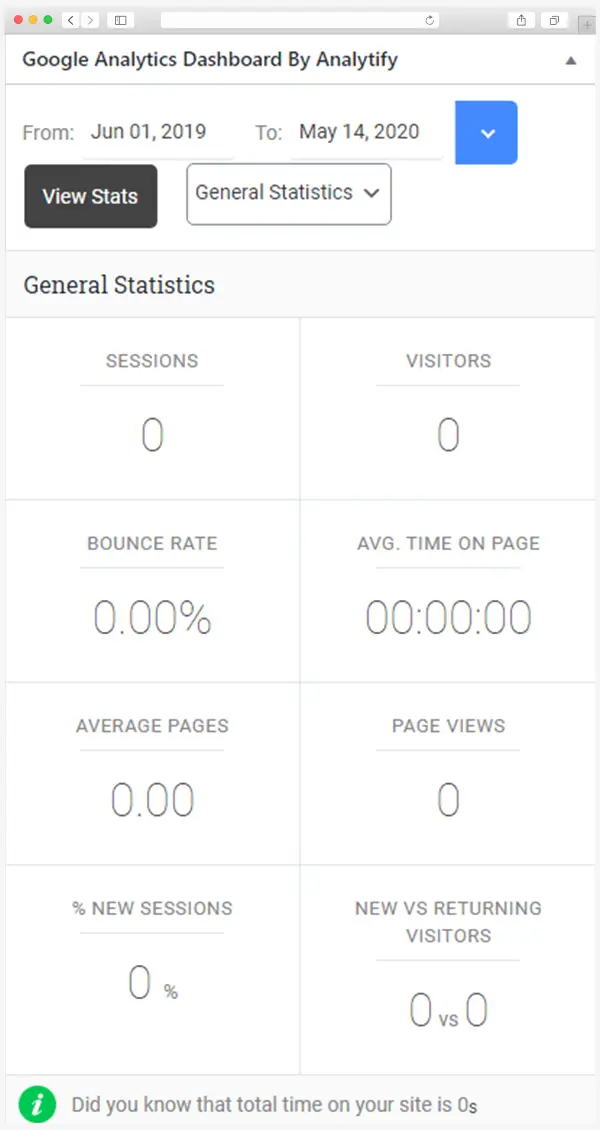
After installing this addon, a new widget will be added to your Dashboard to view your Analytics at one glance. As shown in the bellow screenshot:
You can customize this widget with different dates and with different types of stats, for example, top pages, top countries, top cities, and keywords.
How to Customize Analytify WordPress Dashboard Widget
Customizing your Analytify dashboard widget with different dates and various types of statistics can provide you with valuable insights into your website’s performance. Let’s explore how you can do this step by step:
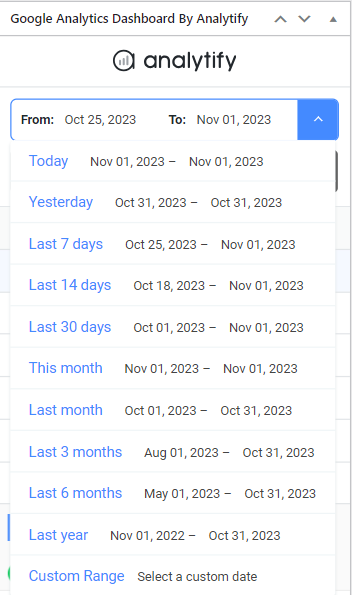
Step 1: Set Date Range
Start by selecting the date range you want to analyze. You can choose a specific time frame, like the last week, month, or a custom date range.
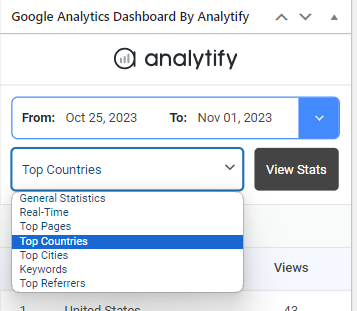
Step 2: Choose Stat Type
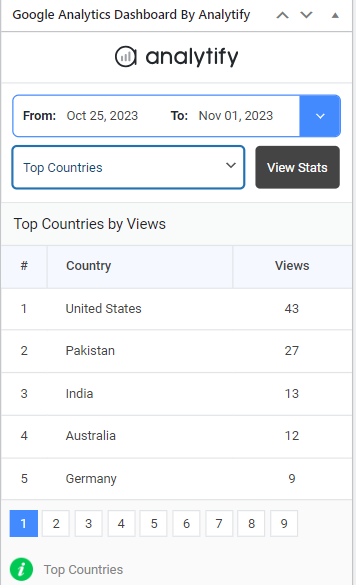
- Once you’ve selected the date range, it’s time to choose the type of statistics you want to view. In this example, let’s say we want to see the top countries visiting your website.
Step 3: Select “Top Countries”
- From the drop-down menu, select Top Countries as your preferred statistic type.
Step 4: Click “View Stats”
- After choosing Top Countries, simply click on the View Stats button.
Step 5: View Top Countries Stats
- Once you’ve clicked View Stats, Analytify will display the statistics related to the top countries visiting your website during the selected date range.
Check Top Pages in Google Analytics Dashboard Widget
In Google Analytics, Top Pages refer to the most frequently visited pages on your website during a specified period. Tracking top pages is important for understanding user behavior and optimizing the performance and content of a site.
Monitoring the top pages of your website allows you to determine which content is most engaging and relevant to your audience. You can then produce more of that type or improve upon it.
Steps to View Top Pages in Analytify:
- Go to the Analytify Widget on your WordPress dashboard.
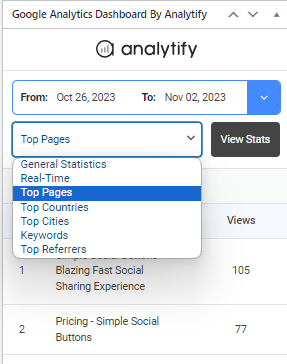
- Select the Top Pages metric (as we selected the Top Countries metric above).
- Click on View Stats.
- Upon clicking, you’ll be presented with data showcasing the most visited pages on your site, along with their respective view counts.
Check the screenshot below:
Congratulations, you’ve successfully installed and set up the Analytify WordPress Dashboard Widget! Now, you can conveniently monitor crucial metrics right from your WordPress dashboard. This is not just a time-saver but also a way to streamline your workflow.
If you have any problems with Analytify or its add-ons, kindly go through the FAQs on the Analytify website or contact the Analytify support team.


