How to Track Calendly with GTM and GA4 (Explained)
Are you struggling with Calendly Google Analytics tracking? You’re in the right place for a solution!
Calendly is an incredibly popular scheduling tool that allows businesses and clients to book meetings and appointments easily. It provides a range of customizable scheduling links and website widgets that simplify the booking process.
But did you know you can also track these interactions in Google Analytics? That’s right! By integrating Calendly with GTM and GA4, you can capture key insights, like when users view your booking page or schedule an appointment.
In this step-by-step tutorial, we’ll show you how to track Calendly events using Google Tag Manager and Google Analytics 4.
Calendly Tracking (TOC):
What is Calendly Tracking?
Calendly tracking refers to monitoring user interactions with your Calendly scheduling tool. This allows you to gather insights into how visitors are engaging with your booking process.
Here are some key events you can track:
- Widget Loaded: When the Calendly widget appears on your website.
- Event Scheduled: When a user successfully books an appointment.
- Event Canceled: When a user cancels a scheduled appointment.
- Button Clicks: When a user clicks on a Calendly link or button.
Tracking these interactions gives you valuable data, such as which marketing channels bring in the most bookings and where users drop off in the scheduling flow.
Why Use GTM and GA4 for Calendly Tracking?
You may be wondering: Why GTM and GA4 Calendly Tracking? Here’s why they’re the perfect duo for Calendly tracking:
- Ease of Setup: GTM allows you to manage all your tracking tags in one place without touching your website code.
- Advanced Tracking: GA4’s event-based tracking makes capturing specific actions like event bookings and cancellations easy.
- Centralized Data: Connecting Calendly to GA4 consolidates your data and allows you to analyze everything from one dashboard.
Key Benefits of Tracking Calendly Events
With Calendly tracking in place, here are a few things you can do:
- Optimize Your Booking Pages: Find out where users drop off and make the necessary adjustments.
- Measure Conversion Rates: See how many website visitors are actually booking appointments.
- Improve Campaign Performance: Understand which marketing campaigns bring in the most bookings.
- Get Detailed Insights: Track specific events like which types of appointments are most popular and how users navigate your scheduling process.
Let’s see the pre-requirements for Calendly Google Analytics integration.
Prerequisites for Calendly Tracking
Before we start into the actual setup process, make sure you’ve got these prerequisites ready:
1. Calendly Account Setup
- Create a Calendly account if you don’t already have one.
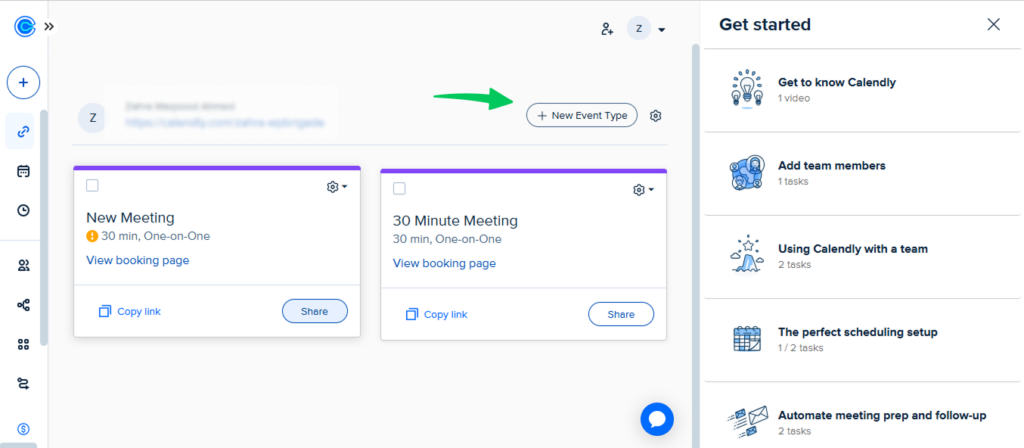
- Set up your event types (e.g., 30-minute meeting, 1-hour consultation) in the Calendly dashboard.
- Embed Calendly on your website using one of the following methods:
- Inline Widget: Calendly is displayed directly on your webpage.
- Popup Widget: Calendly appears as a pop-up when triggered by a button or link.
- Direct Link: Users are redirected to the Calendly scheduling page.
2. Website with Calendly Embedded
Make sure Calendly is properly embedded on your website:
- For Inline Widgets, paste the embed code provided by Calendly into the desired section of your webpage.
- For pop-ups, use the code snippet provided by Calendly to trigger them.
3. Google Tag Manager Installed
Ensure that Google Tag Manager is set up on your website. If not:
- Sign in to Google Tag Manager and create a new container for your website.
- Follow the instructions to add the GTM container code to your website’s header and body sections.
4. Google Analytics 4 Configured
Set up a Google Analytics 4 (GA4) property if you haven’t already:
- Sign in to Google Analytics.
- Create a new GA4 property and copy the Measurement ID.
- Link your GA4 property to your website for tracking purposes.
5. Basic Knowledge of GTM and GA4
Familiarity with:
- Creating tags, triggers, and variables in GTM.
- Viewing events in GA4’s DebugView.
6. Calendly Integration Script
You’ll need a script to push Calendly events (like event_scheduled or widget_loaded) into the GTM data layer. Don’t worry; we’ll provide this script and explain how to use it in the next section.
Once you have these prerequisites ready, you’re all set to begin the process of tracking Calendly with Google Tag Manager and Google Analytics Calendly tracking.
How to Track Calendly Events Using GTM and GA4 (Step-by-Step)
In this section, we’ll guide you through setting up Calendly tracking in Google Analytics using Google Tag Manager. This involves embedding Calendly, configuring GTM, and ensuring events are tracked in GA4.
Step 1: Embedding Calendly on Your Website
To track events, ensure Calendly is properly embedded on your website.
Generate the Embed Code:
- Go to your Calendly account.
- Select the event type you want to embed.
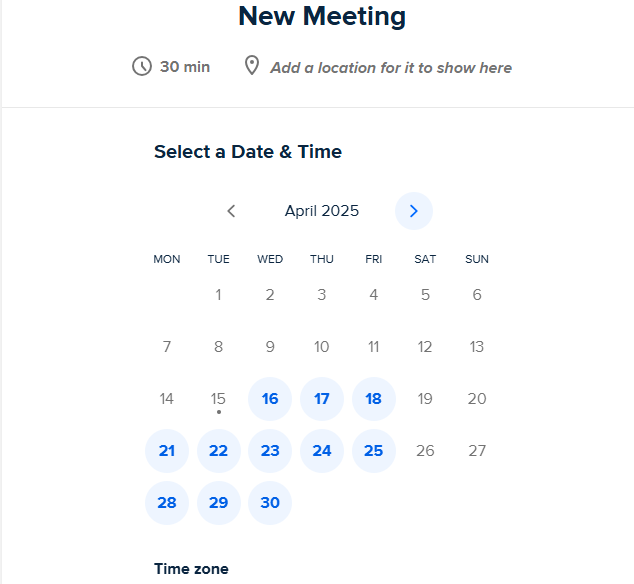
- Then set up your meeting event.
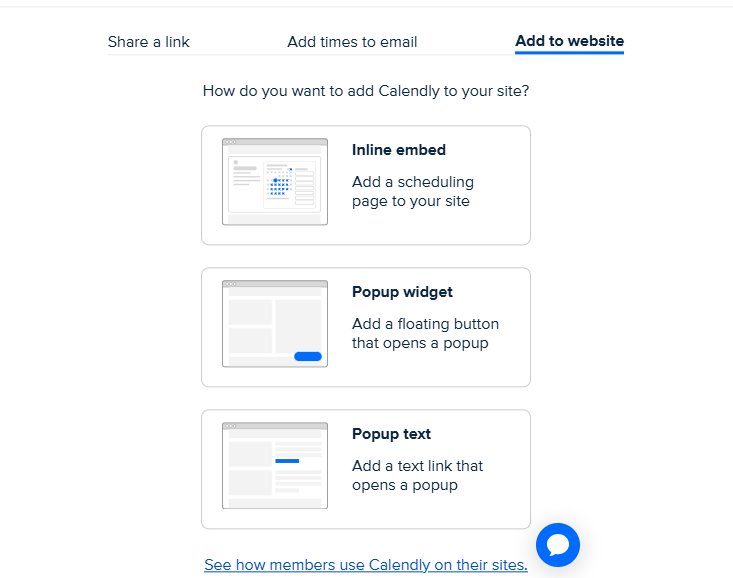
Click on Share >> Add to Website.
Choose one of the following embed types:
- Inline Embed: Displays directly on the page.
- Popup Widget: Opens as a floating modal.
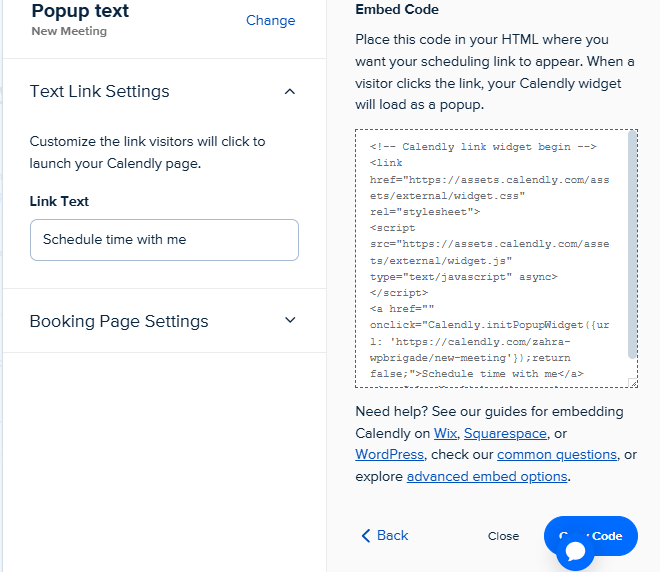
- Popup Text Link: Opens as a pop-up when a text link is clicked.
Add the Embed Code to Your Website:
- Paste the provided embed code into the relevant section of your webpage.
If you’ve embedded Calendly on your site and want to track bookings, user actions, or any other advanced action, you’ll need to set it up with GTM.
Step 2: Setting Up GTM
GTM allows you to capture Calendly interactions and send the data to GA4.
- Add GA4 Configuration Tag:
- Open Google Tag Manager.
- Click on Tags >> New >> GA4 Configuration.
- Enter your GA4 Measurement ID.
- Set the trigger to fire on All Pages.
- Save and publish the tag.
2. Create a Custom HTML Tag for Calendly Tracking:
- Go to Tags >> New >> Custom HTML.
- Add the following script to capture Calendly events:
<script>

  window.dataLayer = window.dataLayer || [];

  window.addEventListener('message', function(event) {

    if (event.data.event && event.data.event.indexOf('calendly') === 0) {

      window.dataLayer.push({

        'event': 'calendly_event',

        'calendly_event': event.data.event.split('.')[1],

        'calendly_details': event.data.payload

      });

    }

  });

</script>
After embedding Calendly on your site, next, if you want to track bookings or user actions (e.g., when someone schedules a meeting), this script allows you to capture those interactions in Google Tag Manager and send them to tools like Google Analytics, Facebook Pixel, etc.
- Fire the Trigger:
- Set the trigger to fire on all pages where the Calendly widget is embedded.
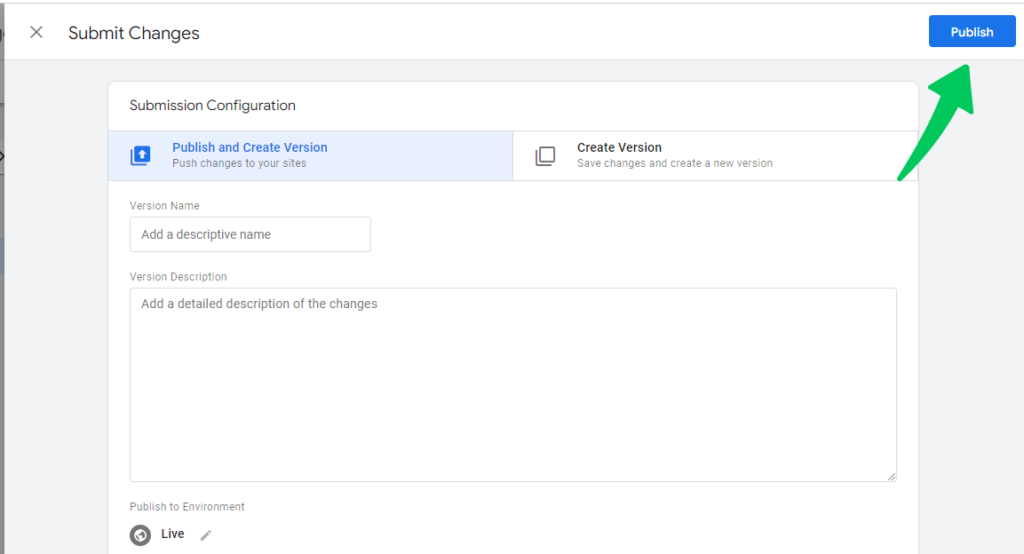
- Save and publish the tag.
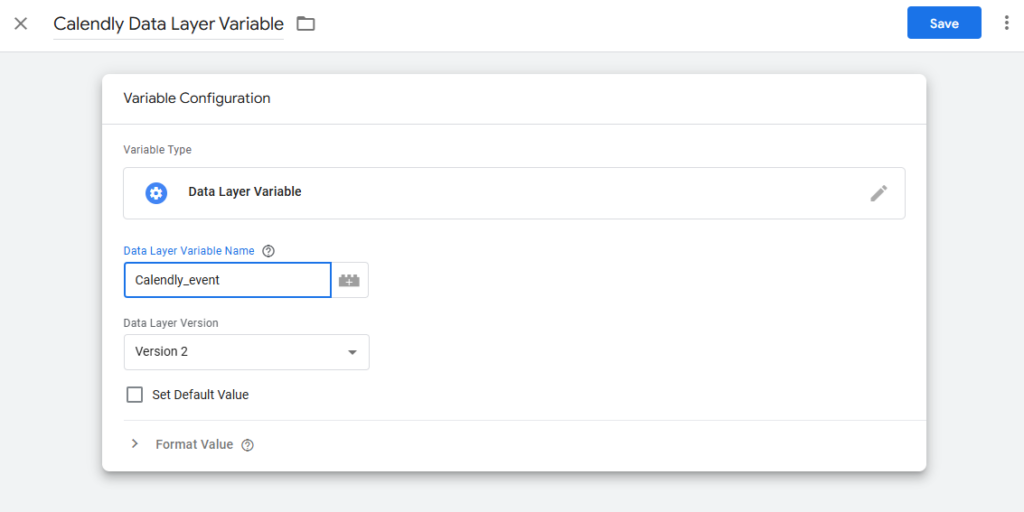
Step 3: Configuring Data Layer Variables
To pass Calendly event data into GTM:
- Go to Variables >> New >> Data Layer Variable.
- Create the following variables:
- Variable Name: calendly_event – Captures the specific event type.
- Variable Name: calendly_details – Captures additional event details (e.g., user data, event name).
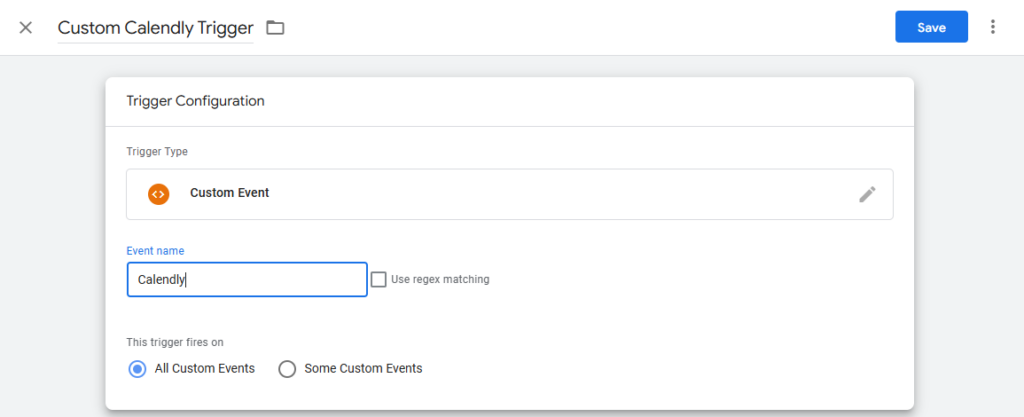
Step 4: Creating Custom Event Triggers
To capture specific Calendly interactions:
- Go to Triggers >> New >> Custom Event.
- Configure the trigger as follows:
- Event Name: calendly_event.
- Trigger Type: Custom Event.
- Save and publish the trigger.
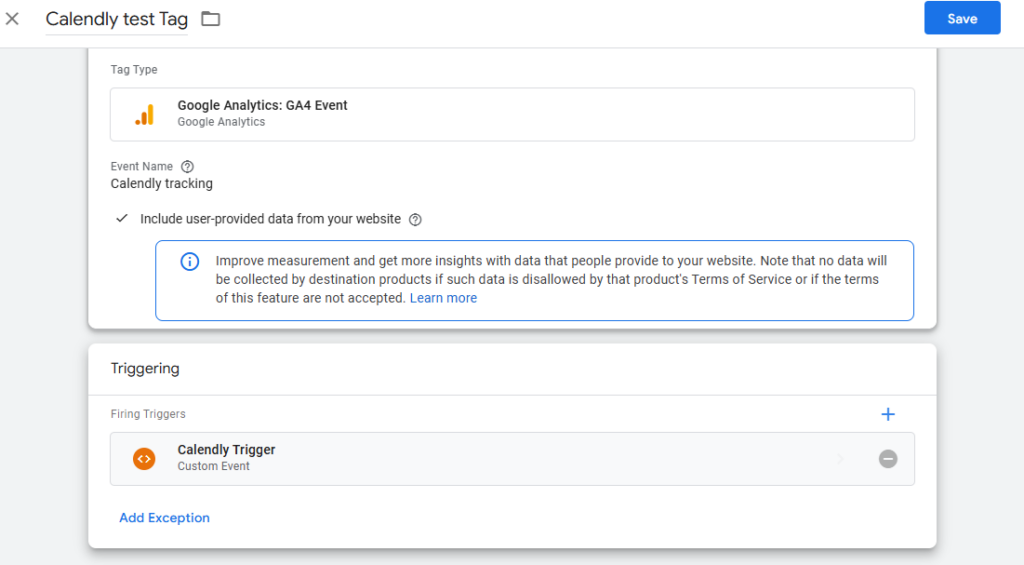
Step 5: Sending Calendly Events to GA4
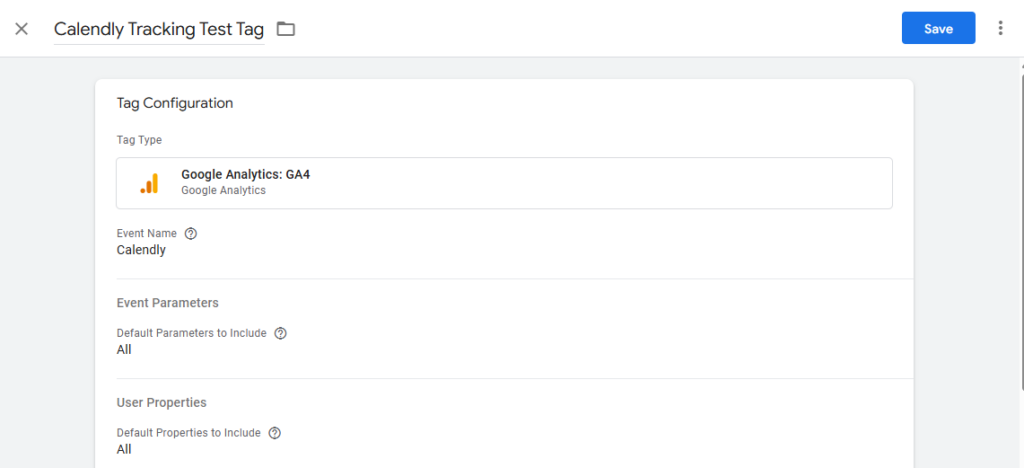
- Create GA4 Event Tags:
- Go to Tags >> New >> GA4 Event.
- Set up the tag:
- Configuration Tag: Select your GA4 Configuration Tag.
- Event Name: Use the variable {{calendly_event}}.
- Event Parameters: Map relevant parameters:
- event_type: {{calendly_event}}
- event_details: {{calendly_details}}
- Assign the Custom Event Trigger you created earlier.
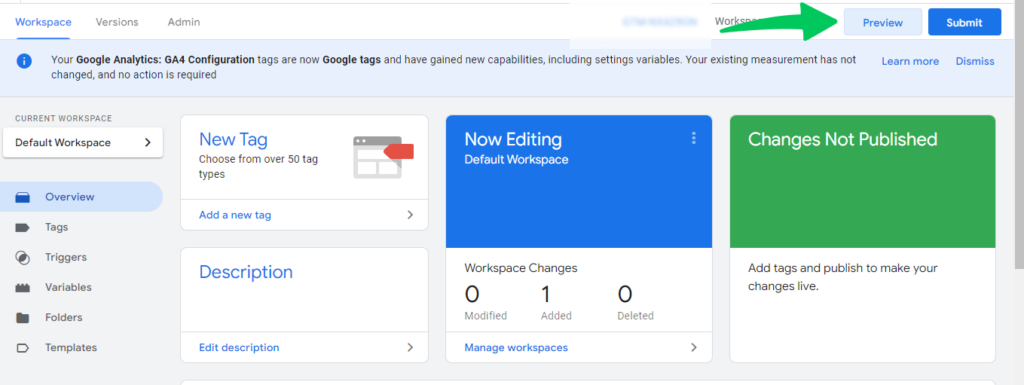
- Test the Tag in GTM:
- Use GTM’s Preview Mode to ensure events are firing correctly.
You will see Calendly Event Tracked:
That’s how you can track calendly with Google Tag Manager.
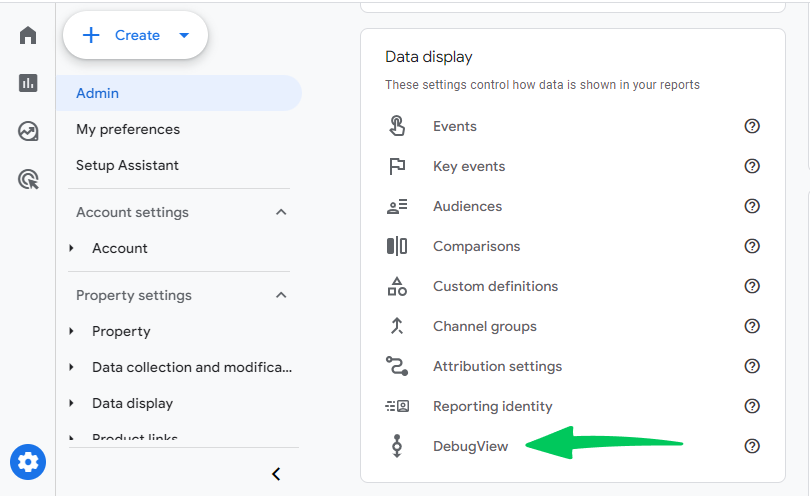
- Verify Events in GA4:
- In GA4, go to Configure >> DebugView.
You can see in GA4 debug view report that your calendly events are being tracked
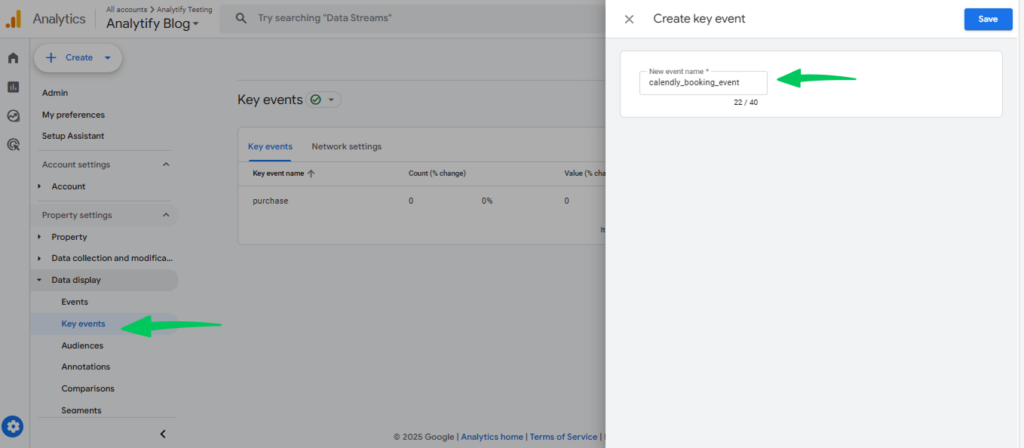
Step 6: Marking Key Events as Conversions
To track important interactions as conversions:
- In GA4, go to Configure >> Events.
- Locate key events (e.g., event_scheduled) and toggle Mark as key event.
You’ve now successfully set up Calendly tracking in Google Analytics using Google Tag Manager.
Calendly Tracking with Analytify
When it comes to tracking Calendly interactions and gaining deep insights into your website’s performance, using Google Tag Manager (GTM) and GA4 can be a bit overwhelming for some users.
That’s where Analytify comes in. It is an easy-to-use WordPress plugin that simplifies integrating Google Analytics with your website, allowing you to track custom events effortlessly.
Join 50,000+ beginners & professionals who use Analytify to simplify their Google Analytics!
Setting Up Analytify for Calendly Tracking
To start tracking events like Calendly button clicks and completed bookings, you’ll need to enable Event Tracking within Analytify.
- Navigate to the Analytify settings within your WordPress dashboard.
- Enable the event tracking feature to capture interactions such as button clicks and bookings.
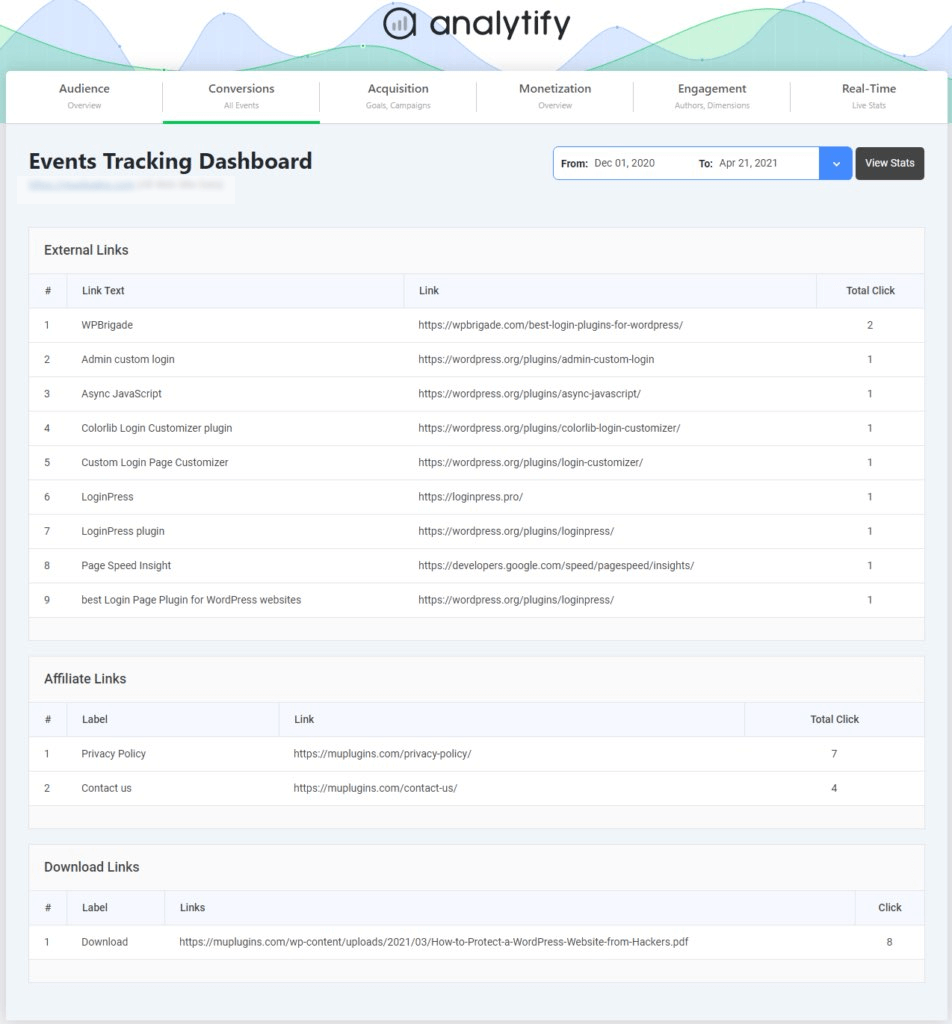
- To track Calendly events in the Analytify dashboard, you can set up custom tracking using Google Tag Manager (GTM). This will allow you to capture key events like scheduling or appointment completion on Calendly and view the data directly in your Analytify dashboard. Here’s how to do it:
- Since Analytify integrates with Google Analytics, once the events are set up in GA, they will automatically appear in your Analytify dashboard.
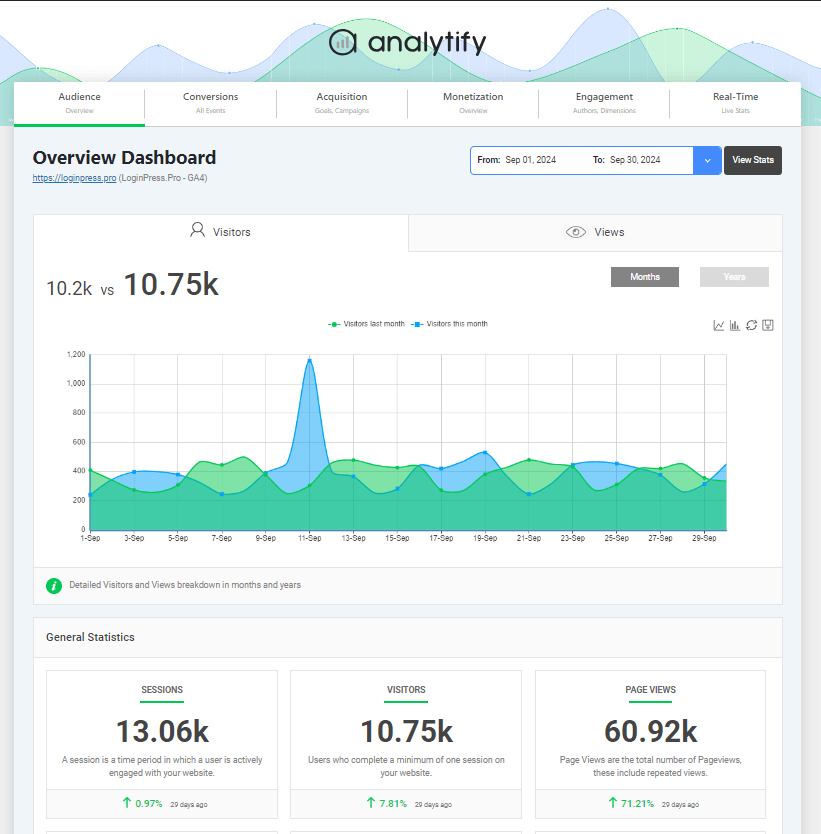
- Open your Analytify dashboard, where you’ll now be able to track the Calendly events alongside your other Google Analytics data, giving you insights into user engagement and conversion.
Advantages of Using Analytify
- Simplified Google Analytics Configuration: You can easily connect your Google Analytics account without the need for complex setups.
- Custom Tracking for Events: Track important user interactions like bookings, conversions, and form submissions directly in Google Analytics.
- Simplified Reporting: Unlike the GA4 dashboard, Analytify offers clear and intuitive reports tailored for WordPress users.
- Enhanced Tracking: Analytify bridges the gaps by offering tracking options that are not always easy to implement directly in GTM or GA4.
- Conversion Insights: Analyze Calendly booking trends alongside other user interactions on your website.
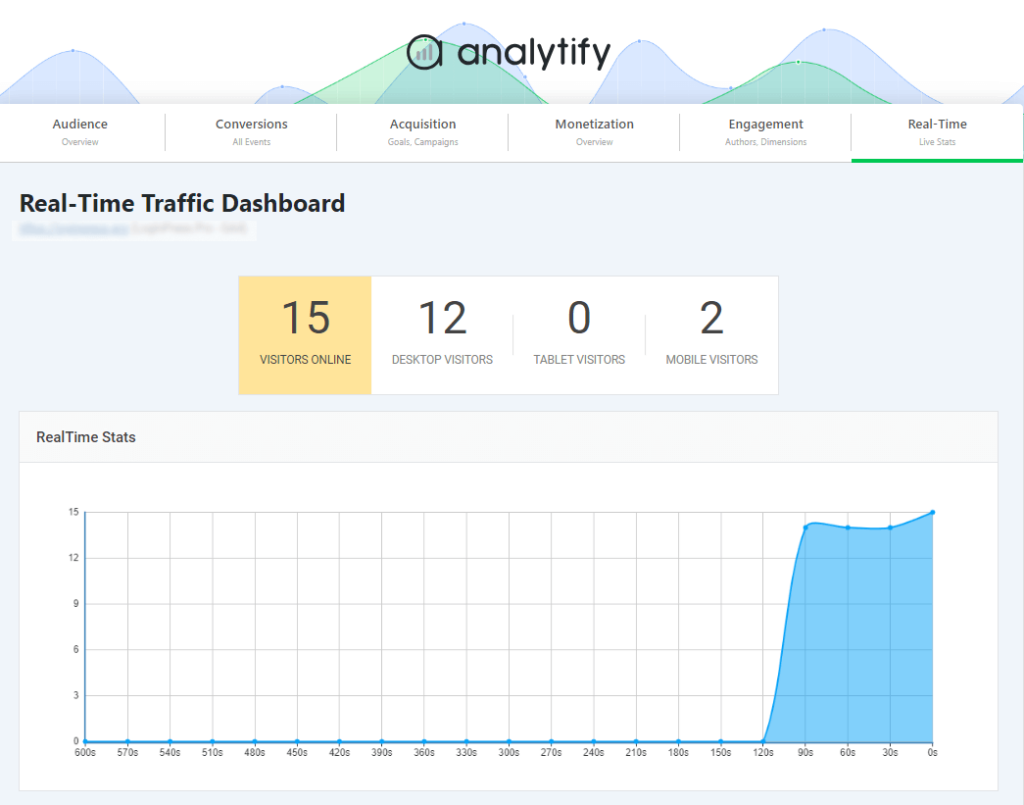
- Real-time Event Tracking: Get instant insights into user interactions on your website.
Calendly Tracking (FAQs)
1. What types of Calendly events can I track in GA4?
You can track Calendly events in Google Analytics, including:
widget_loaded: When the Calendly widget loads on your website.
event_scheduled: When a user successfully books an appointment.
event_canceled: When a user cancels an event.
Button clicks or interactions with embedded Calendly widgets.
2. How do I verify if my setup is working?
Use Google Tag Manager Preview Mode to check if your tags and triggers are firing correctly.
In GA4, go to Configure > DebugView and perform actions on your website (e.g., scheduling a meeting) to ensure events are logged in real time.
3. Can I use GTM and GA4 tracking with the free version of Calendly?
Yes, you can use GTM and GA4 tracking with both free and paid Calendly accounts. However, certain advanced features, like additional customization options, may require a paid plan.
4. How do I track multiple Calendly widgets on one website?
You can track multiple Calendly widgets by:
Adding unique identifiers (e.g., data-attributes) to each widget’s embed code.
Configuring GTM triggers to differentiate events based on the widget’s location or identifier.
5. What happens if I embed Calendly using an iframe?
If Calendly is embedded via an iframe, tracking can become more challenging as iframe interactions don’t automatically send data to your website’s data layer. You’ll need to:
Use Calendly’s event listener API to capture iframe events.
Push these events to the data layer manually via GTM.
6. Can I track Calendly interactions on single-page applications (SPA)?
Yes, but you need to ensure GTM is configured to handle SPAs properly:
Use history change triggers in GTM to capture page changes without a full reload.
Ensure your Calendly tracking script is compatible with SPA frameworks.
7. How can I track failed scheduling attempts?
Failed attempts aren’t automatically tracked by Calendly. However, you can:
Monitor interactions like closing the widget without scheduling.
Use heatmap tools or session recordings to analyze user behavior on booking pages.
8. How do I analyze Calendly conversion tracking data?
Mark key events (e.g., event_scheduled) as conversions in GA4.
Use GA4’s Conversions and Reports sections to analyze trends.
Segment data by marketing channels, user demographics, or device types for deeper insights.
9. Can I integrate Calendly tracking with other tools like CRM systems?
Yes, you can:
Use Calendly’s Zapier integration to send data to CRM tools.
Export data from GA4 and combine it with CRM reports for a unified analysis.
Final Thoughts
By combining Google Tag Manager (GTM), GA4, and Analytify, you can create a powerful tracking system that provides you with detailed insights into your Calendly interactions. Not only will you be able to track events like button clicks and completed bookings, but you’ll also gain actionable data that can help you refine your scheduling workflows and optimize user engagement on your site.
You may also like to learn about Tracking Popups with Google Tag Manager.
Ready to get started? Try integrating Analytify with your Calendly account today and unlock the full potential of your website’s data!

