How to Install Google Tag Manager (Beginners Guide 2025)
Are you looking to learn how to setup Google Tag Manager (GTM)? You’re in the right place. Whether you’re a blogger, a small business owner, or part of a marketing team, understanding how to use Google Tag Manager and make the most of its features can significantly streamline your website’s tracking and management capabilities.
GTM is like a box where you can toss all your website’s tracking codes, from Google Analytics to Facebook Pixel, without needing to touch the site’s code directly. Sounds convenient, right? That’s exactly what Google Tag Manager offers. It’s like having a command center for all your marketing and analytics tools, making it easier to track visitor behavior, campaign effectiveness, and much more.
In this comprehensive guide, we’ll cover everything from how to install Google Tag Manager to setting up your first tags. We’ll offer step-by-step instructions and share tips and tricks to help you become a GTM pro quickly.
Google Tag Manager Setup (TOC):
What is Google Tag Manager?
Google Tag Manager setup is free provided by Google that allows you to deploy and manage your website’s tags without having to edit code.
You might be wondering, “What’s a tag?” Great question!
Tags are snippets of JavaScript that send information to third parties, like Google Analytics or Facebook Pixel. These tags can track how users interact with your website, track form submissions, monitor conversions, and much more.
How Does GTM Work?
GTM operates on a simple yet powerful framework involving three key components: Tags, Triggers, and Variables.
- Tags are the heart of GTM. They are the code snippets that you want to deploy on your site. For instance, the Google Analytics tracking code is a tag.
- Triggers tell GTM when to fire a tag. This could be when a user clicks a button, views a page, or submits a form. It’s like setting conditions for when the tags should do their job.
- Variables are additional information that GTM might need to evaluate triggers and tags. Think of variables as data points that help GTM make decisions, like a page’s URL or the value of a form submission.
GTM vs. Traditional Tracking Code Implementation
Why not just paste the tracking code directly into my website’s code? You might ask. The traditional method requires you to add each code snippet to your site’s HTML manually. It is not only time-consuming but also increases the risk of errors. Plus, whenever you want to add a new tag or update an existing one, you’ll likely need a developer’s help.
GTM simplifies this process, allowing you to manage all your tags in one place without constantly editing your site’s code. It’s like having a control panel for your website’s analytics and marketing tools, making adding, updating, or removing tags easier as your needs evolve.
The Benefits of Using GTM
Google Tag Manager not only simplifies the process of managing your website’s tags but also empowers you to take control of your digital marketing efforts. Let’s explore its benefits:
- Speed and Efficiency: GTM makes it quicker and easier to implement tags without relying on developers.
- Error Reduction: By centralizing tag management, GTM reduces the risk of errors in code deployment.
- Agility: Quickly test and deploy new strategies without waiting for website code updates.
- Advanced Tracking Capabilities: With GTM, you can track custom events and actions on your site that wouldn’t be possible with standard analytics code alone.
- Improved Site Performance: By loading scripts asynchronously, GTM can help reduce the impact of tags on your website’s load time, contributing to better site performance and potentially improving SEO rankings.
- Version Control and Debugging: GTM offers built-in version control, allowing you to easily roll back to previous versions of your tag configurations if needed. The debugging features also let you test tags in a sandbox environment before they go live, ensuring they work as intended.
- User-Driven Event Tracking: GTM simplifies the process of setting up tracking for complex user interactions like video views, scroll depth, and time on page, providing richer data on user engagement.
- Enhanced Data Security and Privacy: With features that help manage consent settings and cookies, GTM aids in compliance with privacy regulations like GDPR and CCPA, offering better control over when and how data is collected.
- Integration with Google Products and Third-Party Services: Seamless integration with Google Analytics, Google Ads, and third-party marketing and analytics services allows for straightforward tag management across a wide range of tools, enhancing your marketing efforts without additional coding.
- Dynamic Tag Management: Use GTM to dynamically alter tag configurations based on user interactions or other criteria, offering a level of customization and flexibility that manually coded tags cannot match.
- Workspaces and Collaboration: GTM supports collaborative work by allowing multiple users to work in different workspaces. This feature enables teams to work on separate projects simultaneously without interfering with each other’s work, enhancing productivity and minimizing conflicts.
How to Install Google Tag Manager?
Setting up a Google Tag Manager account is straightforward, but it’s important to get it right.
Here’s how to set up your GTM account and prepare to manage all your tags in one place.
Step 1: Sign Up for Google Tag Manager
First, head over to the Google Tag Manager website. If you have a Google account, you’re already halfway there. If not, you’ll need to create one. Once logged in, you’ll be prompted to create a new GTM account.
Step 2: Create Your GTM Account and Container
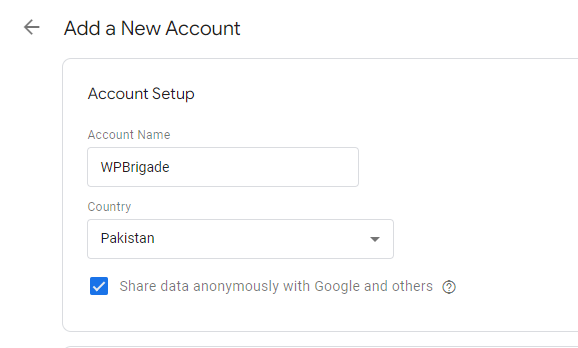
When creating your account, you’ll be asked for a few details:
- Account Name: This is usually your company or website name. It’s how you’ll identify this account if you manage multiple ones in the future.
- Country: Just select your country from the dropdown list.
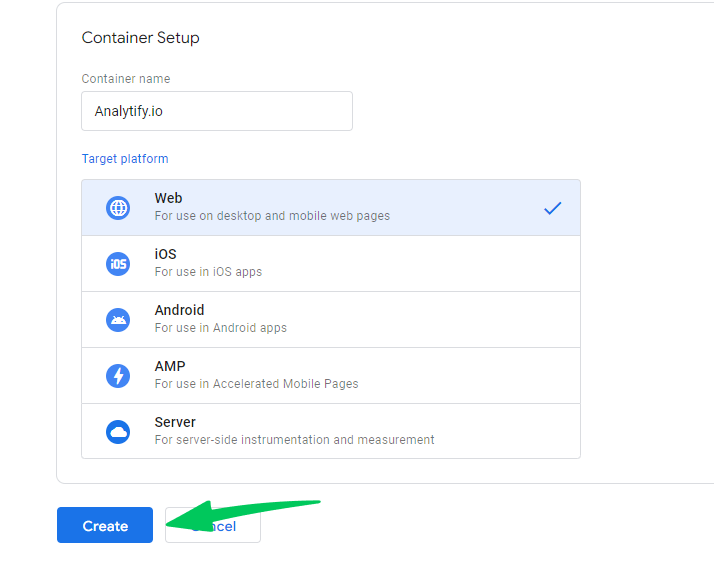
Next, you’ll need to create a container for your website. Think of the container as a big box where all your tags will live.
- Container Name: Use your website name or something that clearly identifies which website this container is for.
- Where to Use Container: You’ll have options like Web, iOS, Android, and AMP. Let’s suppose we choose Web.
- Then click on the Create button.
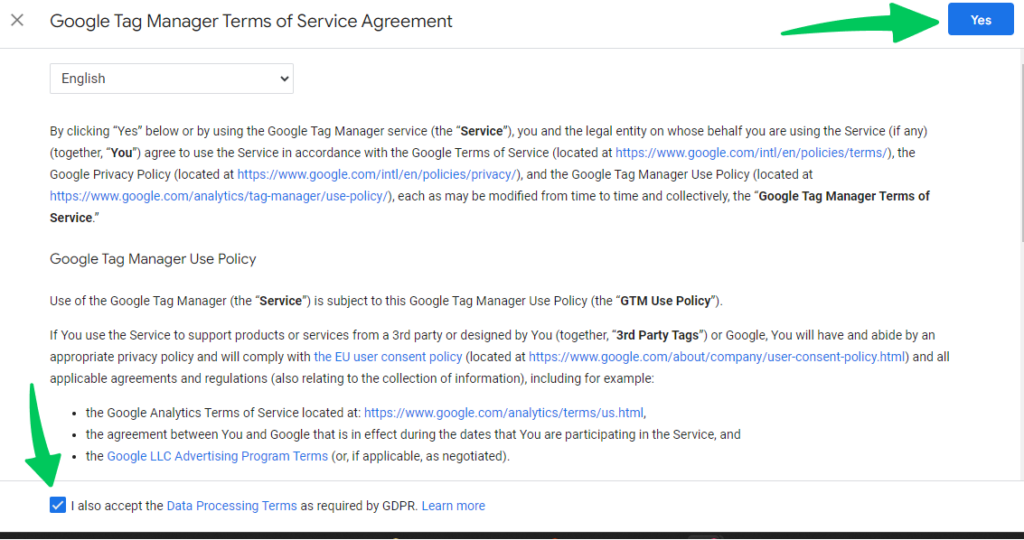
After clicking on the create button, you’ll be taken to the terms and conditions page. Please agree to these terms and conditions.
After agreeing to the GTM terms of service, you’ll be all set with your account and container.
Step 3: Install the GTM Container Code on Your Website
The process of adding the GTM code to your website varies slightly depending on the platform your site is built on. Let’s break it down:
- WordPress: For WordPress users, several plugins make integrating GTM straightforward. Plugins like “Insert Headers and Footers” allow you to easily add the GTM code snippets without editing your theme files directly.
- Shopify: Shopify users can insert the GTM code snippets directly through the theme’s “theme.liquid” file. Place the header code within the <head> tag and the body code immediately after the opening <body> tag.
- Other Platforms: Most other website platforms (Wix, Squarespace, etc.) offer a designated area in their settings or theme editor where you can insert header and body scripts. Refer to your platform’s documentation for specific instructions.
How to Install Google Tag Manager on WordPress
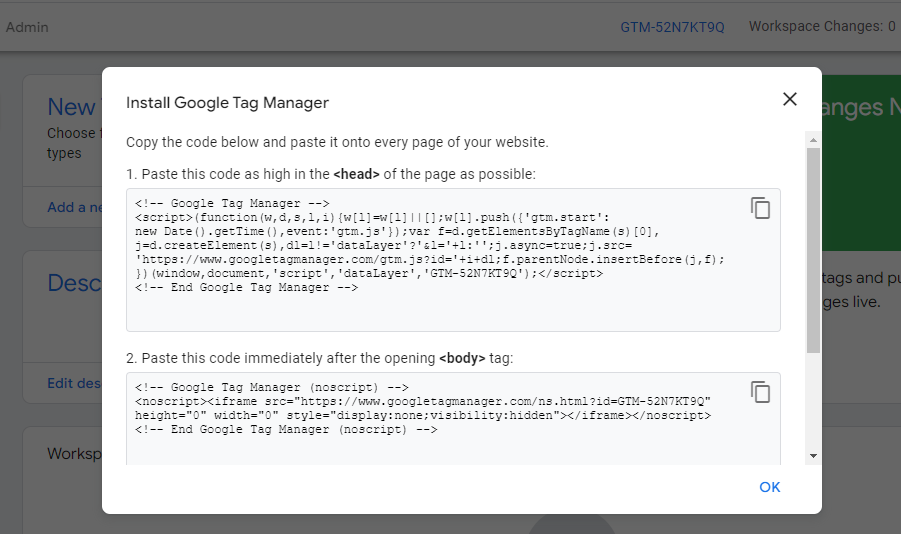
Upon creating your container, Google Tag Manager will provide you with a code snippet. It is the GTM container code, and it needs to be added to every page of your website.
Copy the code snippet: You’ll see two parts to the code snippet provided by GTM. One part goes in your website’s <head> section, and the other goes immediately after the opening <body> tag.
Paste the code into your website: If you’re using a website builder like WordPress, Shopify, or another CMS, look for a GTM plugin or an option to add custom HTML to your site’s header and body. If you’re editing the HTML directly, paste the respective parts of the code snippet.
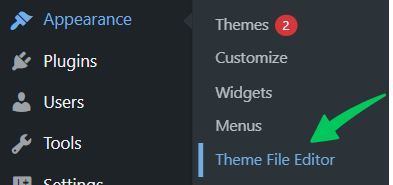
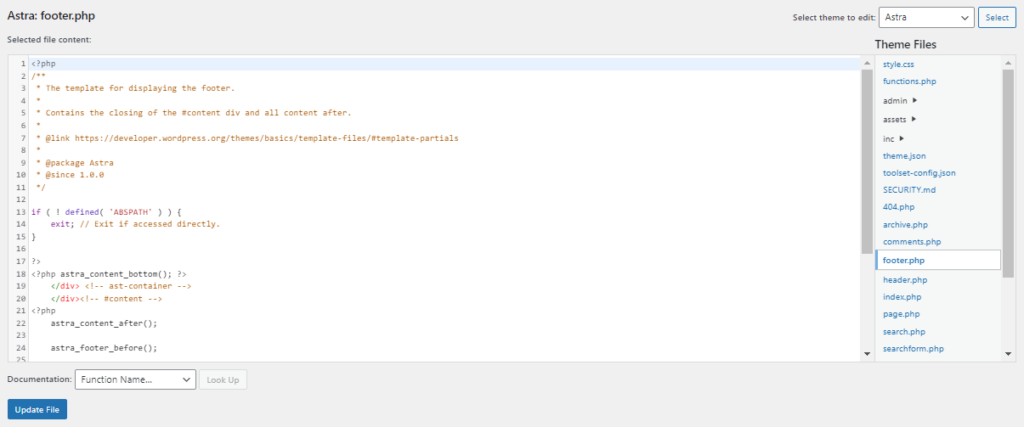
Note: WordPress users must log in to their website and navigate to Appearnces >> Theme Editor.
You’ll insert this code immediately after the opening <head> tag for the first part and the second part immediately after the opening <body> tag.
Then, update the file.
If you’re not comfortable editing your website’s code, don’t hesitate to ask a developer for help. This step is crucial to ensure GTM works properly.
Otherwise you can use Analytify to connect your WordPress site to Google Analytics. In this way, you can skip this method of coding.
Step 4: Verify Your Installation
After installing the code snippet, it’s important to ensure everything’s working correctly:
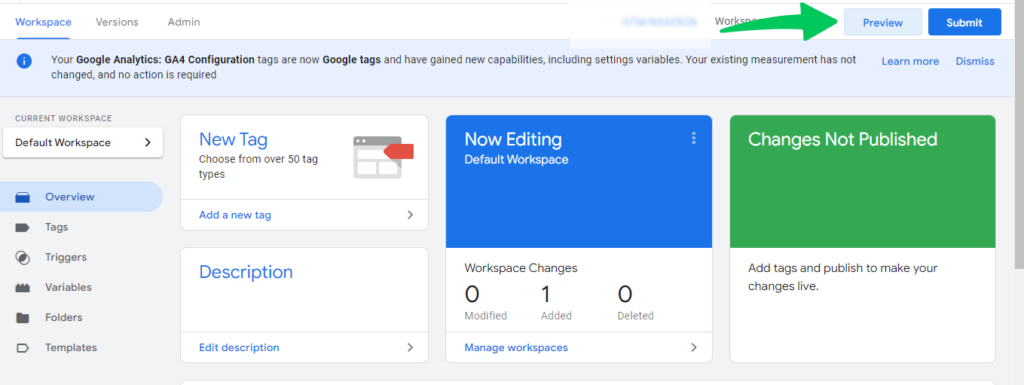
- Use the Preview mode in GTM to test if the container is running correctly.
This will activate Preview mode for the selected container.
Once activated, GTM will open a new tab directing you to enter the URL of the site you want to preview. Enter the URL of your site where you’ve implemented GTM and click Connect.
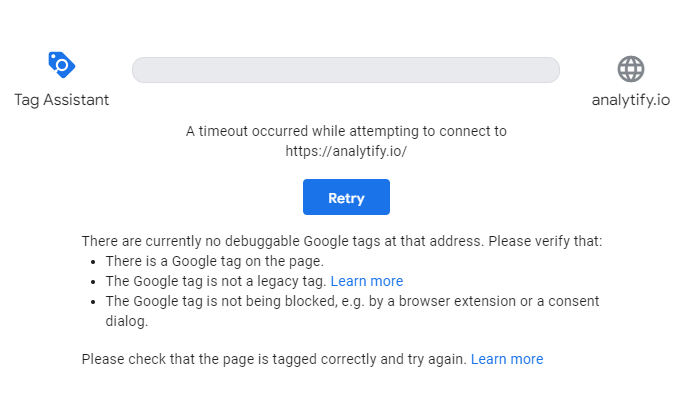
After connecting, the tab will redirect you to your website, and you should see the GTM debug console appear at the bottom or side of your browser window. This console is visible only to you and provides real-time feedback on your GTM configuration.
Step 5: Organize Your GTM Account
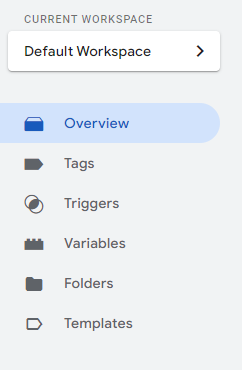
With your GTM code in place, take a moment to familiarize yourself with the GTM dashboard. You’ll notice areas for Tags, Triggers, and Variables. These are the core components we discussed earlier. Think about how you want to organize your tags. A little planning now can save you a lot of time later.
Pro Tip: Naming Conventions
Adopting a clear naming convention for your tags, triggers, and variables is a lifesaver. For example, naming your Google Analytics pageview tag something like “GA – Pageview” makes it easy to identify and manage.
Congratulations! You’ve successfully set up your Google Tag Manager account and are ready to add tags.
Basic GTM Concepts and Terminology
With your Google Tag Manager (GTM) account set up and ready to go, it’s time to familiarize yourself with some of the basic concepts and terminology you’ll use. Understanding these will not only make navigating GTM much easier but will also empower you to make the most of this powerful tool. Let’s dive in!
Tags: The Building Blocks of GTM
Tags are the heart of GTM. They are snippets of JavaScript that send information to a third party, like Google Analytics, Facebook Pixel, or any other data collection tool you’re using. Think of tags as messengers that tell these tools what’s happening on your website.
For example, you might use a Google Analytics pageview tag to track when someone visits your website or a conversion tracking tag to see when someone completes a purchase.
Triggers: When Should Your Tags Fire?
Triggers determine when your tags should execute. GTM offers a wide range of trigger types based on user interactions, such as clicks, form submissions, page views, and more. Setting up a trigger involves specifying the conditions under which your tag should fire.
For instance, you could set a trigger to fire a tag every time someone clicks on a specific button on your website. This way, you can track how effective that button is in driving user action.
Variables: The Data Powering Your Tags and Triggers
Variables are named placeholders for values that change, such as a user’s form input, the URL of the current page, or the value of a transaction. In GTM, variables are used to store data that your tags and triggers can use.
There are built-in variables in GTM for common data points, but you can also define your own custom variables for more specific needs. Understanding how to use variables is key to making your tags and triggers as powerful and flexible as possible.
A Practical Example: Putting It All Together
Imagine you want to track how many visitors sign up for your newsletter. Here’s how you’d use tags, triggers, and variables together in GTM:
- Tag: Create a Google Analytics event tag to record newsletter sign-ups.
- Trigger: Set up a trigger to fire this tag whenever the newsletter sign-up form is submitted.
- Variable: Use a variable to capture the form’s submission status, ensuring the tag only fires upon a successful sign-up.
This example shows how GTM’s components work together to track specific user actions on your site, giving you valuable insights into your audience’s behavior.
Understanding tags, triggers, and variables is important for using Google Tag Manager effectively. They are the foundation upon which all your tracking strategies are built. By mastering these basics, you’ll be well on your way to implementing sophisticated tracking solutions that can provide deep insights into how users interact with your website.
Simplify Google Analytics Integration with Analytify
While setting up GTM on your WordPress site is an effective way to manage various analytics and tracking codes, if your primary goal is to use Google Analytics, Analytify offers a direct and simplified solution.
Join 50,000+ beginners & professionals who use Analytify to simplify their Google Analytics!
Analytify eliminates the complexity of integrating Google Analytics with your WordPress site, allowing you to bypass the GTM setup entirely. Read How to Install Analytify (A Complete Guide).
Here’s how Analytify adds unparalleled value to your WordPress analytics efforts:
- Direct Google Analytics Integration: Analytify seamlessly integrates Google Analytics with your WordPress site, offering a straightforward setup process without the need for GTM. This direct integration means you can start tracking and analyzing your site’s performance in no time.
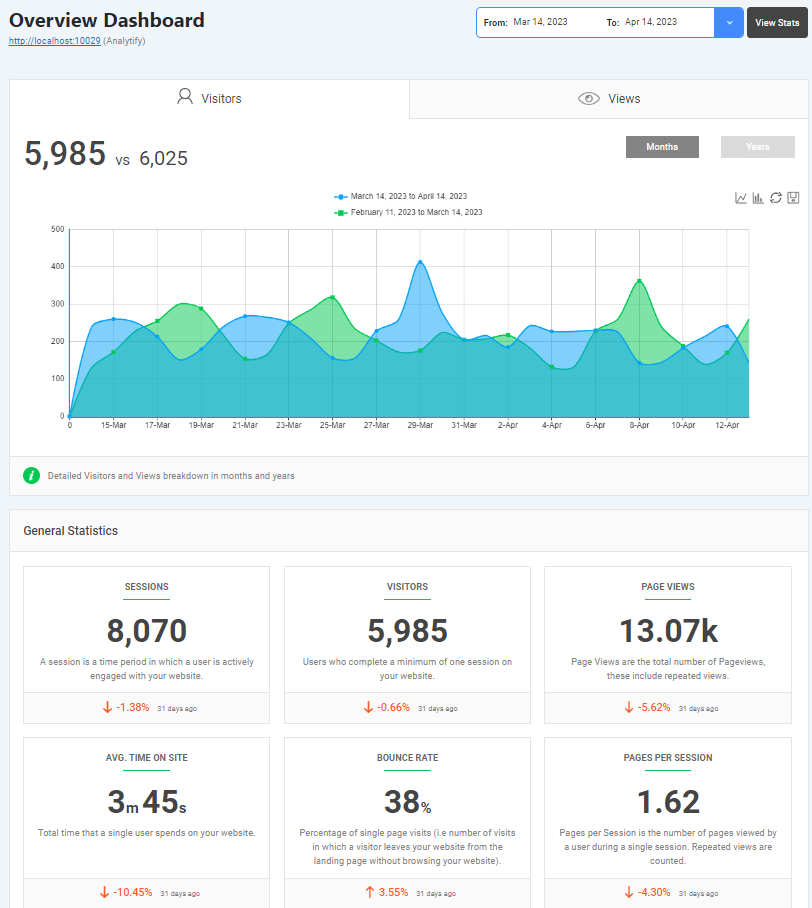
- Analytics within WordPress: With Analytify, you get a user-friendly interface that brings Google Analytics reports right into your WordPress dashboard. This integration provides you with actionable insights about your audience, page views, session durations, and more, all without leaving your site’s backend.
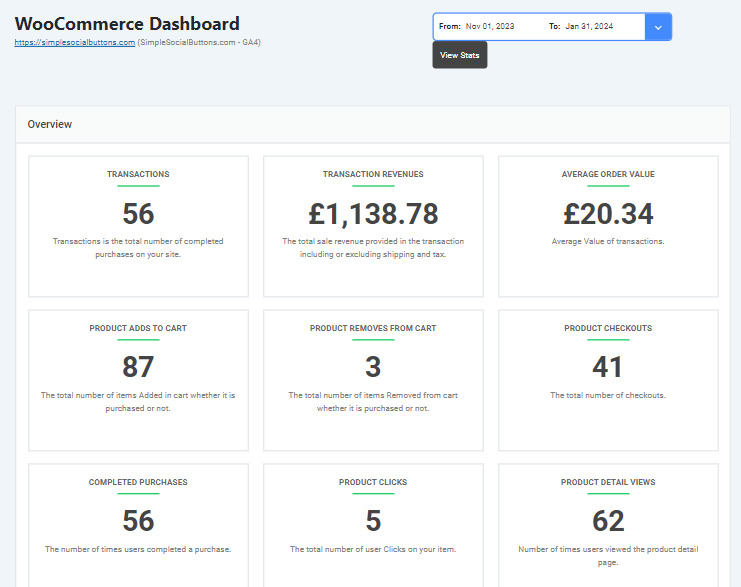
- Enhanced Ecommerce Tracking: For WordPress sites with eCommerce functionality, Analytify effortlessly tracks and reports on your eCommerce metrics. From product impressions to purchase conversions, get detailed insights into your online store’s performance.
- Automated Analytics Reports: Save time and stay informed with Analytify’s automated email reports feature. Customize and schedule reports to keep your team updated with the latest analytics data, directly in their inbox.
- No Coding Required: One of Analytify’s biggest advantages is its no-code setup. Unlike the GTM approach, which might require some familiarity with code snippets for advanced tracking, Analytify is designed for ease of use, making it accessible to all WordPress users, regardless of technical expertise.
Google Tag Manager FAQs
Do I need coding skills to use Google Tag Manager?
Not at all! Google Tag Manager is designed to be user-friendly, allowing marketers, business owners, and content creators to implement tracking tags without writing code. While a basic understanding of HTML and JavaScript can be helpful, it’s not a requirement to get started with GTM.
How does Google Tag Manager work with Google Analytics?
GTM works seamlessly with Google Analytics. You can use GTM to deploy and manage your Google Analytics tracking code, set up event tracking, and configure other custom tracking without altering the code on your website. It simplifies the process, making it easier to collect detailed analytics data.
Is Google Tag Manager free?
Yes, Google Tag Manager is entirely free to use. Google offers this powerful tool at no cost, providing a robust solution for efficiently managing your website’s tags.
Can Google Tag Manager affect my website’s loading speed?
When used correctly, GTM can actually improve your website’s loading speed. It allows for tags to be loaded asynchronously, meaning they don’t interfere with the loading of your main website content. Proper tag management ensures your site remains fast and user-friendly.
How secure is Google Tag Manager?
Google Tag Manager is built with security in mind. You control who has access to your GTM account, and you can limit permissions to ensure that only trusted individuals can make changes. Additionally, GTM operates with high-security standards to protect your data and website from unauthorized access.
Can I use Google Tag Manager for mobile apps?
Absolutely! GTM isn’t just for websites; it’s also designed to work with mobile apps. You can use it to manage and deploy tags in your iOS and Android apps, enabling you to track app installations, usage, and in-app events just as you would on a website.
What should I do if my GTM tags aren’t working correctly?
If you encounter issues with your tags, use GTM’s built-in debugging tools to test and preview your tags in real time. This feature lets you troubleshoot and fix problems before your tags go live. If you’re still stuck, the GTM community and support forums are great resources for finding solutions and getting expert advice.
Conclusion
Google Tag Manager is more than just a convenience; it’s a transformative tool that can significantly enhance your data collection strategies and marketing efficiencies. With GTM, updating tags and deploying tracking codes usually don’t require a developer or lengthy timelines. You’re now equipped to manage your website’s analytics on your own terms, making real-time decisions and updates that reflect your business’s needs.
We hope this guide has helped you to have a solid foundation about what GTM is, how to set it up, and how to start using it to streamline your website’s tracking and analytics.
You many also like to explore GA4 Content Grouping: A Complete Guide (2024).
We encourage you to implement what you’ve learned and utilize how GTM can benefit your website and business. Whether you’re looking to enhance your tracking accuracy, streamline your marketing deployments, or gain better control over your website’s functionality, Google Tag Manager is here to make those goals achievable.


