Google Analytics eCommerce Tracking on WordPress (Explained 2026)
Are you struggling to track your eCommerce analytics effectively on your WordPress site? With Google Analytics for eCommerce, these insights are just a few clicks away.
But setting up Google Analytics eCommerce tracking for WordPress can often feel overwhelming, especially for those new to the platform. That’s where Analytify comes in. This user-friendly plugin makes integrating GA4’s powerful eCommerce tracking features into your WordPress site simple and straightforward, even for beginners.
In this guide, we’ll show you how to set up Google Analytics for eCommerce on WordPress and how to track eCommerce analytics.
Google Analytics eCommerce for WordPress (TOC):
What is GA4 eCommerce Tracking?
Google Analytics 4 (GA4) eCommerce tracking is an advanced feature that allows you to monitor and analyze the behavior of users on your online store. GA4 uses an event-based model, which gives you greater flexibility in tracking specific interactions and conversions on your website. This means you can track everything from simple actions like page views to more complex events like product purchases, cart additions, and even checkout completions.
GA4 eCommerce tracking provides detailed tracking of the entire customer journey, like:
- Revenue Tracking: Measure the total revenue generated from sales, allowing you to track overall business performance.
- Product Performance: Understand which products are performing well by tracking product views, add-to-cart actions, and purchases.
- Conversion Metrics: Track important conversion-related metrics, such as the eCommerce conversion rate, which shows how many visitors completed a purchase compared to how many visited your site.
- Customer Behavior: Track user actions across their journey, from landing on your site to completing a purchase, allowing you to identify drop-off points and optimize the customer journey.
These events allow you to measure important metrics such as total revenue, purchase frequency, average order value, and more. This data is essential for understanding which products are performing well, where you’re losing customers in the funnel, and which marketing channels are most effective at driving sales.
Challenges in Setting Up GA4 eCommerce Tracking on WordPress
Technical Barriers
While GA4 offers robust tracking features, setting up eCommerce tracking on WordPress can be challenging, especially if you’re unfamiliar with technical configurations. Some of the common hurdles include:
- Manual Coding: Setting up eCommerce events like add_to_cart or purchase usually requires custom coding, which can be time-consuming and complicated for beginners.
- Plugin Compatibility: Many WordPress eCommerce plugins may not automatically integrate with GA4, requiring additional configurations.
Common Pitfalls
- Data Layer Issues: If you’re not careful with how data is pushed to the data layer (the object where GA4 pulls its event data), you might miss out on tracking essential eCommerce events.
- Missing Events: Some eCommerce events, like purchase, may not be tracked by default, leading to incomplete or inaccurate reporting.
How to Simplify GA4 eCommerce Tracking in WordPress
Join 50,000+ beginners & professionals who use Analytify to simplify their Google Analytics!
Analytify is the best WordPress plugin designed to simplify the process of integrating Google Analytics 4 eCommerce tracking on your site. With Analytify, you can easily track eCommerce events and gather insights about your store’s performance. No coding required.
Analytify automatically integrates with popular WordPress eCommerce plugins like WooCommerce, enabling seamless tracking of all key eCommerce events such as product views, add-to-cart actions, and completed purchases.
Key Features of Analytify:
- Automatic eCommerce Event Tracking: Automatically tracks important eCommerce events like product views, adds to cart, and purchases without needing manual configuration.
- Easy Integration with Popular Plugins: Works seamlessly with WooCommerce, Easy Digital Downloads, and other major eCommerce platforms.
- Real-Time Dashboard: View your eCommerce metrics in real time from within your WordPress admin panel, giving you instant access to the most important data.
- GDPR-Compliant: Analytify ensures that your data collection practices are compliant with privacy regulations, such as GDPR, so you can track performance without worrying about legal issues.
How to Set Up GA4 eCommerce Tracking in WordPress (With Analytify)
Setting up Google Analytics 4 (GA4) eCommerce tracking on your WordPress site can be a difficult task, especially if you’re unfamiliar with the technical side of things. Fortunately, with Analytify, the best WordPress plugin designed to simplify Google Analytics integration, you can easily track your store’s performance and make data-driven decisions without needing to code.
Step 1: Install and Activate the Analytify Plugin
Before you can integrate Google Analytics 4 with your WordPress site, you’ll need to install Analytify.
- Purchase and Download Analytify:
Go to the Analytify website and purchase the plugin. After purchase, download the ZIP file from your account dashboard. - Then, in your WordPress dashboard, go to Plugins >> Add new and then upload the ZIP file.
For complete setup, look at How to Install and Activate Analytify Pro Plugin (Easy Guide)
Step 2: Connect Your Google Analytics Account
Now that you have Analytify installed, it’s time to link it to your Google Analytics 4 account to start tracking your eCommerce data.
- Go to Analytify Settings:
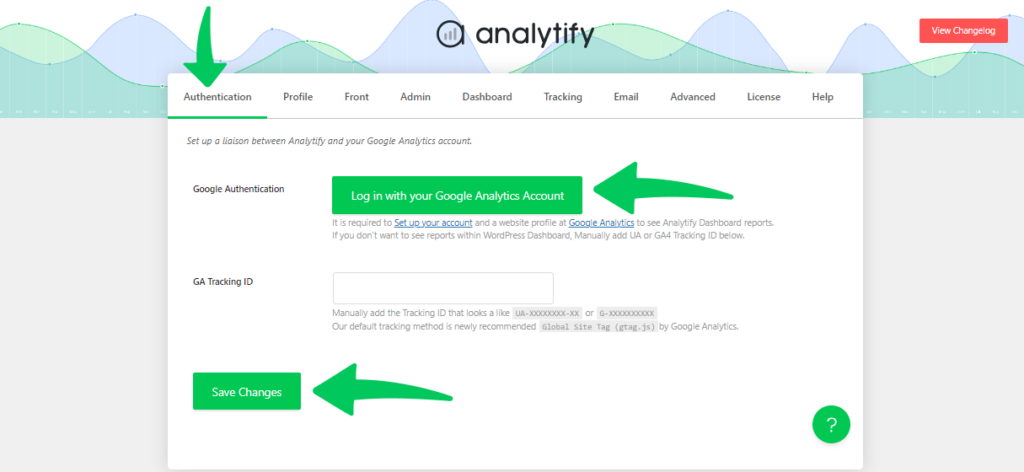
In your WordPress dashboard, navigate to Analytify >> Settings. - Authenticate with Google:
- Click the Authenticate with Google button.
- Sign in with the Google account that has access to your Google Analytics 4 (GA4) property.
- Grant the necessary permissions to allow Analytify to access your GA4 data.
- Click the Authenticate with Google button.
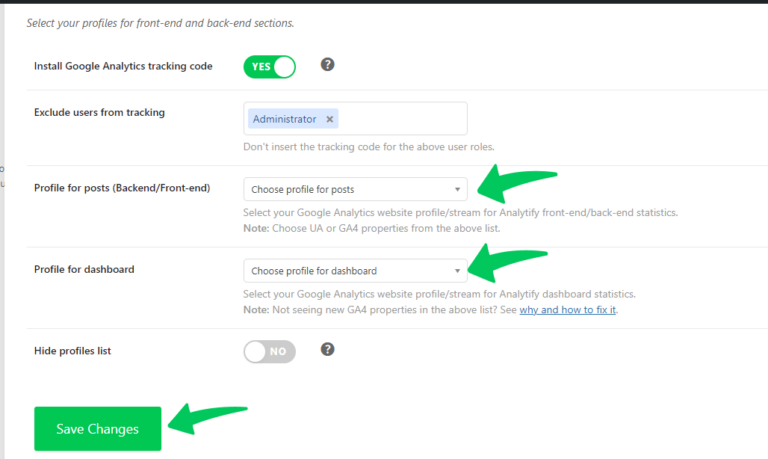
- Once authenticated, select the GA4 property you want to connect to and save the settings.
Step 3: Install the eCommerce Add-On for WooCommerce or Easy Digital Downloads
Once Analytify is installed and configured with GA4, you’ll need to install the eCommerce add-on depending on which platform you’re using for your store.
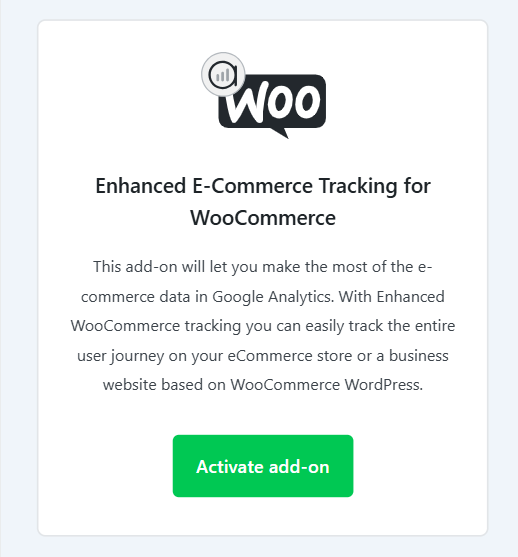
- Install the WooCommerce Add-On (for WooCommerce stores):
- Go to Analytify >> Add-ons in your WordPress dashboard.
3. Find the WooCommerce Add-On and click Install and Activate.
Install the Easy Digital Downloads Add-On (for EDD stores):
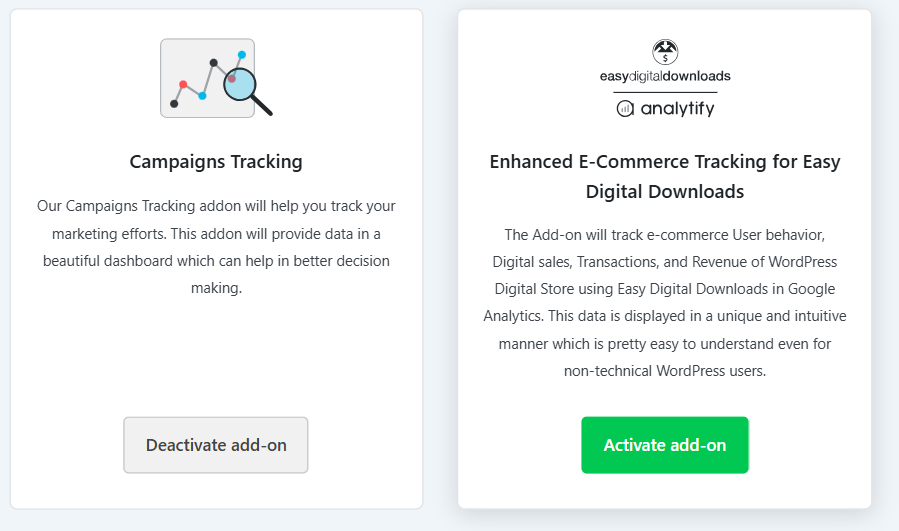
Similarly, go to Analytify >> Add-ons, find the EDD Add-On, and click Install and Activate.
Step 4: Track ECommerce Analytics in WordPress
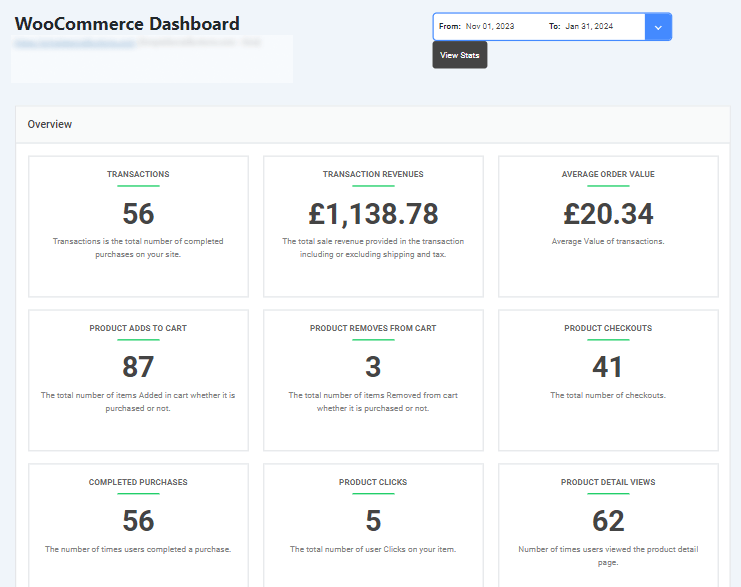
After setting up Google Analytics and eCommerce setup with Analytify, you can directly track e-commerce sales in the WordPress dashboard. Analytify provides you Google Analytics e-commerce data right on your WordPress dashboard.
That’s how you can setup eCommerce tracking in WordPress with Analytify.
Step 5: Verify eCommerce Data Collection in GA4
Once the settings are configured, it’s important to verify that data is being tracked correctly.
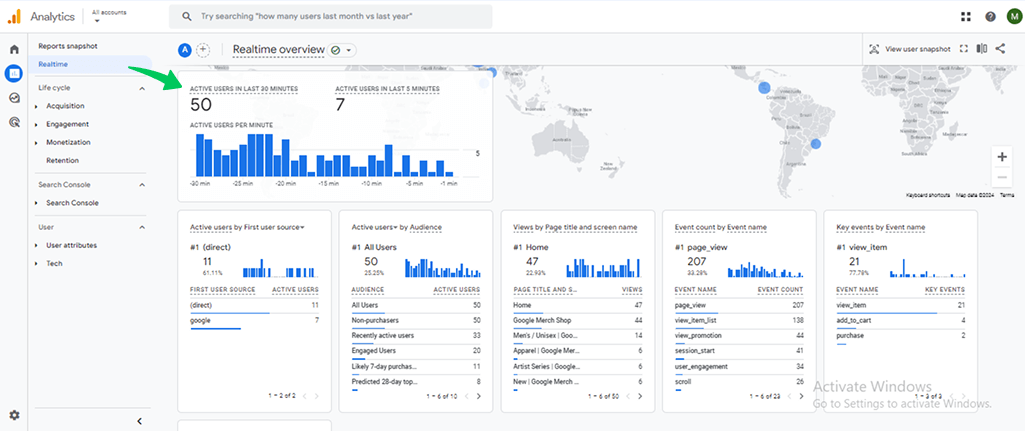
- Check Real-Time Data in GA4:
- Open Google Analytics 4 and go to the Real-Time report.
- You should see events like view_item, add_to_cart, and purchase being triggered as you interact with your online store.
- If you’re not seeing the events, make sure the correct product pages and checkout steps are included in the event tracking setup.
Monitor eCommerce Metrics:
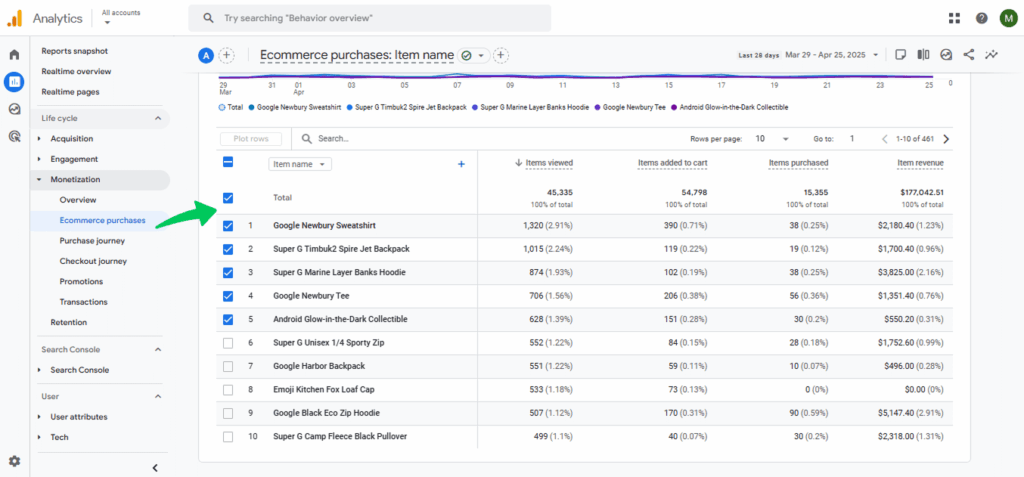
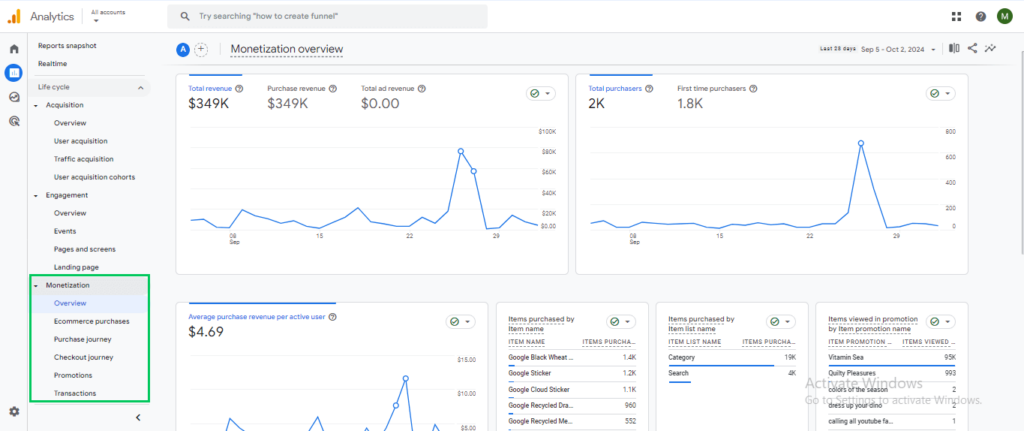
- Go to the Monetization section in GA4 to see key metrics like revenue, transactions, e-commerce conversion rate Google Analytics and average order value.
- You should also see product performance reports showing which products are selling the most.
Troubleshooting Common eCommerce Analytics Issues
If your eCommerce data isn’t appearing correctly in GA4, here are some common issues and solutions:
- Event Tracking Discrepancies: Double-check your plugin settings and ensure that the required events are activated. If events are missing, you may need to troubleshoot the integration with your eCommerce plugin.
- Data Layer Conflicts: If you’re using other plugins that also modify the data layer, conflicts may arise. Ensure that Analytify is the primary plugin for handling eCommerce tracking.
- GA4 Configuration Errors: If you encounter issues in GA4, review your property settings to ensure that your GA4 tracking code is placed correctly and that the correct events are being triggered.
Frequently Asked Questions About eCommerce Analytics
1. What is eCommerce tracking in Google Analytics?
eCommerce tracking in Google Analytics allows you to monitor and analyze online sales activities on your website. By implementing specific eCommerce events like view_item, add_to_cart, begin_checkout, and purchase, you can gain insights into user interactions, product performance, and revenue generation. This data helps in optimizing marketing strategies and improving user experience.
2. How do I set up eCommerce tracking in Google Analytics 4 (GA4)?
To set up eCommerce tracking in GA4, follow these steps:
Install Google Tag Manager (GTM): Add the GTM container code to your website.
Implement a Data Layer: Use a data layer to pass dynamic eCommerce data (like product IDs, names, and prices) to GTM.
Configure GA4 Event Tags in GTM: Set up tags for eCommerce events such as view_item, add_to_cart, begin_checkout, and purchase.
Test the Implementation: Use GTM’s preview mode to ensure that events are firing correctly.
Publish the Container: Once verified, publish the GTM container to make the changes live.
3. What is the eCommerce conversion rate in GA4, and how is it calculated?
In GA4, the eCommerce conversion rate is the percentage of sessions or users that resulted in a purchase. There are two primary types:
Session Conversion Rate: Calculated by dividing the number of sessions with at least one purchase by the total number of sessions.
User Conversion Rate: Calculated by dividing the number of users who completed a purchase by the total number of users.
These metrics provide insights into how effectively your website converts visitors into customers.
4. How can I track eCommerce sales in Google Analytics?
To track eCommerce sales, ensure that the purchase event is implemented correctly on your website. This event should capture transaction details such as revenue, tax, shipping, and items purchased. Once set up, you can view sales data in GA4 under the “Events” and “Monetization” sections. Using Analytify simplifies the process of managing and testing these events.
5. What is the difference between Google Analytics and eCommerce?
Google Analytics is a web analytics service that tracks and reports website traffic, while eCommerce refers to the buying and selling of goods or services online. Integrating eCommerce tracking into Google Analytics allows businesses to monitor online sales performance, understand customer behavior, and make data-driven decisions to enhance their eCommerce strategies.
WordPress eCommerce Analytics: Final Thoughts
Setting up Google Analytics for eCommerce on WordPress is easier than ever. Analytify makes the process simple by automating event tracking, ensuring accurate data collection, and providing real-time insights within your WordPress dashboard. By following the steps outlined above, you’ll be able to use GA4 eCommerce analytics tracking features to optimize your online store and grow your business faster.
Further Readings:
- How To Enable Google Analytics Ecommerce Tracking?
- 5 Enhanced Ecommerce Reports
- 10 Crucial Ecommerce Metrics To Track In GA4 (2026)
Now, we’d love to hear from you. What unique strategies have you used to optimize your eCommerce tracking, and how has Google Analytics 4 helped you improve your online store’s performance? Let us know in the comments!

