How to Check if GA4 is Working? (2026)
Do you want to know how to check if GA4 is working? If yes, you are at the right place.
When it comes to tracking your website’s performance, ensuring that Google Analytics 4 (GA4) is working correctly is essential. GA4 helps gather valuable insights into visitor behavior, traffic sources, and more, making it important for data-driven decisions.
However, if GA4 isn’t set up or functioning properly, you could miss out on critical information that helps you understand your audience and improve your site.
In this guide, we’ll show you several simple ways to check if GA4 is working on your website.
How to Check if GA4 is Working (TOC):
How to Check if GA4 is Working (5 Ways)
You can try a few different methods to ensure that GA4 is accurately tracking data on your site. Each step will help you verify whether GA4 is properly installed and collect the information you need.
1. Use GA4 DebugView
DebugView in GA4 is a powerful feature that lets you track and verify real-time data coming from your website or app. It’s especially useful for checking that events, conversions, and custom parameters are firing correctly. Here’s how to use DebugView:
- Option 1: Use Google Tag Assistant by activating its “Debug” option (if you’re using it to manage tags).
- Option 2: Use a browser extension like Google Analytics Debugger or enable debug mode in Google Tag Manager if you’re managing GA4 tags through GTM.
Open Google Analytics:
- Log in to your GA4 property in Google Analytics.
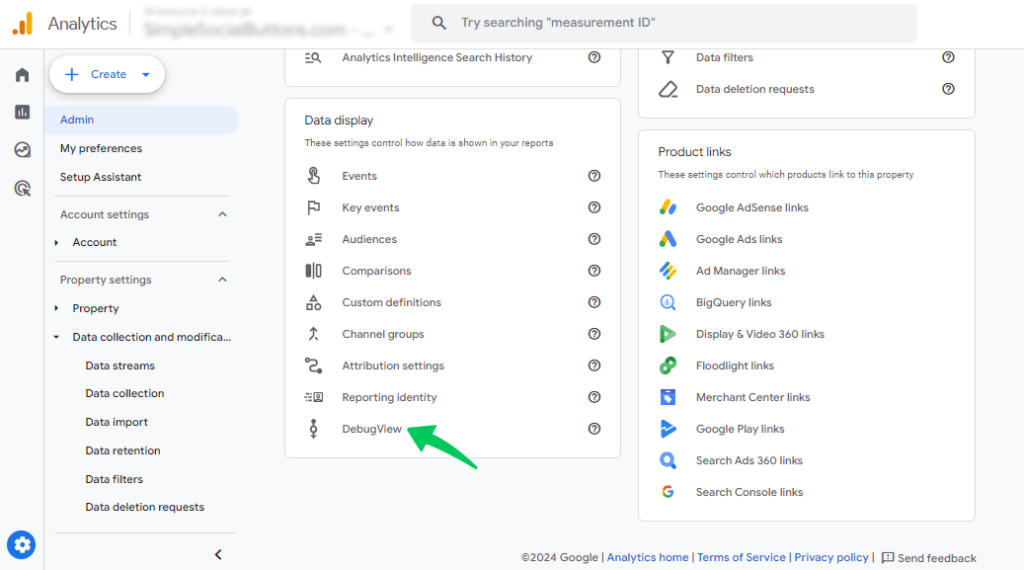
- Navigate to Admin in the left sidebar, and then select DebugView under the Property column.
Trigger Events on Your Website:
- While on your website in debug mode, perform some actions, such as navigating between pages or clicking buttons that should trigger events.
- If your DebugView is not working read How to fix DebugView.
Monitor Events in DebugView:
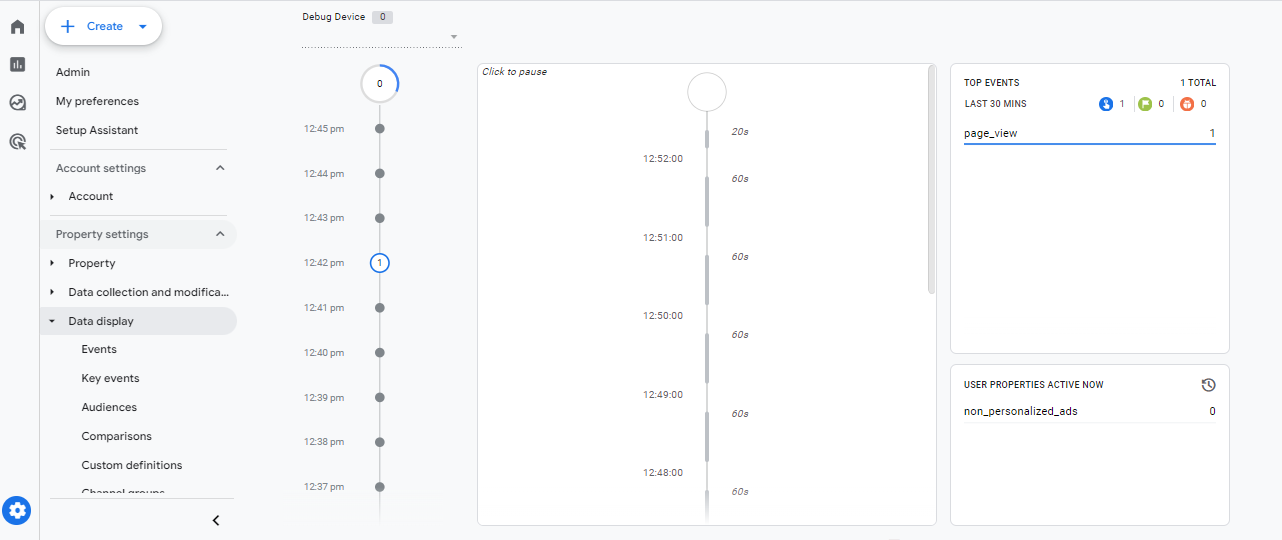
- In DebugView, you’ll see a real-time stream of events on the right side of the screen. Each event should correspond to actions you’ve performed on your website.
- Events show up as dots on a timeline, with recent events listed at the top.
- If your GA4 tags are working, you should see events like
page_view,scroll,click, or any custom events you’ve set up.
Verify Event Details:
- Click on each event to view detailed information, such as parameters and user properties, confirming that GA4 is capturing data accurately.
That’s how to check if GA4 is working or not.
2. Check Real-Time Reports in GA4
Another simple way to see if GA4 is working is by checking the Real-Time reports within your Google Analytics account. These reports show you live data from your website, so you can confirm if visitor information is being tracked correctly.
Here’s how to do it:
- Log in to Google Analytics: Go to Google Analytics and sign in with your account.
- Select your GA4 Property: Make sure you select the GA4 property for the website you want to check.
- Navigate to Real-Time Reports:
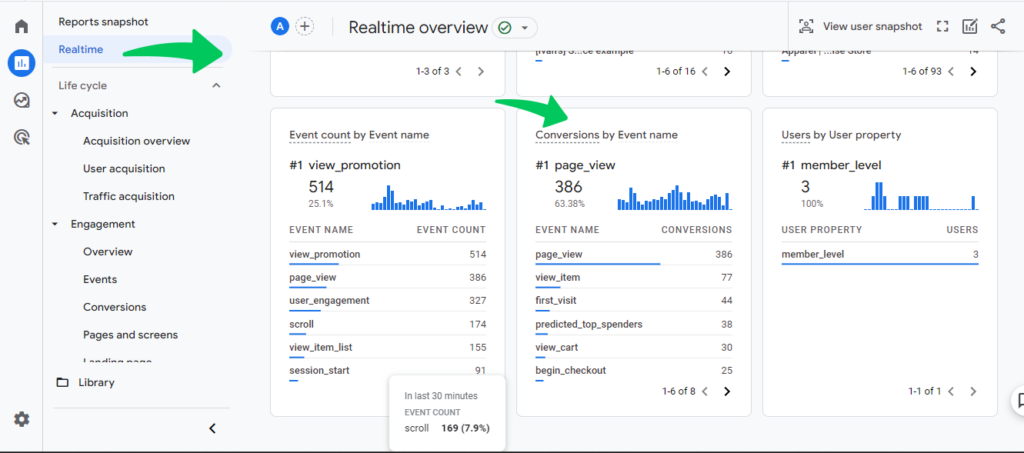
- In the left-hand menu, click on Reports.
- Under Reports, select Real-time.
- Visit Your Website: Open a new tab in your browser and go to your website. This will generate real-time data.
- Monitor the Real-Time Report: Go back to the Google Analytics Real-Time report and see if your visit shows up. You should see at least one active user on the site (which is you).
What to Look For:
- Active Users: The number should increase to reflect your visit.
- Page Views: The page you’re on should appear in the list of active pages.
- Location: Your location might be displayed if available.
If you see your activity in the Real-Time report, it means Google Analytics status is fine. GA4 is successfully tracking data from your website. If not, there might be an issue with how GA4 is set up on your site.
3. Inspect Page Source for GA4 Tag
You can also check if GA4 is working by inspecting the code on your website to see if the GA4 tag is present. This method involves viewing the source code to locate the GA4 tracking ID.
Here’s how to do it:
- Go to Your Website: Open your website in a browser.
- Right-click on the page and select “View Page Source” or press Ctrl + U (Windows) / Cmd + Option + U (Mac) to open the page’s source code.
- Search for the GA4 Tag: Use Ctrl + F (Windows) or Cmd + F (Mac) to open the search bar, then type “G-” followed by your GA4 tracking ID.
- Verify the GA4 Code: If you find the GA4 tag, it means the code is installed. However, finding it alone doesn’t confirm it’s functioning correctly, so it’s best to combine this check with other methods.
Alternatively, you can use Analytify to simplify this process. Analytify makes it easy to install and manage GA4 tags directly from your WordPress dashboard without editing any code.
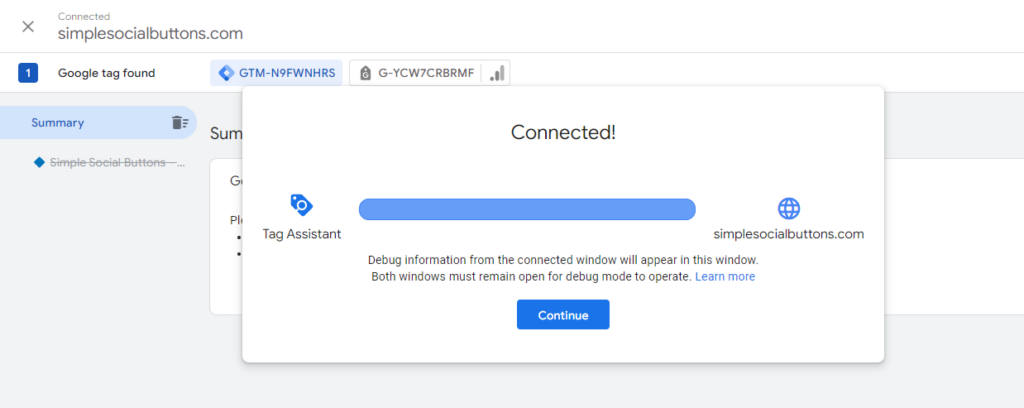
4. Use Google Tag Manager Preview Mode
If you’re using Google Tag Manager (GTM) to handle your GA4 tags, you can use GTM’s Debug Mode to confirm that GA4 tags are firing correctly. Debug Mode allows you to test your tags without affecting regular website visitors.
Here’s how to check GA4 tags with GTM Debug Mode:
- Log in to Google Tag Manager: Go to Google Tag Manager and sign in.
- Enable Preview Mode:
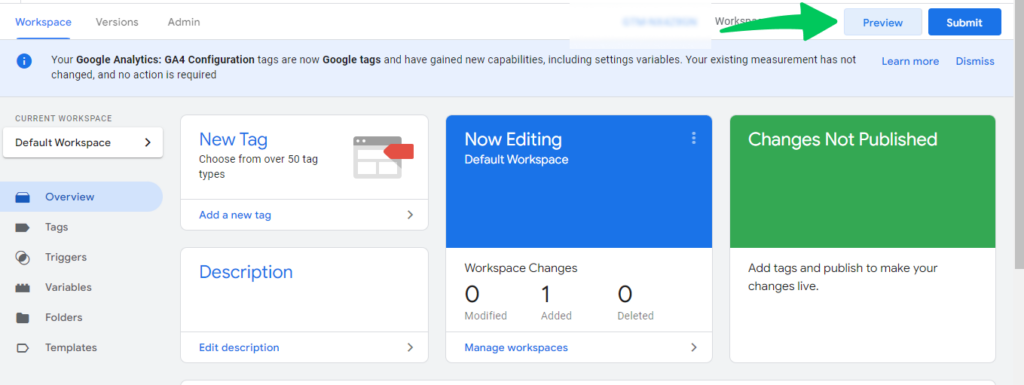
- In the top-right corner of your GTM dashboard, click “Preview.”
- Enter your website URL in the popup and click “Connect.”
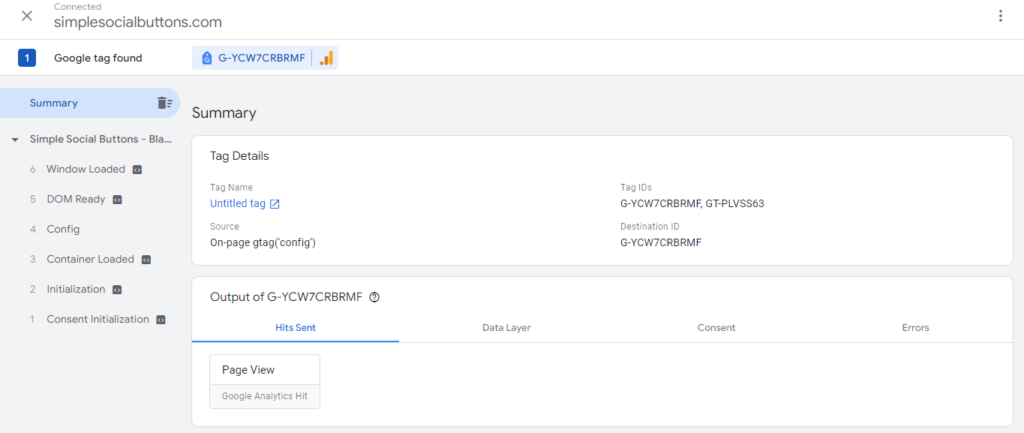
- Open Your Website in Debug Mode: A new window will open with a Debug Console showing which tags are firing on your website.
- Check for GA4 Tags:
- In the Debug Console, look for the GA4 tags. If they’re firing correctly, you’ll see a record of each page view and event tracked by GA4.
- Review the Details: You can click on each tag in the Debug Console to see more details about what’s being tracked.
This method is highly reliable for users who have set up GA4 via Google Tag Manager. If you’re looking for an easier way to handle GA4 tracking on WordPress without needing GTM, Analytify offers a convenient solution to set up and verify Google Analytics with a few clicks.
Let me know when you’re ready for the next method!
5. Check Google Analytics from Network Tab in Browser Developer Tools
Another effective way to confirm that GA4 is working is by using the Network tab in your browser’s Developer Tools. This method lets you check if Google Analytics 4 is working.
Here’s how to check GA4 using Developer Tools:
- Open Developer Tools:
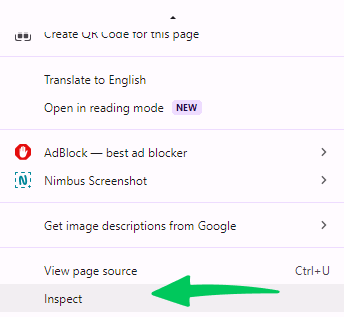
- Right-click on your webpage and select “Inspect”, or press F12 (Windows) / Cmd + Option + I (Mac) to open Developer Tools.
- Go to the Network Tab:
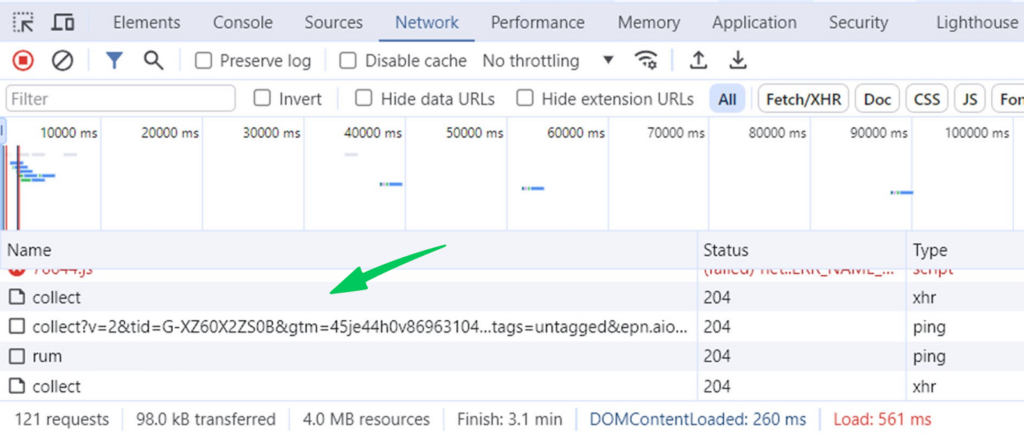
- In Developer Tools, click on the “Network” tab to monitor network activity.
- Filter for GA4 Requests:
- In the search bar within the Network tab, type “collect”. This will filter the network requests to show only those related to GA4.
- Visit or Refresh the Page:
- Refresh the page or click through to a different page on your website to trigger GA4 events.
- Look for Successful GA4 Requests:
- If GA4 is working, you’ll see requests with URLs like https://www.google-analytics.com/g/collect in the list of network requests.
- Each request confirms that data is being sent to Google Analytics.
If you see these network requests, it means your GA4 tags are functioning correctly and sending data.
That’s how to do Google analytics testing successfully.
If checking with Developer Tools seems complicated, remember that Analytify provides an easy-to-use alternative for GA4 setup and tracking verification right within WordPress.
Join 50,000+ beginners & professionals who use Analytify to simplify their Google Analytics!
Analytify: Effortless GA4 Setup and Troubleshooting
If you’re using WordPress, Analytify offers a straightforward solution for setting up and verifying GA4 tracking without needing to deal with code or complex setups. Analytify directly connects your site to Google Analytics and allows you to see your data in your WordPress dashboard.
Key Benefits of Analytify:
- Effortless Setup and Integration: With Analytify, connecting your site to GA4 is as simple as a few clicks, and no coding is needed.
- Real-Time Data Insights: View real-time analytics directly in your WordPress dashboard, providing instant feedback on site performance.
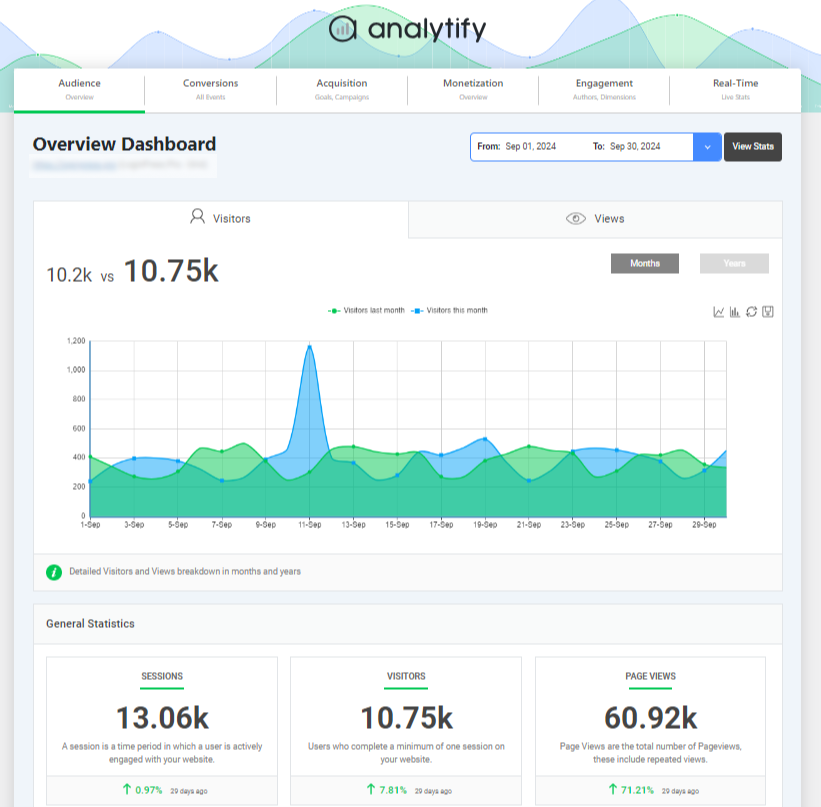
- Detailed Analytics: Access reports on user behavior, traffic sources, and content performance without leaving your site.
- Enhanced Error Management: Analytify helps identify and troubleshoot tracking issues efficiently, reducing the risk of missed data.
How to Verify GA4 Tracking with Analytify:
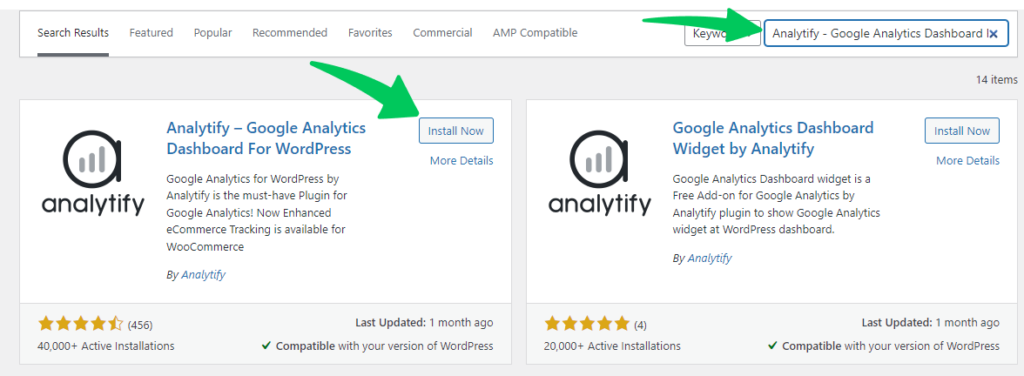
- Install and Activate Analytify: From your WordPress dashboard, go to Plugins >> Add New, search for Analytify, and activate it.
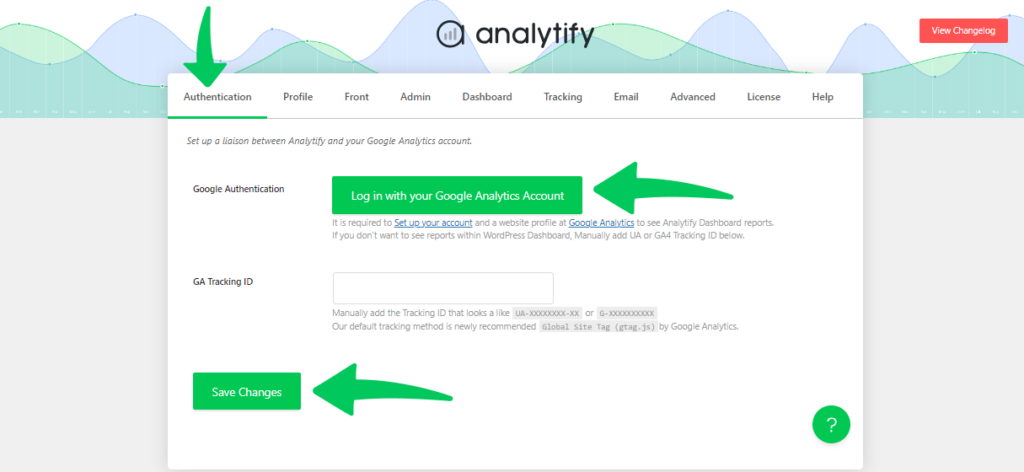
- Connect Your Google Analytics Account: In the Analytify settings, link your Google Analytics account, selecting the GA4 property.
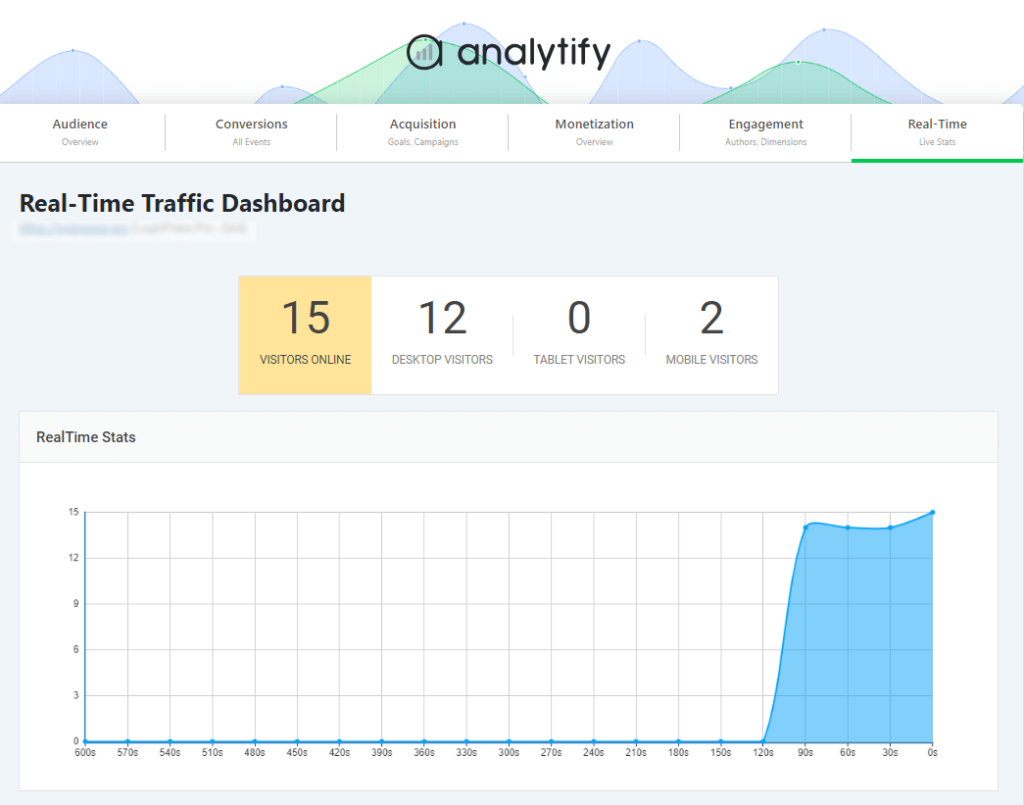
- Monitor Analytics Data: Visit the Analytify Dashboard to view real-time data. If you see active users and page views, your GA4 setup is functioning correctly.
Using Analytify simplifies the GA4 process, letting you focus on insights rather than technical setup.
Additional Tips for Troubleshooting GA4 Issues
If you still do not see data in GA4, there might be a few reasons why it does not work. Here are some additional troubleshooting tips that can answer your query about how to check if Google Analytics is working:
1. Check for Tracking ID Errors
- Make sure the GA4 tracking ID is correctly entered in your website settings or Google Tag Manager. A typo or an extra space can prevent data from being sent.
2. Remove Duplicate Tags
- Sometimes, multiple GA4 tags on a single page can interfere with tracking. Check that only one GA4 tag is firing per page to avoid duplicate data.
3. Allow Time for Data to Show
- GA4 data processing can sometimes take a few hours. If you’ve just set up GA4, wait a little while and then check your reports again.
4. Use Analytify for a Hassle-Free Solution
- If you’re looking for a simpler way to manage and troubleshoot GA4, consider using Analytify. With Analytify, you can monitor and troubleshoot GA4 tracking directly in WordPress, reducing the risk of errors.
You can also check this detailed guide on troubleshooting GA4 data availability issue.
FAQs about How to Check if GA4 is Working
1. How do I know if GA4 is working?
You can check if GA4 is working by using methods like Google Tag Assistant, viewing Real-Time reports in GA4, inspecting the page source, or using Analytify if you’re on WordPress. Each method helps confirm that your website is successfully sending data to Google Analytics.
2. What if my GA4 Real-Time report shows no data?
If there’s no data in the Real-Time report, it could be due to issues with your tracking ID, a delay in data processing, or an incorrect setup. Double-check your tracking ID, remove any duplicate tags, and ensure the GA4 tag is correctly installed.
3. How do I fix Google Analytics if it’s not working on my site?
Start by checking that the tracking code or GA4 tag is correctly implemented. You can also try using the troubleshooting tips mentioned above or use Analytify for a straightforward solution if you’re on WordPress.
4. Can Analytify check if my Google Analytics is working?
Yes, Analytify provides a simple way to verify that GA4 is set up correctly. Once connected to GA4, Analytify displays real-time data directly in your WordPress dashboard, so you can be sure tracking is active without needing extra tools.
5. How can I see if a site has Google Analytics?
To check if a site has Google Analytics, you can use the Google Tag Assistant extension, inspect the page source for GA tags, or use Developer Tools to monitor network requests for GA4 events.
Final Thoughts
Verifying that Google Analytics 4 is working on your website is essential for gathering accurate data. By using Google Tag Assistant, GA4 Real-Time reports, and Developer Tools, you can be sure your setup is tracking visitors correctly.
If you’re a WordPress user, Analytify offers an easy alternative to monitor and troubleshoot GA4 directly within your site, making it a convenient solution for all your tracking needs.
We hope this article has helped you to check if GA4 is working.
You may also like to read How to check If A Site Has Google Analytics (6+ Easy Methods).
Now, we’d love to hear from you which method helped you most tocheck if GA4 is working or not.

