Download

How to Display Front End Analytics on Your Website

We have been getting a lot of requests from users who are looking to enhance their websites with a comprehensive ‘front end analytics‘ solution.

These requests have been coming in through a variety of different channels. It is crucial to be aware of some potential safety problems, despite the fact that we understand the urge to make your stats analytics more easily accessible.

Continue reading “How to Display Front End Analytics on Your Website”

How to Install And Activate Analytify Pro Plugin (Easy Guide)

Analytify Pro is the premium version of Analytify, the best WordPress Google Analytics plugin that provides advanced Google Analytics integration for your WordPress websites. 

Analytify is an excellent plugin to track your website’s performance and user behavior and gain insights into how visitors interact with your content. Analytify Pro’s features include real-time stats, enhanced e-commerce tracking, custom dimensions and metrics, campaign tracking, and more.

Continue reading “How to Install And Activate Analytify Pro Plugin (Easy Guide)”

(not set) or (not provided) in Google analytics

Here is a little explanation from Google about (not set) and (not provided).

Not Set vs. Not Provided

Not Set: The ‘keyword’ (not set) simply identifies traffic that doesn’t arrive via a particular keyword and hence may not come via any search at all. This includes traffic coming from email, referral sites, or even things like Google Images.
Not Provided:  The keyword (not provided) describes organic searches that are being hidden from your view, to provide a measure of privacy for users. In 2011, Google began encrypting results from SSL searches (secure searches from users who are logged in to their Google Accounts or using the Firefox search bar).

So, If you see (not set) or (not provided) in Google analytics campaigns add-on, Dashboard, or any other place within Analytify plugins, consider that this (not set) or (not provided)  traffic is not from a particular keyword.

If you know any other explanation of this, please share it with us in the comment.

Thanks!

How to Enable Google Analytics Demographics and Interest Reporting in WordPress

Google Analytics can tell you a lot about the people who visit your website by giving you information about their age, gender, and interests. This guide will show you how to turn on Google Analytics Demographics and Interest reporting in Google Analytics and integrate them into your WordPress site using the Analytify WordPress tool.

Continue reading “How to Enable Google Analytics Demographics and Interest Reporting in WordPress”

Getting Google Analytics Stats for Specific Page or Post ID Using Analytify Shortcodes

Are you looking for how to get Google Analytics Stats for Specific Page or Post ID Using Analytify Shortcodes? If yes, you’re at the right place.

Analytify is a powerful tool for WordPress theme developers and website administrators. It gives detailed data that helps you track your website. You can use Analytify shortcodes to see Google Analytics Stats for specific Page and Post. This guide will walk you through each step.

Continue reading “Getting Google Analytics Stats for Specific Page or Post ID Using Analytify Shortcodes”

Automatic redirect to Analytify dashboard when users log in

Analytify offers a  great feature of implementing an automatic redirect to the Analytify dashboard upon user login in WordPress. This feature is particularly useful for administrators who want instant access to Analytify’s powerful analytics immediately upon logging in.

 In this article, we’ll show the process step-by-step, ensuring a smooth integration of the provided code into your theme’s functions.php file.

Requirements:

Ensure you have Analytify installed and activated on your WordPress site.

How to Add the Redirect Code?

Below is a step-by-step process on where and how to add the provided code in your theme’s functions.php file.

1. Access Theme’s functions.php File:
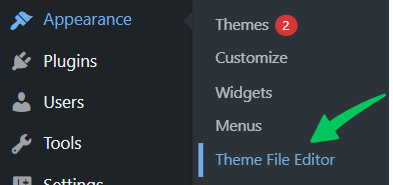
In your WordPress site, navigate to Appearances >>Theme Editor.

theme file editor.png

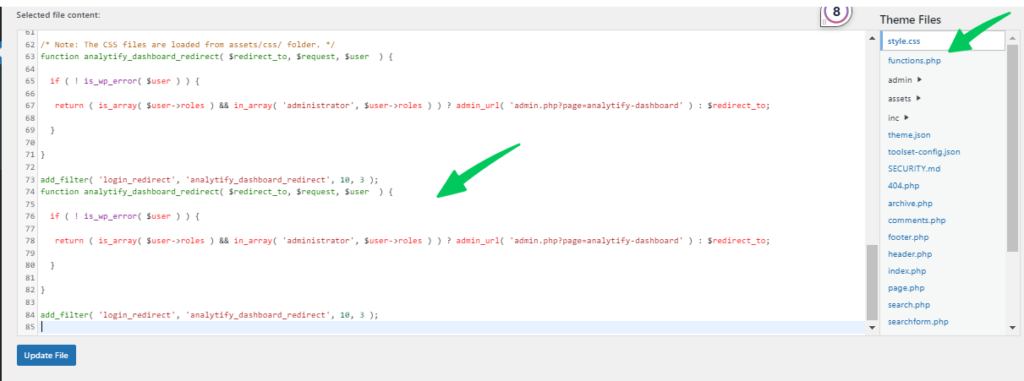
Access the functions.php file within your active theme’s directory, as shown in the screenshot below:

post the code to redirect to analytify dashboard when login

2. Paste the Code Snippet:

You would need to carefully add the following code at the bottom of your theme’s functions.php file:

Note: This code will allow redirect for administrator role only.

function analytify_dashboard_redirect( $redirect_to, $request, $user ) {

  if ( ! is_wp_error( $user ) ) {

   return ( is_array( $user->roles ) && in_array( 'administrator', $user->roles ) ) ? admin_url( 'admin.php?page=analytify-dashboard' ) : $redirect_to;

  }

}

add_filter( 'login_redirect', 'analytify_dashboard_redirect', 10, 3 );

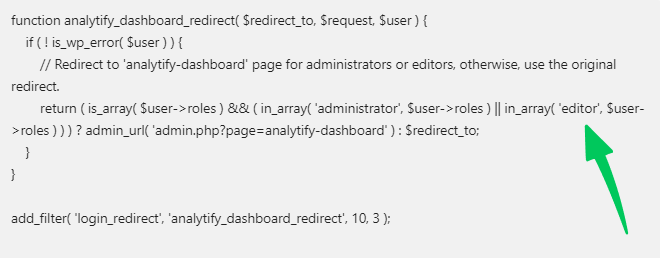
However, if you want to add redirect for your editor, use the following code:

function analytify_dashboard_redirect( $redirect_to, $request, $user ) {
if ( ! is_wp_error( $user ) ) {
// Redirect to 'analytify-dashboard' page for administrators or editors, otherwise, use the original redirect.
return ( is_array( $user->roles ) && ( in_array( 'administrator', $user->roles ) || in_array( 'editor', $user->roles ) ) ) ? admin_url( 'admin.php?page=analytify-dashboard' ) : $redirect_to;
}
}

add_filter( 'login_redirect', 'analytify_dashboard_redirect', 10, 3 );4


In case, you want to add any other role you can simply replace “editor” with the specific role.

editor redirct analytify dashbboard

3. Save Changes:

Update the file to save the functions.php file.

4. Testing the Redirect:

Log out of your WordPress dashboard. Then, log In with the Administrator account.

5. Verify Redirect:

After successful login, you should automatically be redirected to the Analytify dashboard.

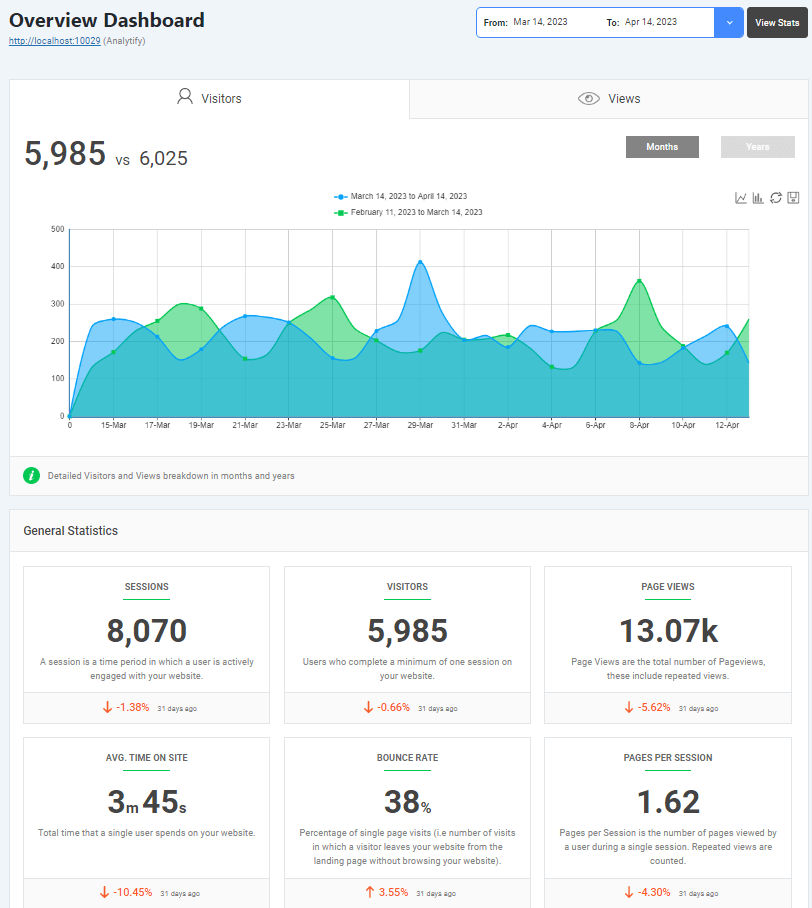
analytify dashboard
1 10 11 12 13
Enjoy all time low prices and LIFETIME deal this BlackFriday season.
Buy Now 
close-image