
Add Social Media Stats with Advanced ShortCode on Post or Page
Would you like to view & display the social media stats of any page or blog post to view the performance of social media traffic on your web page or blog post content?
WordPress Analytify has the option to show “Social Media” stats on your Post/Page. For this, you have to insert a shortcode on your Post/Page.
Analytify is a powerful WordPress plugin that integrates seamlessly with Google Analytics, allowing you to track and analyze your website’s performance. One of its key features is the ability to display detailed statistics using shortcodes.
In this article, we’ll guide you through the process of adding Social Media Stats to your WordPress posts or pages using the Analytify Advanced Shortcode.
How to Add Social Media Stats with Advanced ShortCode on Post or Page
Requirements
- Analytify Pro installed and activated.
- Analytify connected to a Google Analytics 4 property. See How to Integrate Analytify with Google Analytics 4.
Step 1: Install Analytify Plugin
Read How to Install And Activate Analytify Pro Plugin.
Step 2: Create or Edit a Post/Page
To add Social Media Stats to a post or page, create a new post or edit an existing one in WordPress.
Step 3: Insert the Shortcode
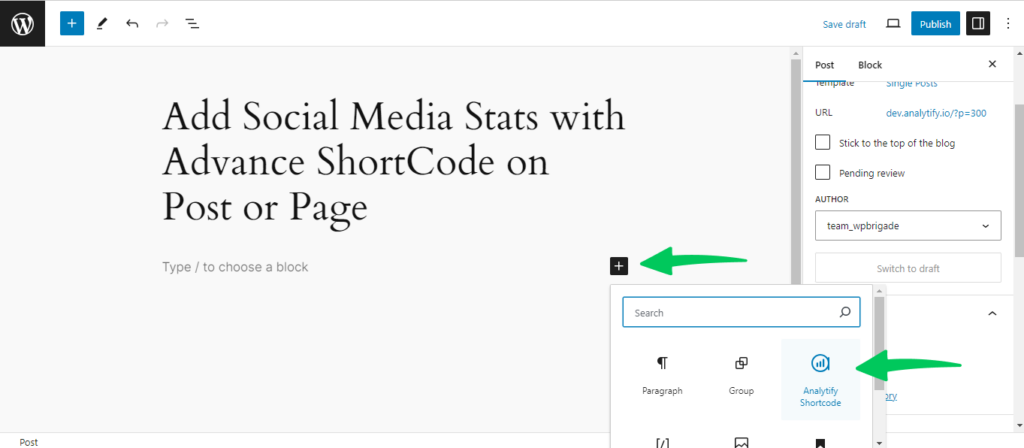
Switch to the Text editor mode in the WordPress post/page editor and click on plus icon +.
Then select Analytify Shortcode block.
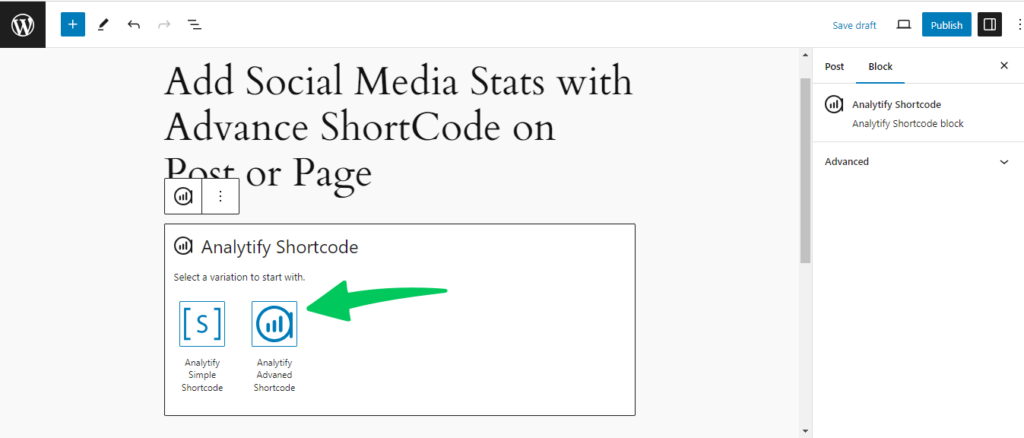
Now select Advance Shortcode.
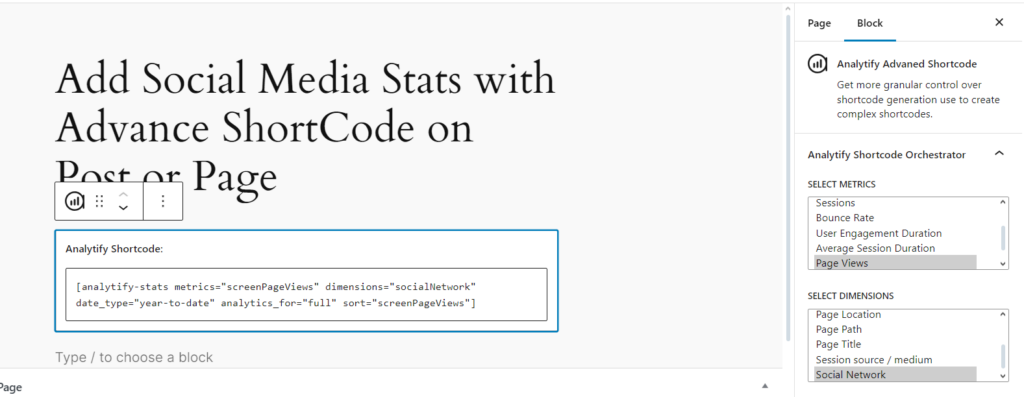
The block settings panel opens with all available Advanced Shortcode controls.
Work through each setting in the panel:
SELECT METRICS — choose which GA4 data points to display. You can select more than one. Examples: Sessions, Total Users, Bounce Rate. Use Clear Metrics to reset your selection.
SELECT DIMENSIONS — choose how to break the data down. Examples: Country, City, Session Source/Medium. You can select more than one. Use Clear Dimensions to reset.
PERIOD — set the time range using a preset option:
- Yesterday
- Last Week
- Last 15 Days
- Last 30 Days
- This Year
- Last Year
Step 4: Publish or Update
Preview the post/page to ensure that the Social Media Stats are displaying correctly.
Click “Publish” to make the post live or “Update” if you’re editing an existing post/page.
Step 5: View the Stats
Click Publish for a new post or Update for an existing one. Once live, the social media stats table appears on the post or page, showing which social networks drove traffic during the selected period.
That’s it!
This is how you can display social media traffic analytics on your specific page or blog post content by adding the Analytify shortcode that will help you to analyze the social media traffic performance on your content. Check our other guide on how to show the world map of visitors at the front-end by using the shortcode.