How to Add Analytify Advanced Shortcodes on Post or Page — Documentation page title
Analytify’s Advanced Shortcode gives you a full breakdown of GA4 data inside any WordPress post or page. Use it when you need more than a single number: break down stats by country or city, sort results by any metric, set a custom date range, or pull data for a specific page ID.
All settings are configured inside the Gutenberg Analytify Shortcode block with no code required.
Important: Use the Advanced Shortcode when you need dimension breakdowns, sorting, custom date ranges, or per-page-ID stats. If you only need a single metric total for the full site or current page, the Simple Shortcode is faster. The Advanced Shortcode covers everything the Simple one does, plus these four additional controls:
Prerequisites
Both of the following must be active before the shortcode can pull any data.
- Analytify Pro plugin installed and activated on your WordPress site. Read more on How to Install And Activate the Analytify Pro Plugin.
- Google Analytics is linked with your Analytify plugin. Read more on How to Integrate Google Analytics 4 with Analytify.
How to Use Advanced Shortcode on Post or Page
Follow these five steps to add an Advanced Shortcode with dimension breakdowns, sorting, or a custom date range.
Step 1: Log in to the WordPress site
Log in to the dashboard of your WordPress site.
Step 2: Create a New Post or Page or Edit an Existing One
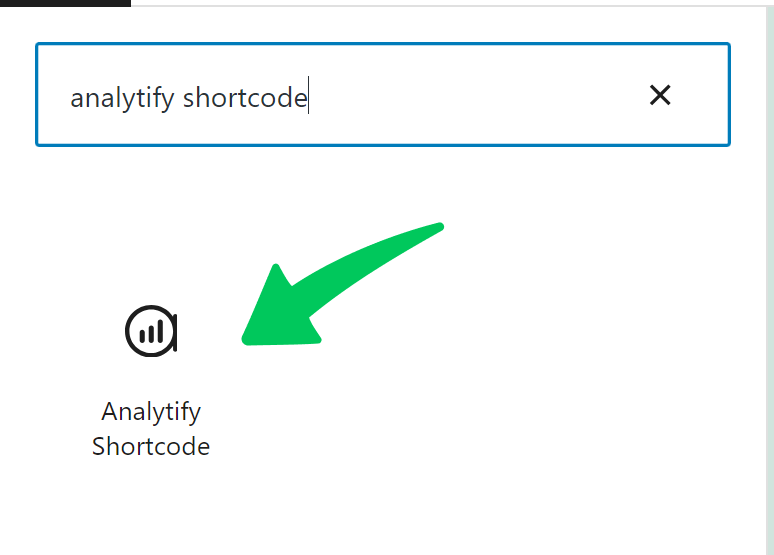
In the WordPress block editor, click the + icon to add a new block. Search for Analytify Shortcode and select it from the results.

Step 3: Select Analytify Shortcode Block
First, select the Analytify Shortcode block from your post editing bar.
After clicking the Analytify Shortcode block, a new block will open on your page.
Step 4: Add the Advanced Analytify Shortcode
Select Advanced Shortcode from the block options.
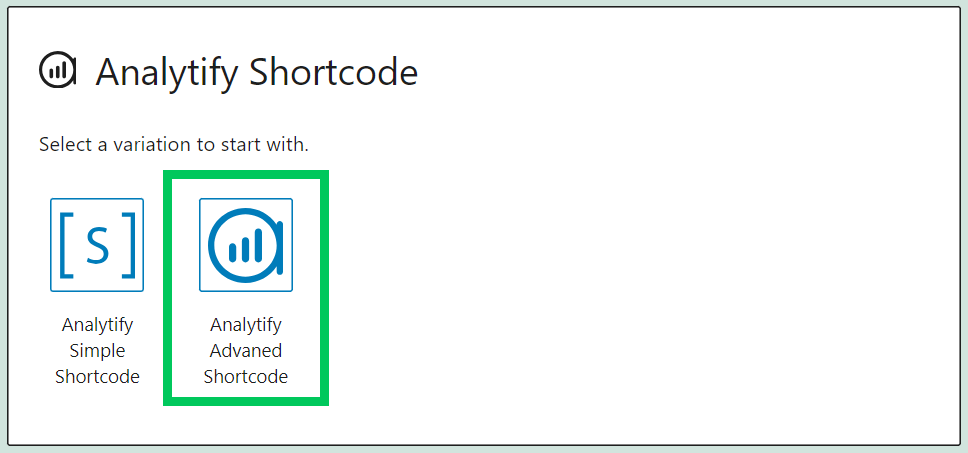
After selecting Advanced Shortcode, you need to navigate to its block settings.
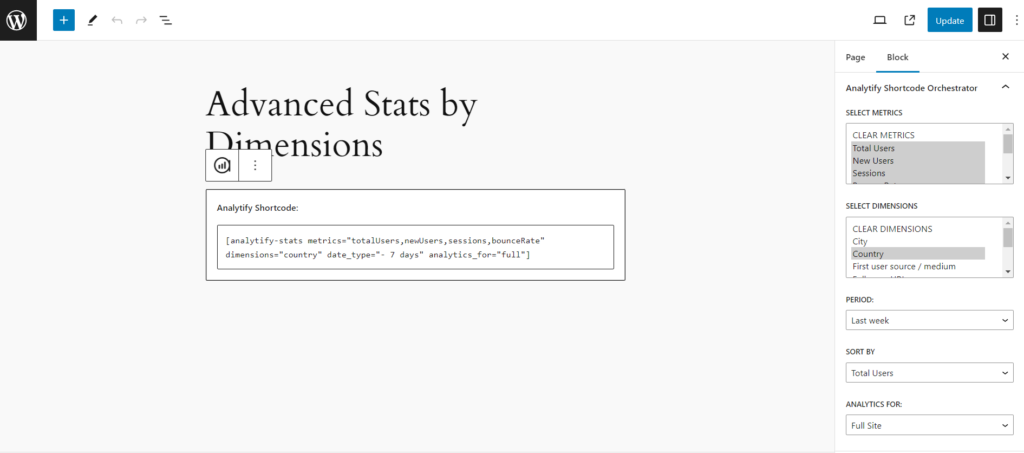
- In the SELECT METRICS: Select which GA4 numbers to show. You can choose more than one, for example Total Users, Sessions, and Bounce Rate.

- In the SELECT DIMENSIONS: Choose how to break down the data. Options include Country, City, and Session Source/Medium. Select more than one if needed. Use Clear Dimensions to reset.
- Period: Set the time range using a preset: Yesterday, Last Week, Last 15 Days, Last 30 Days, This Year, or Last Year.
- Sort By: Choose which metric the results table sorts by, for example, Total Users or Sessions.
- Analytics For: Choose Full Site or Current Page/Post. To target a specific page ID, select Page ID and enter the ID in the field that appears.

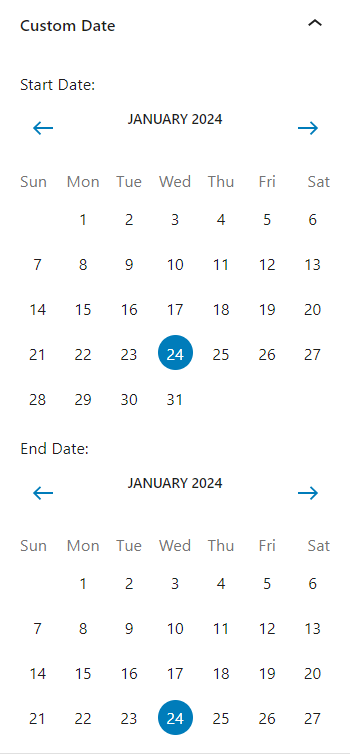
Custom Date (optional): Enter a start date and end date if none of the preset periods fit. Use the format YYYY-MM-DD.
What Does the Shortcode Look Like in Practice?
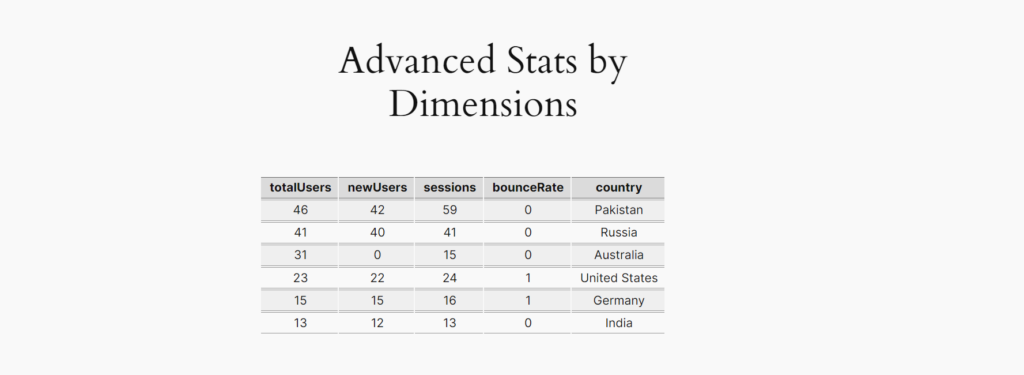
The block generates the shortcode automatically as you configure each field. Two real-world examples:
Total users, sessions, and bounce rate broken down by country for the last 30 days:
| sessions | totalUsers | bounceRate | country |
|---|---|---|---|
| 194,113 | 153,711 | 0 | United States |
| 52,102 | 37,087 | 0 | India |
| 43,346 | 30,520 | 0 | United Kingdom |
| 29,763 | 13,386 | 0 | Pakistan |
| 24,570 | 22,841 | 1 | Singapore |
| 23,726 | 22,726 | 1 | China |
Total users for a specific page between two custom dates:
808
Step 5: Publish or Update the Post or Page
Click Publish for a new post or page, or Update for an existing one. The analytics table renders on the front end with the dimension breakdown and sorting you configured.
That’s it!
What Does Each Advanced Shortcode Attribute Control?
The table below covers every attribute available in the Advanced Shortcode, in plain language.
| Attribute | What it does | Example value |
|---|---|---|
| metrics | Which GA4 numbers to display. Separate multiple values with a comma. | sessions,totalUsers,bounceRate |
| date_type | Time period for the stats. | today, -7 days, -30 days, year-to-date, custom |
| start_date / end_date | Start and end dates when date_type is set to custom. Format: YYYY-MM-DD. | start_date=”2024-01-01″ end_date=”2024-01-31″ |
| analytics_for | Scope: current page, entire site, or a specific page or post ID. | current, full, page_id |
| custom_page_id | The page or post ID to show stats for. Only used when analytics_for=page_id. | custom_page_id=”123″ |
| dimensions | How to break down the data, for example by country, city, or page title. | dimensions=”country” |
| sort | Which metric the results table sorts by. | sort=”sessions” |
| Tips & Notes: For any preset period (such as -30 days or Last Week), Analytify calculates start_date and end_date automatically. You only need to set those manually when date_type is custom.custom_page_id only works when analytics_for is set to page_id. Pairing it with current or full has no effect.Use Clear Metrics and Clear Dimensions in the block panel to reset your selections without deleting the entire block. Shortcodes pull live data from GA4 on each page load. Stats always reflect the period defined in the shortcode at the time of the visit. For a simpler display showing only a metric total with no breakdown, use the Simple Shortcode instead. See: How to Add a Simple Shortcode to a Post or Page. |
This is how you can easily implement/add an advanced shortcode to your specific page or blog post for analytics. You may also want to check our guide on how to add the Simple shortcode on a page or post.