
Add Top Countries Stats on Post or Page (Advance ShortCode)
Analytify is a widely used plugin for WordPress that enables the integration of Google Analytics directly into the WordPress dashboard. It offers streamlined statistical data and facilitates effortless analysis of website traffic. The plugin has a feature named “Analytify Advanced Shortcodes” that offers a range of shortcodes to incorporate diverse Google Analytics data into pages or posts. This technical document provides instructions on how to utilize Advance Shortcodes by Analytify to Add the Top Countries on a Post or Page.
Requirements
- Analytify Pro plugin installed and activated on your WordPress site. Read more, How to Install And Activate Analytify Pro Plugin.
- Google Analytics linked with your Analytify plugin. Read more, How to Integrate Google Analytics 4 with Analytify.
Steps To Show “Top Countries” Stats
Step 1: Login to the WordPress site
Log in to the dashboard of your WordPress site.
Step 2: Create a New Post or Page, or Edit an Existing One
You can also edit a post or page that is already there. For this, you need to navigate to that particular post >> edit.
In our case, we are adding shortcodes to the Post.
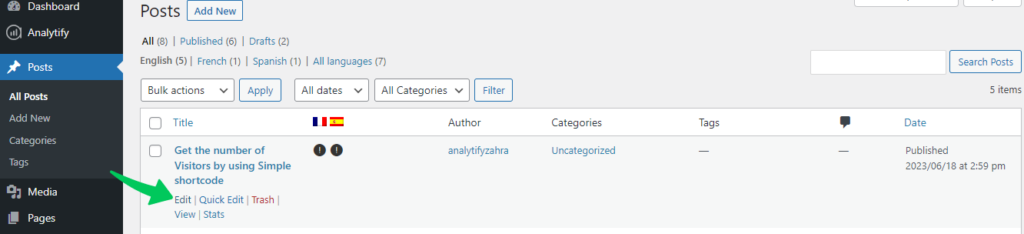
Step 3: Select Analytify Shortcodes Block
First, select the Analytify Shortcodes block from your post editing bar.
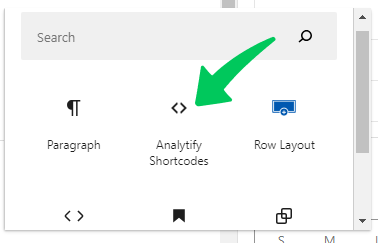
After clicking the Analytify Shortcodes block, a sidebar will open on the right side of the page.
Step 4: Add the Advanced Analytify Shortcode
Select the Advanced Shortcode from the sidebar options.
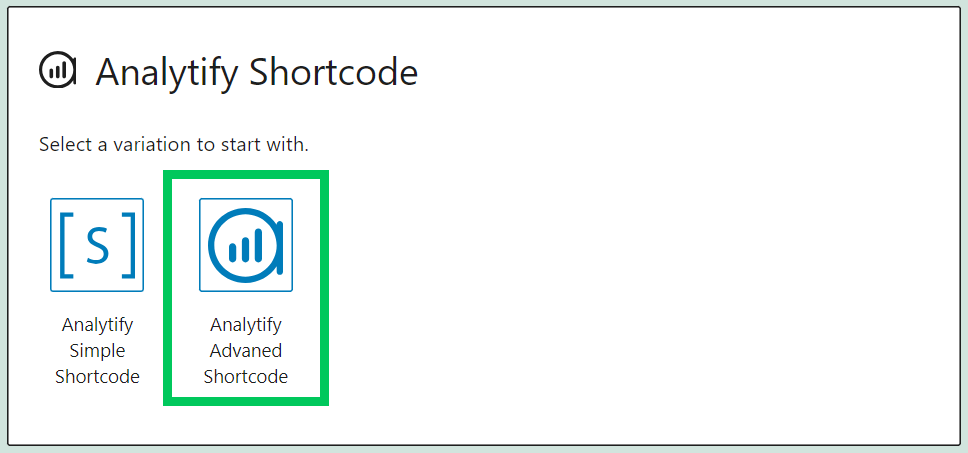
After selecting Advanced Shortcode, you’ll be navigated to its settings.
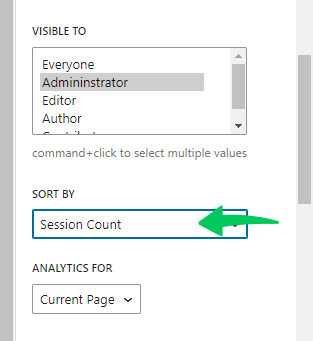
First, select the Sessions as Metrics.
Next, set the value Country, which one you want to retrieve in Dimensions.
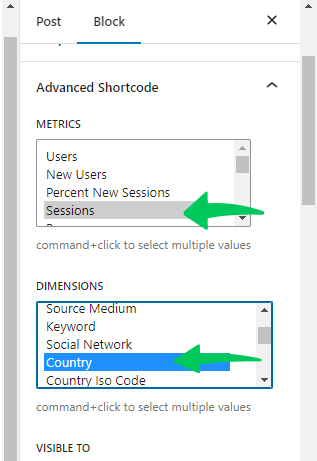
After this, select the visibility according to your choice.
Then, sort the value with respect to Metrics (Sessions). Let’s select Session Count in the Sort By column.
Next, also set Analytics for the current page or for the whole website, according to your choice.
Follow the screenshot below for direction.
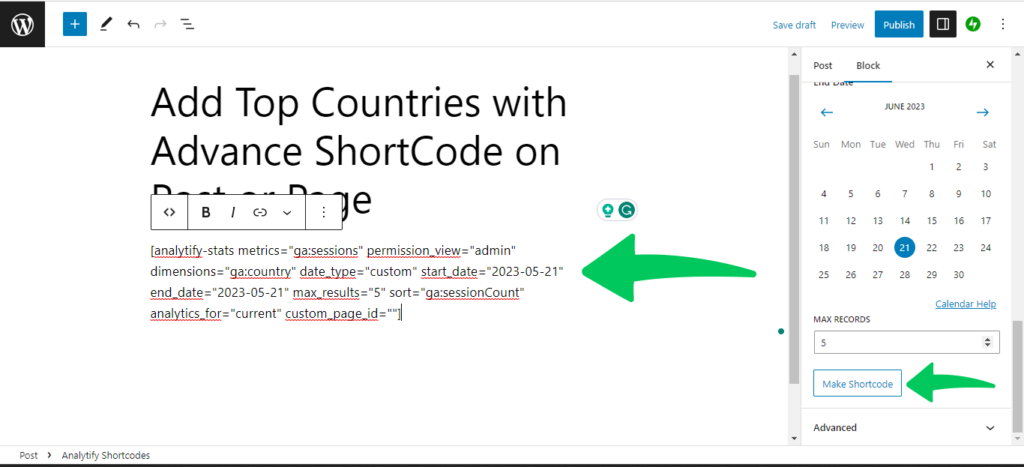
After this, select the date range and click on Make Shortcode
You’ll see a shortcode will be automatically generated on your post as shown in the picture below.
Step 5: Publish or Update the Post/Page
After adding the shortcode, you can either publish your new page or post or click Update on a current page or post.
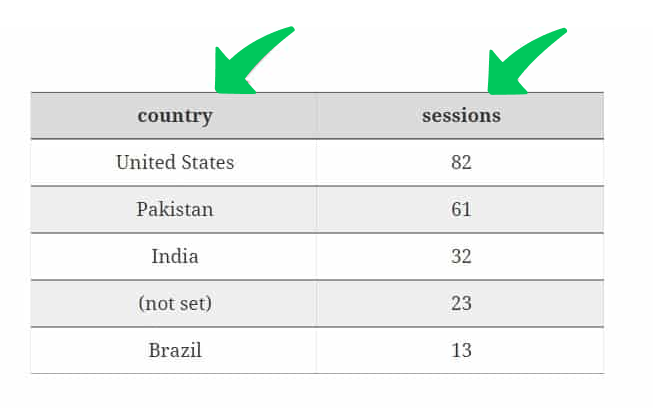
And you’ll get similar results as shown below.
That’s it!
This is how you can easily implement/add an advanced shortcode to your specific page or blog post for analytics. Check our guide on How to Add the Simple Shortcode on a Page or Post.
You can also explore our guide on how to view top cities stats of any page or post by adding the shortcode.
Feel free to contact our support team.