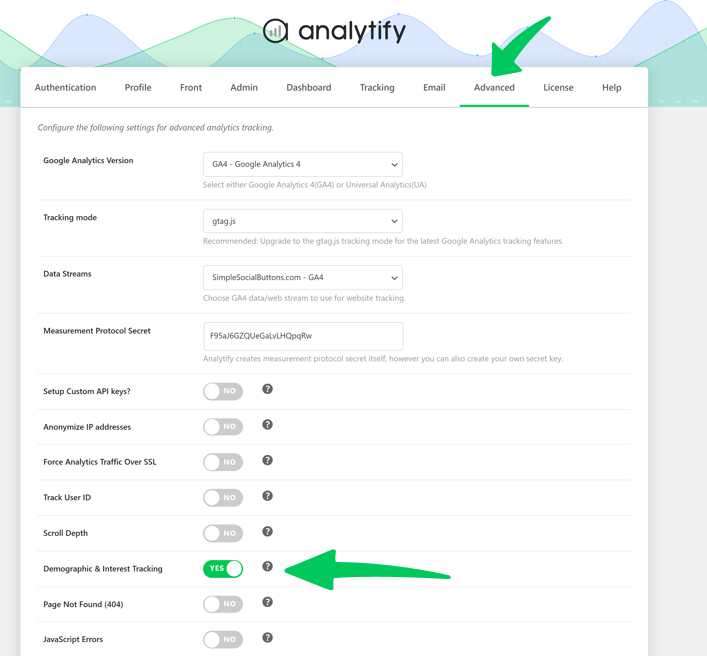
Enabling the Google Analytics Demographics and Interest reporting is a game-changer for targeting your audience more effectively. With the Analytify plugin for WordPress, this process becomes very easy. Here’s a simple guide to help you activate this feature directly to enable demographics in google analytics from your Analytify’s WordPress dashboard.
To get started, follow these straightforward steps:

4. Save Changes: Scroll down the page and click on the Save Changes button.
Congratulations! You’ve just enabled Demographics and Interest Tracking in Analytify.
Once these settings are saved, you can use the Analytify plugin to see Google Analytics Demographics and Interest reporting feature right in your WordPress dashboard.
Moreover, when you turn on the demographics feature in Google Analytics, it usually takes 24 hours for the data to start showing up. Don’t worry if you don’t see anything right away.
If you have any further queries, feel free to contact the Analytify support team.