Are you eager for Google Ads conversion tracking to get the most out of your advertising efforts? Look no further – Analytify is here to make the process simple and effective.
Anaytify’s Google Ads Tracking addon will allow you to monitor the effectiveness of your ads in real-time with GA4, helping you make informed decisions to enhance your advertising strategies.
In this Knowledge Base article, we’ll walk you through the steps to set up Google Ads Conversion Tracking with Analytify.
Let’s get started!
Before diving into Analytify, you must create a conversion in your Google Ads account. This step is important as it generates the Conversion ID and Conversion Label, which you will need later. Here’s how you can do it:
First, log into your Google Ads account. If you don’t have one, create it. It’s free!
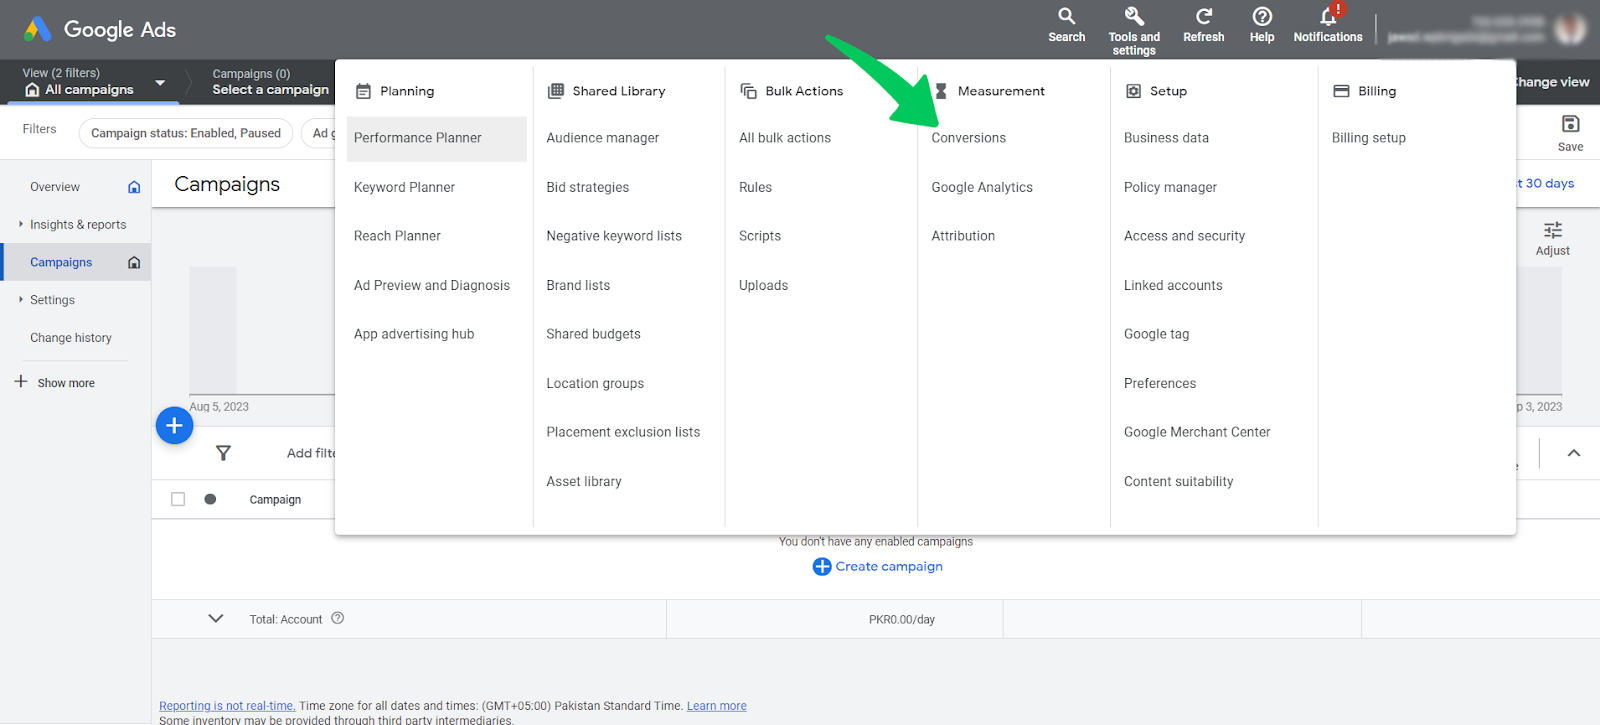
After logging in, find and click on the Tools & Settings tab (you’ll find this symbolized as a wrench icon).

Under the Measurement section, click on Conversions.
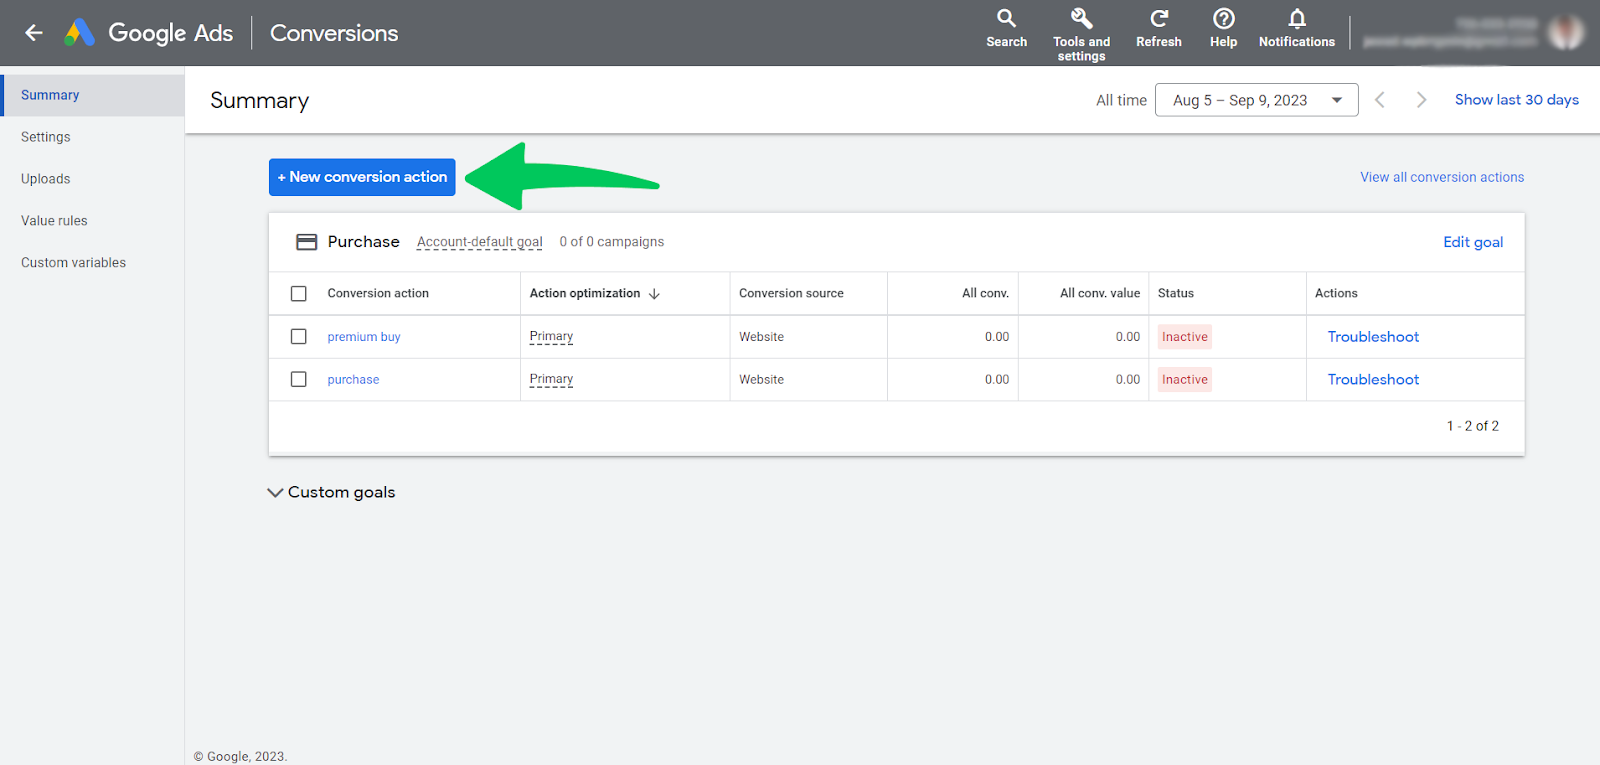
On the Conversions page, you’ll see a list of existing conversions (if any). Click the plus + New Conversion Action button to create a new one.
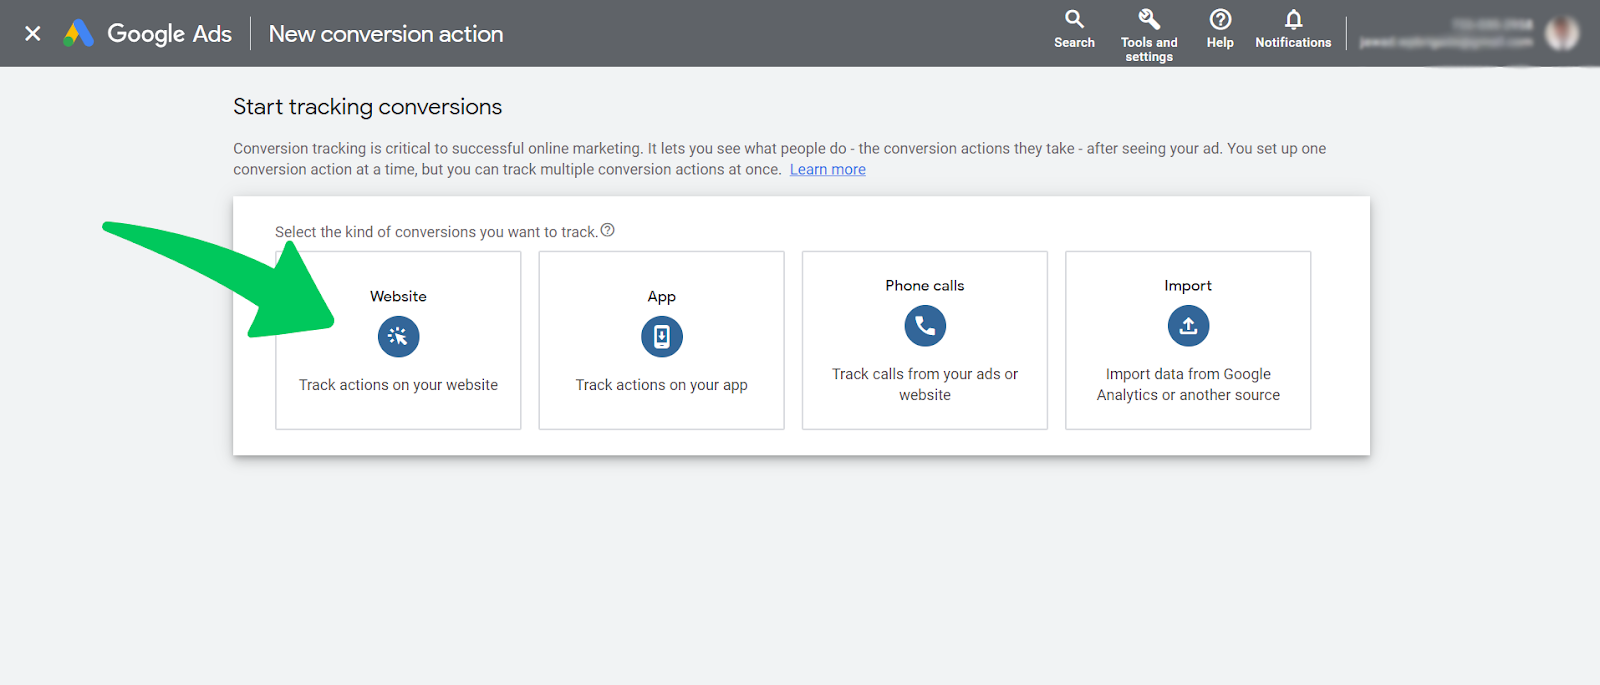
After this, you will have to choose the category that best describes the action you wish to track.
You will be presented with a few options for the type of conversion you want to track. Choose the Website option.
It would help you to track actions on your website, such as form submissions or purchases.
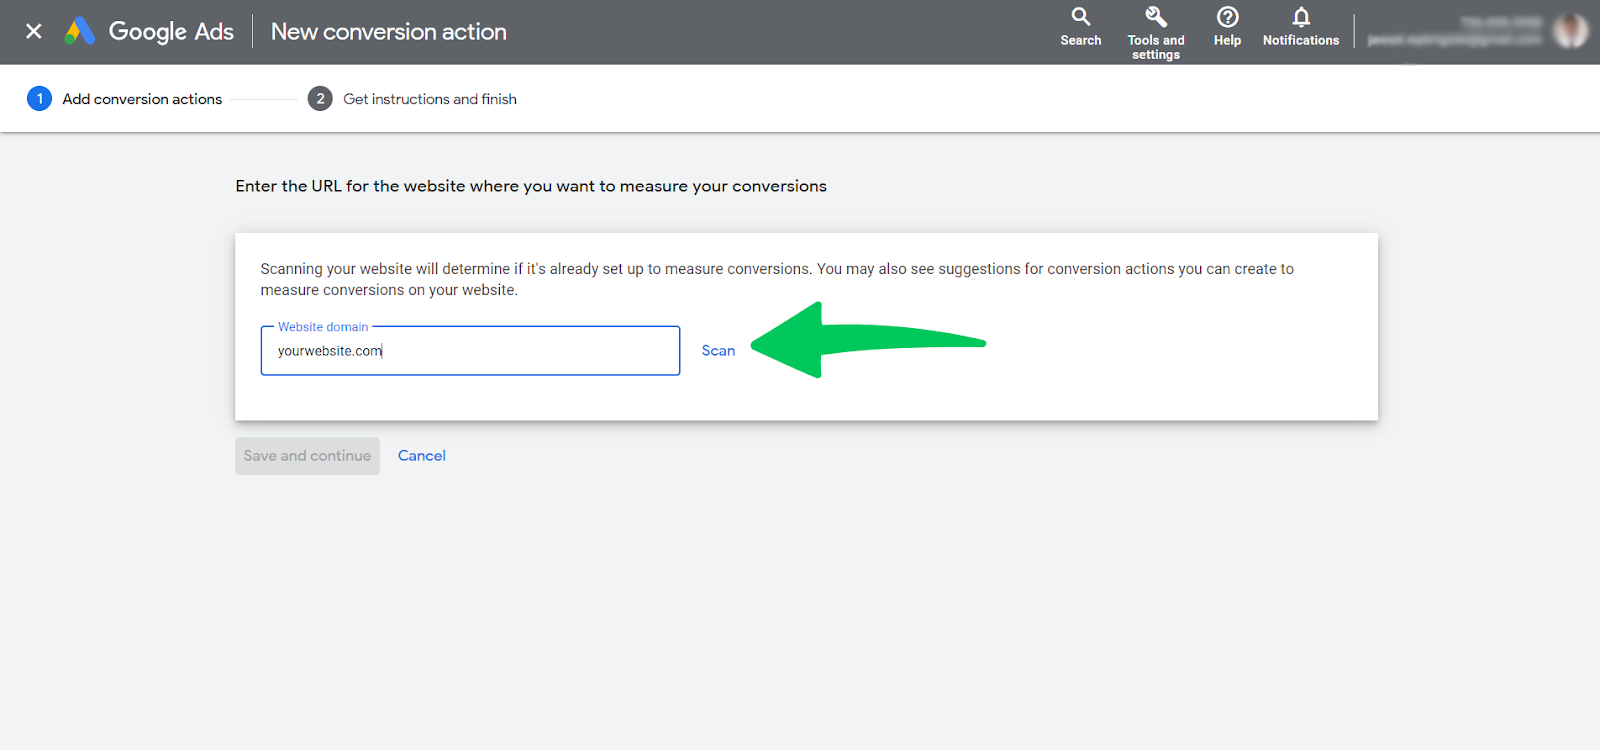
Google will now check your website to see if it is set up for conversion tracking. Enter your website’s domain and then click Scan.
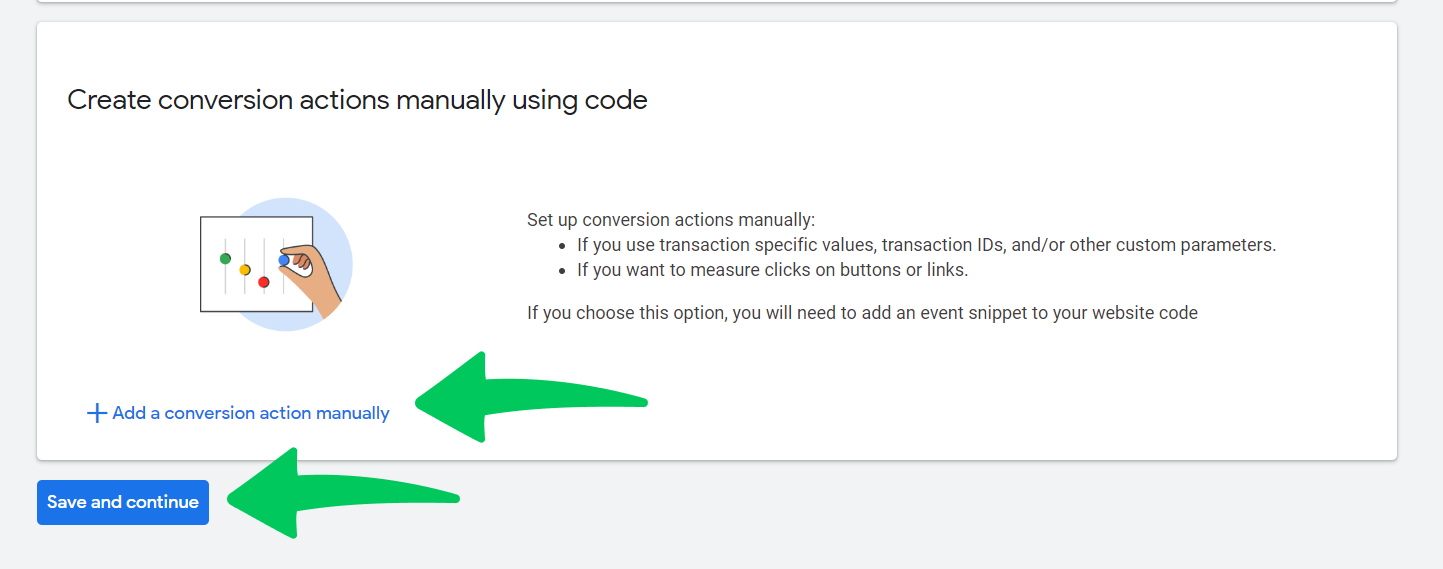
Then, Google Ads will prompt you to choose whether to build a conversion action automatically or manually. You must select the manual option by selecting + Add a conversion action manually.
Then click on the Save and continue button.
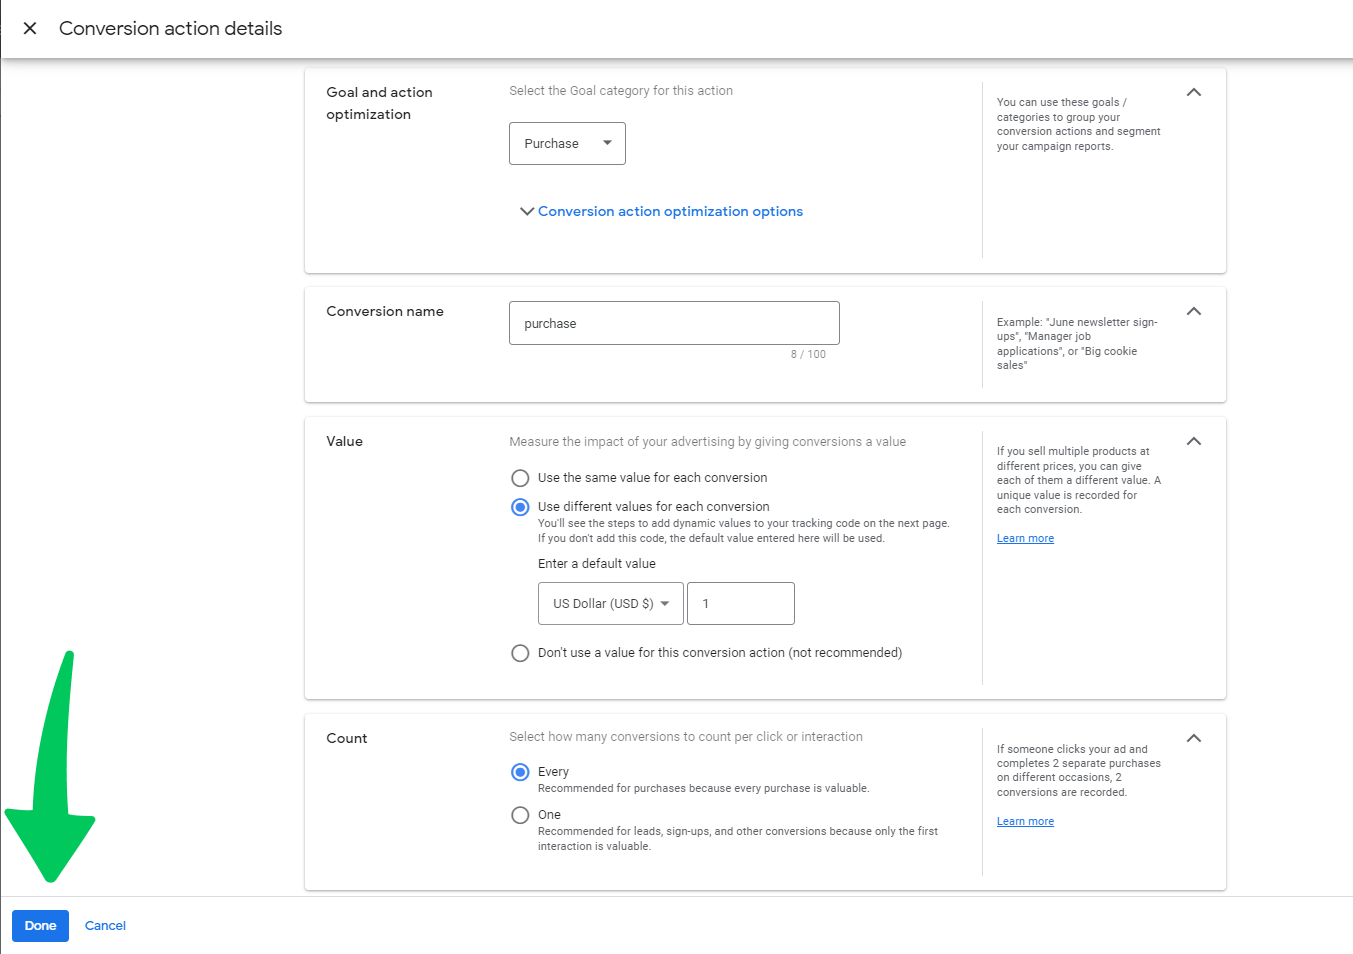
Choose the type of conversion action you want to track. You need to select Purchase.
Then, fill in the other necessary details, such as the name of the conversion action, value, count, etc.
Once you’ve configured all the settings, click the Save button to create your conversion action.
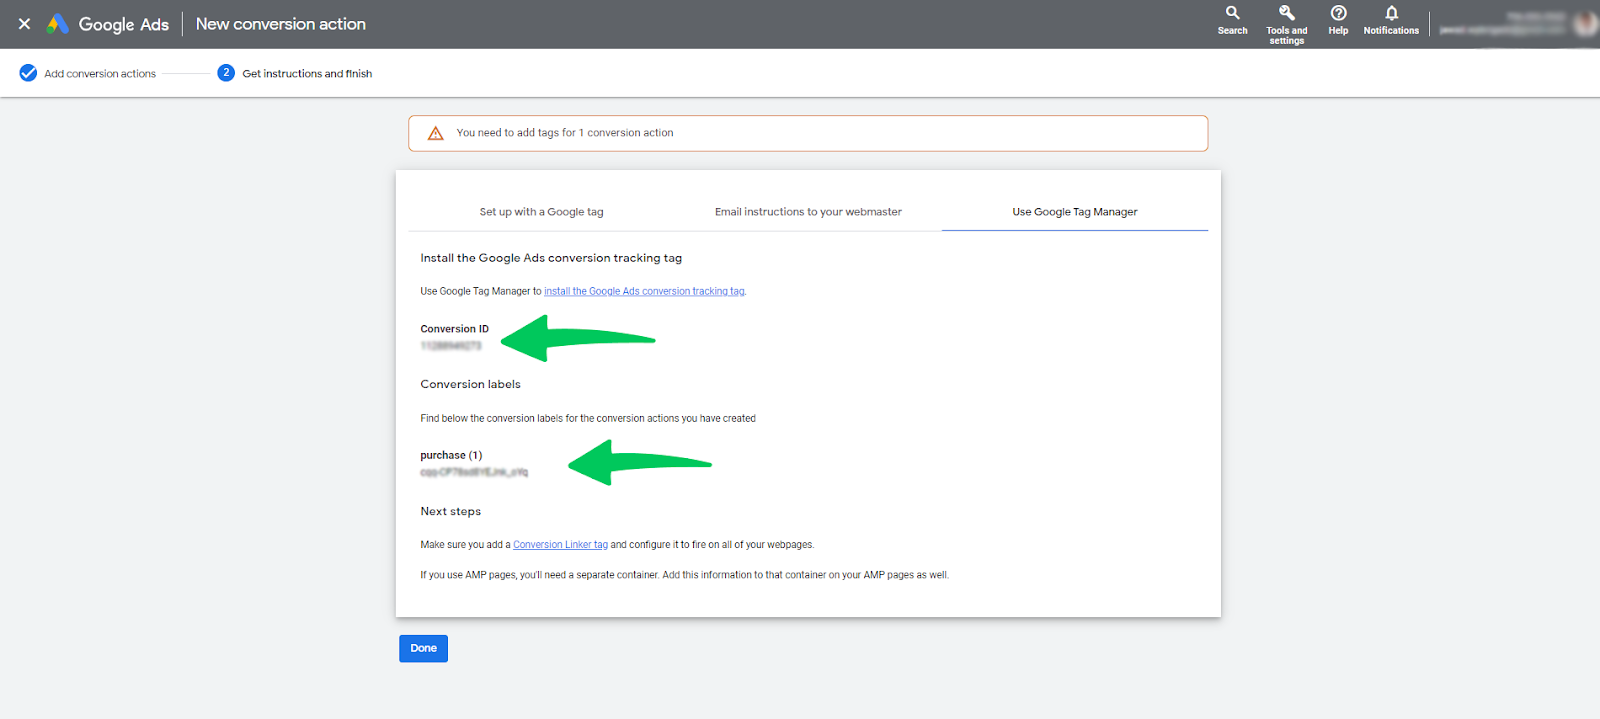
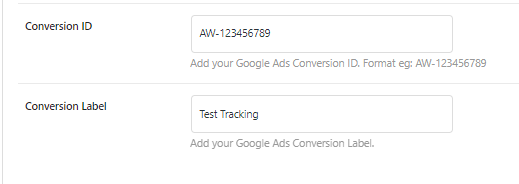
Once created, note down the Conversion ID and Conversion Label. These are like your tracking codes. These will be important in the later stages.
Check the screenshot below as an example:
Now that you have your Conversion ID and Label, let’s integrate them with Analytify:
Access your WordPress dashboard.
Note: We assume that you have already installed Analytify. If not, read How to Install And Activate Analytify Pro Plugin.
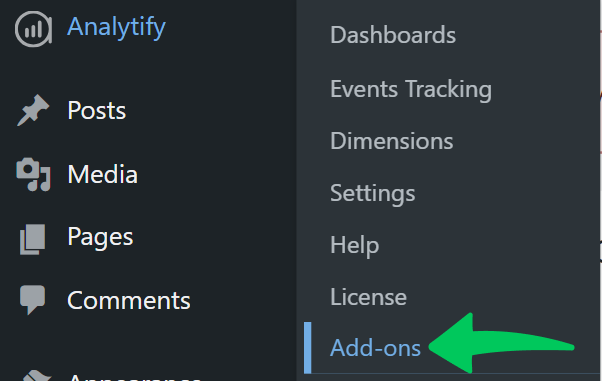
In your WordPress dashboard, go to Analytify >> Add-ons.
If you haven’t already, activate the Google Ads Tracking addon. It will allow Analytify to communicate with your Google Ads account.

After activating the Google Ads Tracking add-on, navigate to Analytify >> Settings >> Tracking tab.

Under the tracking tab, find the Google Ads Tracking and turn it on.

After turning on Google Ads Tracking, you’ll find fields for “Conversion ID” and “Conversion Label.”
Simply copy and paste the Conversion ID and Conversion Label you obtained from your Google Ads account into these fields.
Remember to save your changes!
Congratulations! You’ve successfully set up Google Ads Conversion Tracking with Analytify. Now, you’ll be able to monitor the performance of your Google Ads campaigns in your Google Ads account.
Analytify offers a simple and smooth way of tracking Google Ads conversion campaigns in GA4 without manually adding the code to your website.
Remember, tracking ad conversions helps you understand the effectiveness of your advertising efforts so you can optimize your campaigns for better results.
If you have any questions or need further assistance, feel free to contact Analytify’s support team.