
How to Add Simple Shortcode in Post or Page — Documentation page title
The Analytify Simple Shortcode block lets you display a single GA4 metric — such as total users, page views, or bounce rate — directly inside any WordPress post or page. You configure it using three dropdowns in the block editor. No code required.
Analytify has two types of shortcodes. The Simple Shortcode displays one metric for a selected period and scope. The Advanced Shortcode adds dimension breakdowns, sorting, custom date ranges, and per-page targeting.
Prerequisites
Both of the following must be set up before the shortcode can display any data.
- Analytify Pro plugin installed and activated on your WordPress site. Read more on how to Install And Activate the Analytify Pro Plugin.
- Google Analytics is linked with your Analytify plugin. Read How to Integrate Google Analytics 4 with Analytify.
You can set any Session from Metrics and set the Visibility role for the present total number of sessions.
Here is an example of getting this site’s total number of users.
How Do You Add a Simple Shortcode to a Post or Page?
The Simple Shortcode requires only three settings: Metrics, Period, and Analytics For. Follow the steps below to add it to any post or page.
Step 1: Login to the WordPress site
Log in to the dashboard of your WordPress site.
Step 2: Create a New Post or Page or Edit an Existing One
You can make a new post or page where you want to show how many pageviews you’ve had.
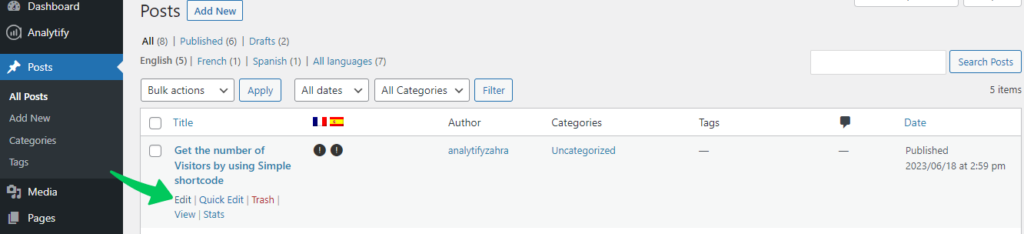
You can also edit a post or page that is already there. For this, you need to navigate to that particular post >> edit.
In our case, we are adding shortcodes to Post.
Step 3: Select Analytify Shortcode Block
First, select the Analytify Shortcode block from your post editing bar.
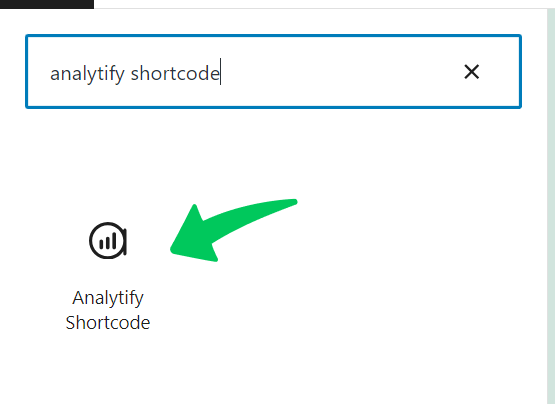
A block will open on your page.
Step 4: Add the Simple Analytify Shortcode
Select Simple Shortcode from the block options.
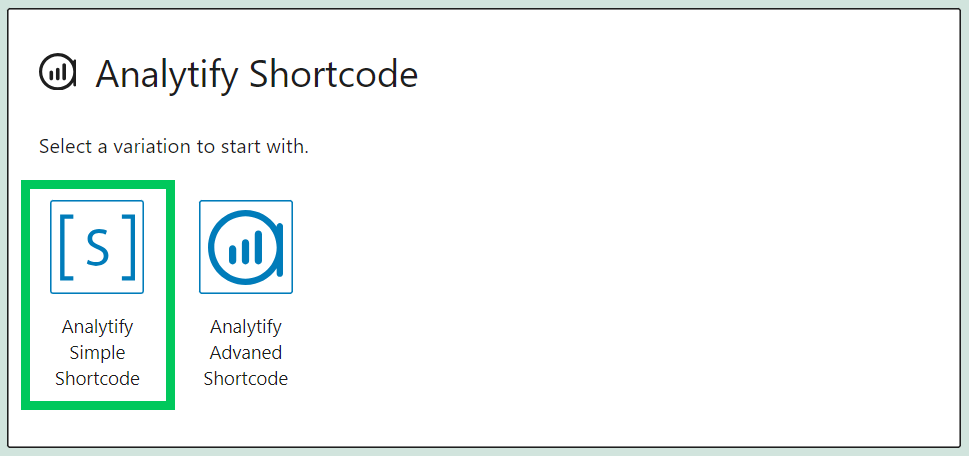
After selecting Simple Shortcode, you need to navigate to its block settings.
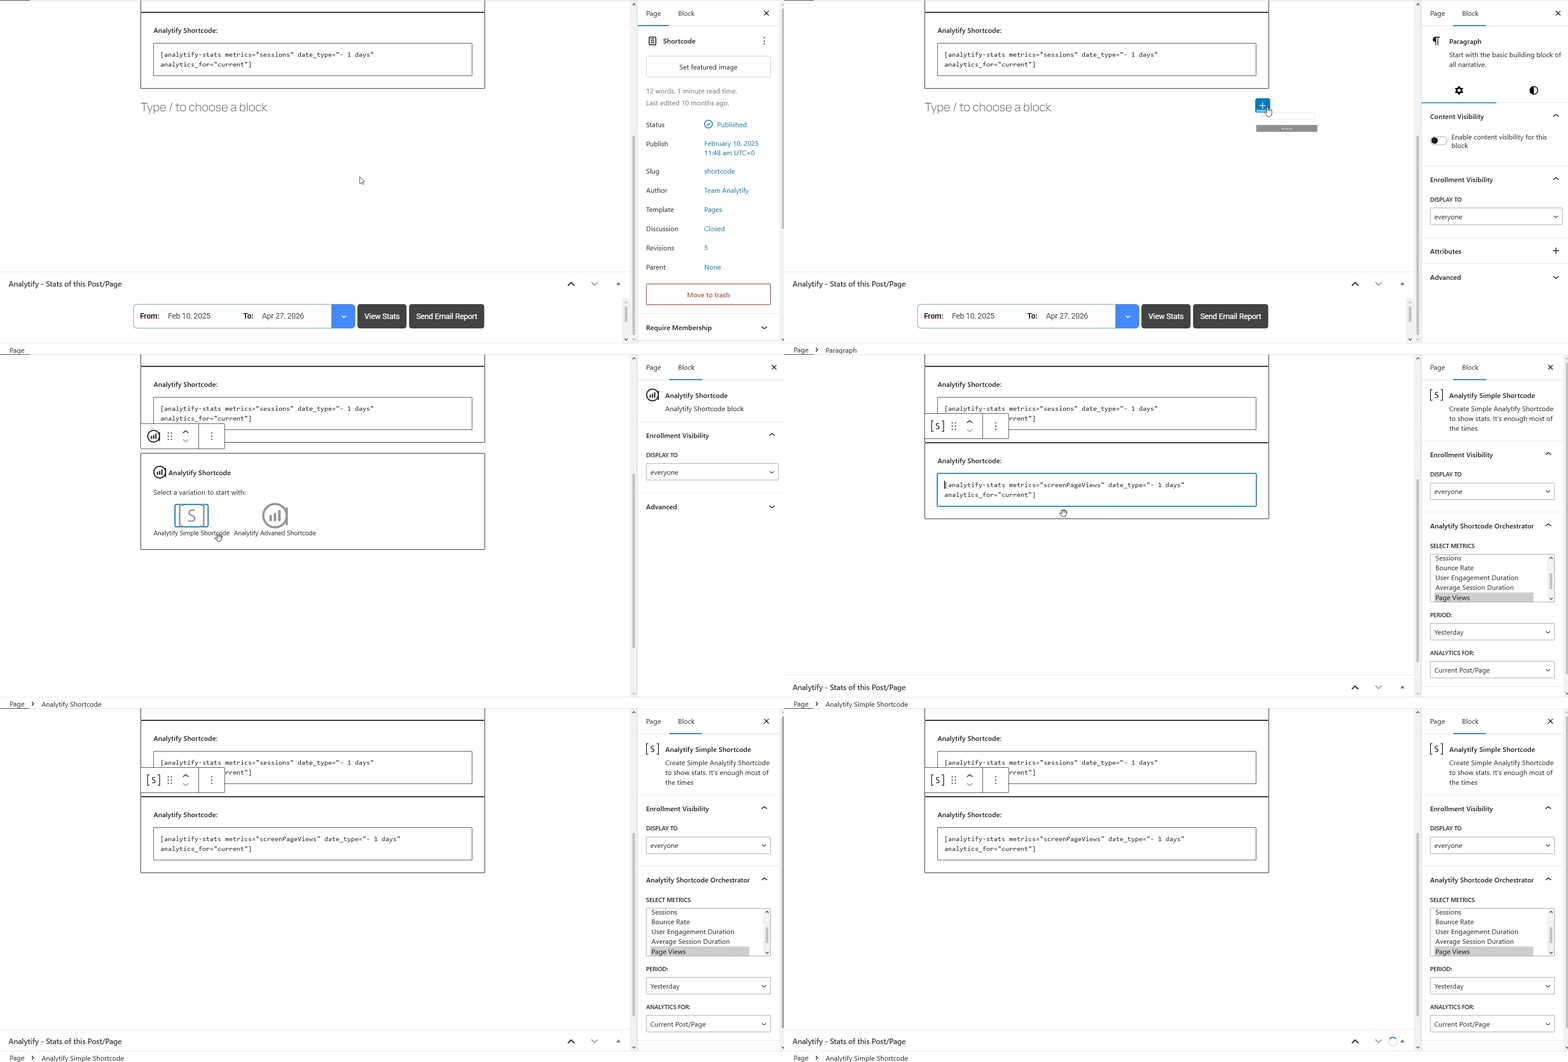
- Metrics: Choose which GA4 numbers to show. Options include Total Users, Sessions, Bounce Rate, Pageviews, and more. You can select more than one.
- Period: Set the time range for the stats. Choose from Yesterday, Last Week, Last 15 Days, Last 30 Days, This Year, or Last Year.
- Analytics For: Choose whether stats cover the current page only or the full site.
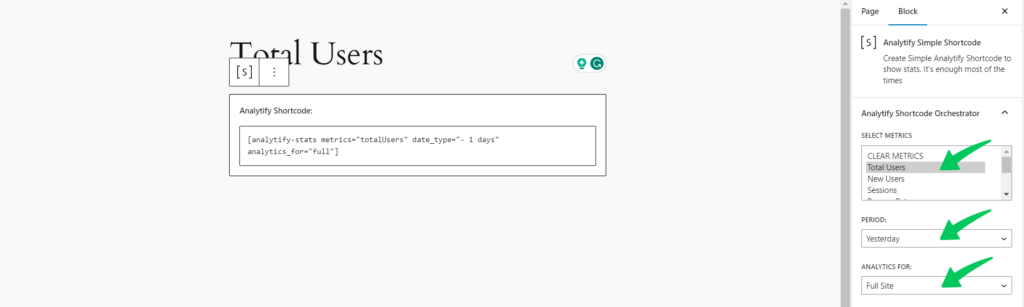
The block generates the shortcode automatically.
Step 5: Publish or Update the Post/Page
After adding the shortcode, you can either publish your new page or post or click Update on a current page or post.
And you’ll get similar results as shown below.

That’s it!
What Does Each Shortcode Attribute Control?
The table below explains the three attributes used by the Simple Shortcode in plain language.
| Attribute | What it does | Example value |
|---|---|---|
| metrics | Which GA4 numbers to display. Separate multiple values with a comma. | sessions,pageviews,totalUsers |
| date_type | Time period for the stats. | today, -7 days, -30 days, year-to-date |
| analytics_for | Scope: current page only or the entire site. | current, full |
| Tips & Notes: The shortcode is generated automatically as you make selections in the block panel. You do not need to type or edit it manually. To display more than one metric, Analytify adds them as a comma-separated list inside the metrics attribute (for example: metrics=”sessions,totalUsers,bounceRate”). For breakdowns by country, sorting, or custom date ranges, use the Advanced Shortcode instead. See: How to Add Advanced Shortcodes to a Post or Page. |
This is how you can easily implement/add a simple shortcode to your specific page or blog post for analytics. Check our guide on how to add the advanced shortcode on a page or post.
Feel free to contact our support team.