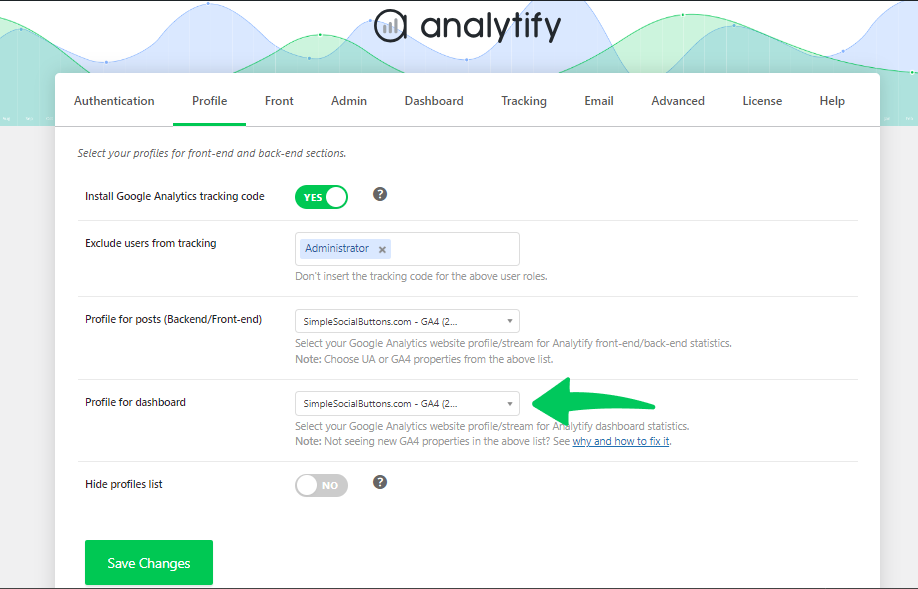
Are you looking to seamlessly integrate your website’s analytics into your WordPress dashboard? Analytify makes this possible by connecting with Google Analytics, allowing you to view crucial data directly within WordPress. A key part of this setup is selecting the right GA4 profile. In this article, we will guide you through the process of choosing the appropriate profile in Analytify to display analytics on your WordPress dashboard.
Before we begin, it’s important to understand what a Google Analytics profile is. A profile (or a property in Google Analytics terms) represents a specific website or a segment of a website for which you are collecting data. If you manage multiple websites or different segments of a single website, each may have its own profile in Google Analytics.
Selecting the correct profile is crucial for displaying relevant analytics on your WordPress dashboard. The right profile ensures that the data you see is specific to the website or segment you are interested in. This accuracy is key for making informed decisions about your site’s performance and user engagement.
If you haven’t already, install the Analytify plugin on your WordPress site and activate it. Read How to Install And Activate Analytify Pro Plugin.


After selecting the appropriate profile, save your changes.
Selecting the right profile for displaying analytics in your WordPress dashboard using Analytify is a crucial step in effectively managing and understanding your website’s performance. By following these steps, you ensure that the data you are analyzing is accurate and tailored to your website, enabling you to make better-informed decisions for your site’s growth and success.
Remember, the effectiveness of your website analytics lies not just in collecting data but in interpreting and utilizing it wisely. With Analytify, you are well-equipped to make this a reality for your WordPress site.
Need more assistance with Analytify or have additional questions? Feel free to reach out to our support. We’re here to support you in maximizing the potential of your website analytics!