
How to Post a Blog on WordPress? A Comprehensive Step-by-Step Guide

Want to publish your first blog post on WordPress? This guide walks through every step, from writing to tracking results.
You’ll learn exactly how to add a new post in WordPress in a few simple steps.
WordPress powers over 40% of all websites on the internet. It’s a user-friendly platform built for beginners and experienced developers alike.
WordPress fits any blog niche: travel, technical writing, ecommerce, or DIY projects.
This guide explains exactly how to post a blog on WordPress, step by step.
How to Post WordPress Blog (TOC):
Before you post, you need a WordPress site set up. Read our complete guide on How To Build a WordPress Website if you haven’t set one up yet.
WordPress Basics
WordPress basics start with the dashboard, the difference between posts and pages, and the editor you’ll write in. Get familiar with these three before you publish your first post.
Dashboard Overview
The WordPress dashboard is the control center for your entire site. It’s where you create content, manage settings, and customize your site’s appearance. Here’s what you’ll find on it:
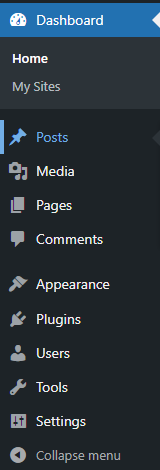
- Posts: This is the heart of your blog, where you’ll craft and manage your articles.
- Media: This is the digital library for images, videos, and documents.
- Pages: Pages are for static content like your “About” or “Contact” pages.
- Comments: Where you engage with your readers’ feedback.
- Appearance: Appearance is the stylist of your site, allowing you to change themes, customize layouts, and add widgets.
- Plugins: Plugins are the magic wands of WordPress, extending the functionality of your site with added features.
Posts vs. Pages
Posts are your blog entries: dynamic content that updates regularly and appears in reverse chronological order.
Pages are static content that rarely changes, like your About or Contact page. The table below breaks down the difference.
| Attribute | Posts | Pages |
|---|---|---|
| Purpose | Blog entries and timely updates | Static, evergreen content |
| Sort order | Reverse chronological | No date order, tree structure |
| Categories and tags | Yes | No |
| Shows in RSS feed | Yes | No |
| Typical example | A how-to article or news update | An About or Contact page |
Using the WordPress Editor
The WordPress Editor is where you write and format your post. WordPress gives you two options: the block-based Gutenberg Editor or the Classic Editor. Here’s how they compare:
| Editor | Interface | Best for |
|---|---|---|
| Gutenberg Editor | Block-based, drag-and-drop layout control | Visual layouts, embedded media, custom design |
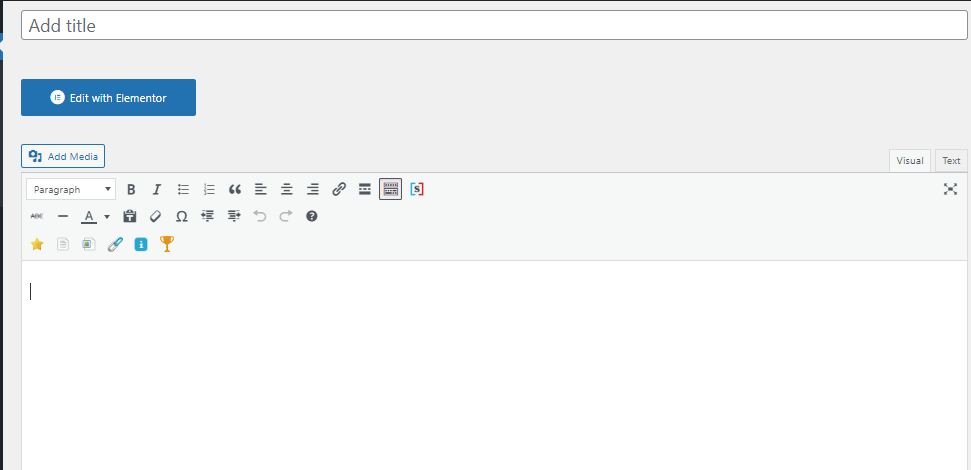
| Classic Editor | Single text field, word-processor style | Fast, distraction-free writing |
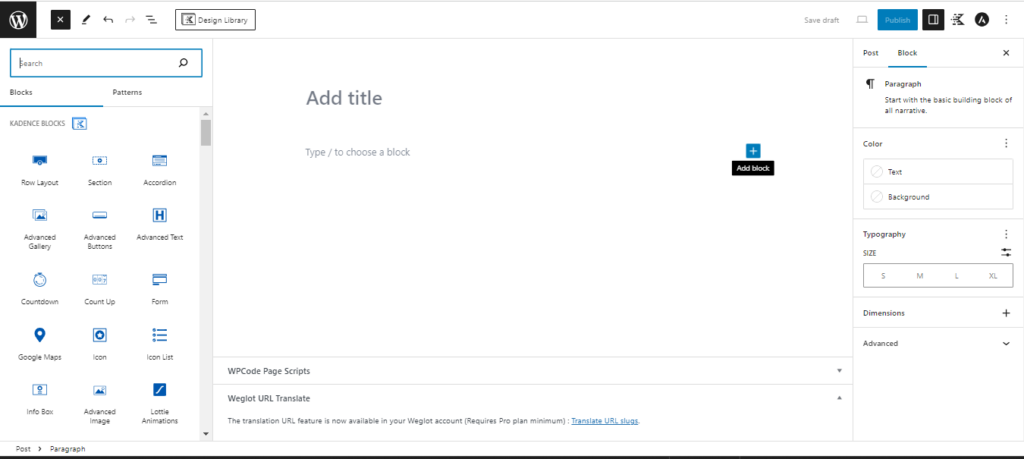
Here’s what the Gutenberg block editor looks like in practice:
Here’s what the Classic Editor looks like in practice:
How to Post a Blog on WordPress (Step-by-Step)
Posting a blog on WordPress takes six steps: plan your content, write your post, organize it with headings, add media, optimize it for SEO, then schedule or publish. Here’s each step in detail.
We’ll use a real example to show each step in action.
Say you just got back from a mountain hike with photos to share. That trip could become your next post: “A Day Among the Peaks: My Mountain Hiking Adventure.”
Follow these six steps using that example post.
Step 1: Planning Your Content
Planning comes first: know your audience, pick a topic, and outline your post before you write a word.
- Know Your Audience: You must know your audience. Tailoring your message to them is key.
- Choose a Captivating Topic: Select something that resonates with your readers and fits your niche.
- Outline Your Post: Create a clear structure to keep you focused and ensure your post is easy to follow.
Step 2: Writing Your Post
Add a new post by going to your WordPress dashboard, opening the Posts menu, and clicking Add New.
This opens a blank Gutenberg editor, ready for your title and content.
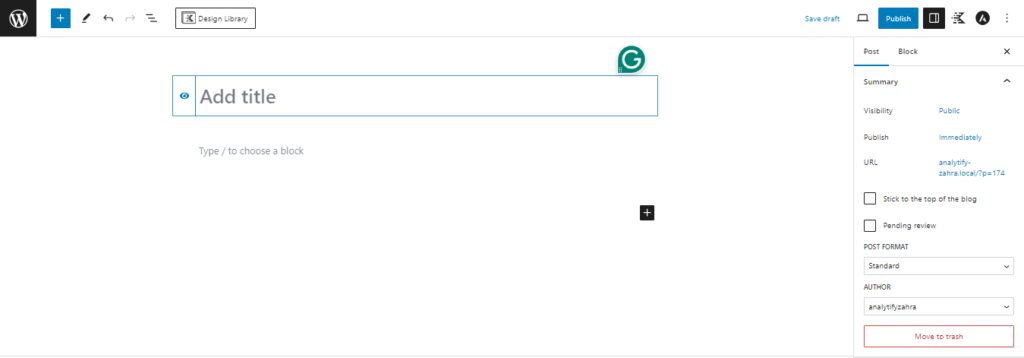
The first block you’ll see is the title field.
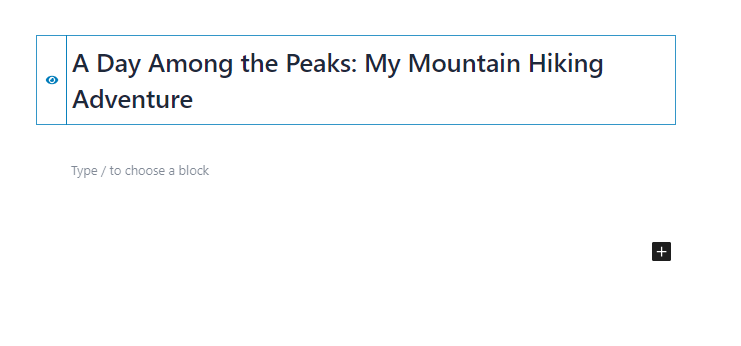
Write your post title here. It’s the first thing readers see, so make it specific and attention-grabbing.
Add your focus keyword to the title if you’ve done keyword research for the topic.
Here’s an example of an engaging, keyword-focused title:
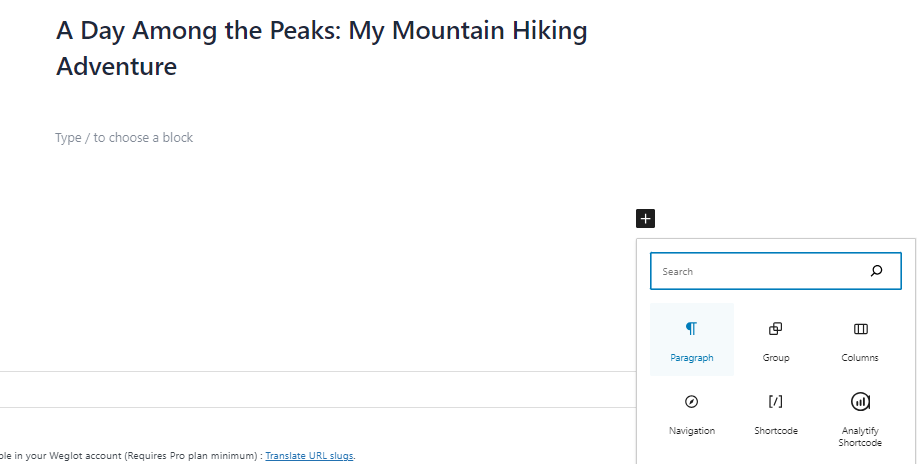
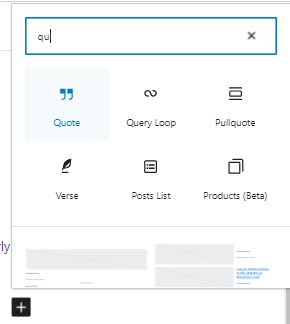
Click the + icon in the editor to add your next block.
Choose the paragraph block to start writing your post body.
Building with blocks
Here are the block types you’ll use most often in a blog post:
- Paragraph Block: This is for writing the main body of your content. To create new paragraphs, simply start typing away.
- Heading Blocks: Use these to structure your post with clear headings (H1 for your main title, H2 for subheadings, etc.).
- List Blocks: Bullet points or numbered lists can be a great way to present information clearly and concisely.
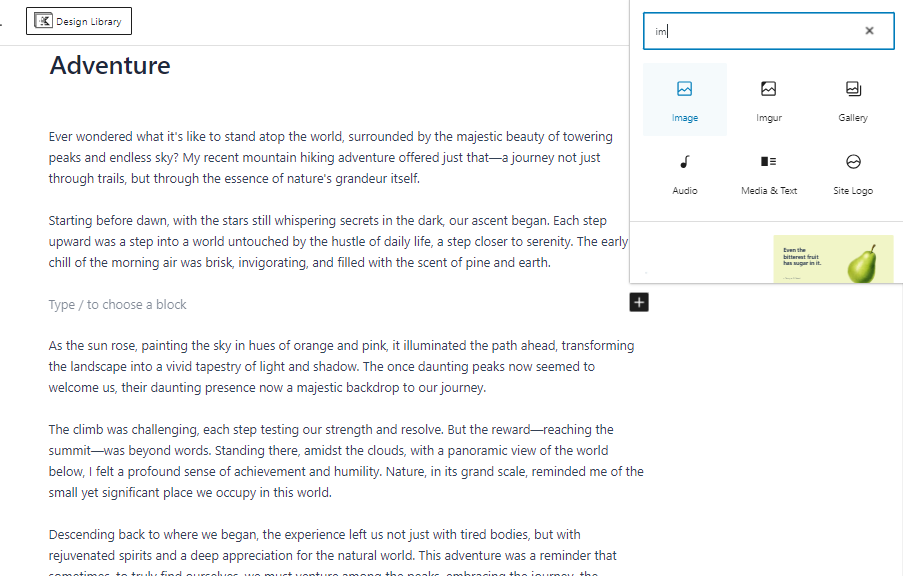
- Image Block: Click the “+” icon and select “Image” to upload an eye-catching image to enhance your post.
- Quote Block: Highlight an important quote or statistic with a dedicated quote block.
Step 3: Organize Your Content
Organize your content with headings and subheadings so readers can scan and follow your post easily.
- Be Conversational: A friendly tone can make your content more relatable and engaging.
- End With a Call to Action: Prompt your readers to engage further with your content or explore other areas of your site.
Step 4: Add Media
Add media to your post by inserting images, video, and a featured image. Visuals keep readers engaged and break up long blocks of text.
- Add Images: Visuals can enhance your post’s appeal and help illustrate your points more effectively.
- Embed Videos and Audio: Multimedia elements can provide a richer experience for your audience.
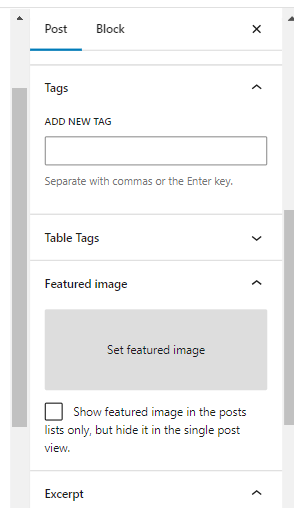
- Add Featured Image: You must also upload the blog’s featured image, which is the cover photo of your post.
At this point, you’ve built a complete post: title, body, headings, and media. Publishing it is just the start. The next step is making sure people actually find it.
Next, you’ll optimize your post with SEO practices so it reaches the audience you wrote it for.
Step 5: Optimizing for Search Engines (SEO) to Grow Your Blog
SEO makes your blog post easier for Google to find and rank. It’s what turns a finished post into one that actually gets read.
The higher your post ranks for relevant keywords, the more people find it. That’s the entire goal of SEO.
Here are the key SEO practices to apply to every WordPress blog post:
1. Keyword research
- Keyword Research: We briefly touched on this earlier. Before creating your content, consider what keywords your target audience might use to search for information related to your topic. Various keyword research tools are available online, e.g., Google Keyword Planner, Ubersuggest, Semrush, Ahrefs, and Moz Keyword Explorer.
- Strategic Integration: Once you’ve identified relevant keywords, strategically incorporate them throughout your blog post. However, avoid keyword stuffing and focus on creating natural-sounding content that prioritizes value for your readers.
2. Title tags and meta descriptions
- Title Tags: These are the clickable headlines that appear in search results. Craft a compelling and informative title tag that includes your target keyword and accurately reflects your blog post’s content. Ideally, keep your title tag under 60 characters to ensure it doesn’t get cut off in search results.
- Meta Descriptions: Short snippets appear beneath your title tag in search results. They provide a concise overview of your blog post’s content and entice users to click. Aim for meta descriptions of around 150-160 characters, and include your target keyword naturally.
3. Use an SEO plugin
SEO plugins like Rank Math suggest keywords, score your content, and help you write title tags and meta descriptions.
Here’s a summary of the SEO elements covered above:
| SEO Element | Description |
| Keyword Research | Identifying relevant keywords your target audience uses to search for information. |
| Strategic Keyword Integration | Naturally incorporating keywords throughout your blog post for better search engine discoverability. |
| Title Tags | Clickable headlines in search results (ideally under 60 characters). |
| Meta Descriptions | Short snippets summarizing your blog post’s content (around 150-160 characters). |
| SEO Plugins (Optional) | Tools that assist with keyword research, content analysis, and title/meta description generation. |
SEO is ongoing. Refine your approach as you publish more and learn what ranks.
These practices help your posts attract readers and build your blog’s authority in your niche.
Step 6: Scheduling and Publishing Your Post
Publish your post immediately, schedule it for later, or save it as a draft. Here’s how each option works in WordPress.
1. The Publish button
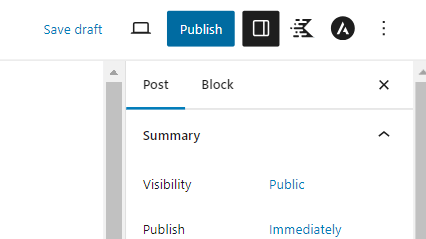
After proofreading, click the blue Publish button on the right side of the editor. Your post goes live immediately.
2. Scheduling
WordPress also lets you schedule a post for a future date and time. Use this to publish when your audience is most active.
Here’s how to schedule your post:
- Locate the “Publish” box on the right side of the editor.
- Click on the “Publish immediately” link to reveal a drop-down menu.
- Select “Schedule” from the menu.
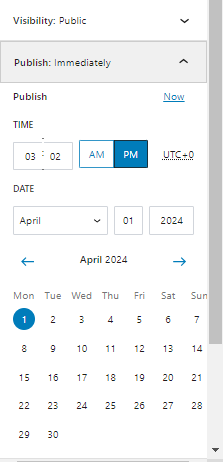
- A calendar interface will pop up. Choose your desired date and time for publication.
- Once you’ve selected the date and time, click the blue “Schedule” button.
3. Save as a draft
Not ready to publish? Click Save Draft in the top right corner. WordPress saves your progress so you can finish it later.
4. Preview your post
Before publishing, use Preview to see exactly how your post will look live on your site.
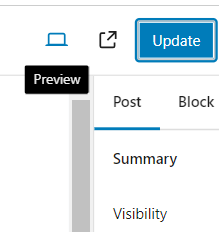
Preview catches formatting errors and lets you make last-minute adjustments before you publish.
A few more settings to check before you publish:
- Post Categories and Tags: WordPress allows you to categorize your posts and assign relevant tags. It helps organize your content and makes it easier for readers to find specific topics they’re interested in.
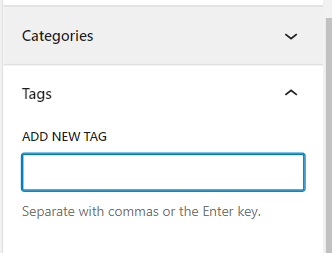
You’ll find these settings in the panel on the right side of the editor.
That’s it: you’ve successfully posted a blog on WordPress.
Track Analytics of Your New WordPress Blog Post
Track your blog’s analytics to see how many people find and read each post, then use that data to improve your content.
Analytify tracks all of this directly inside your WordPress dashboard, no separate login required.
We Make Google Analytics Look Easy!
You know all about Google Analytics and love the data it provides, but wouldn’t it be nice if there is a tool to manage all of that complex information within your WordPress dashboard?
Here’s the Analytify dashboard, showing your site’s key stats in one place:
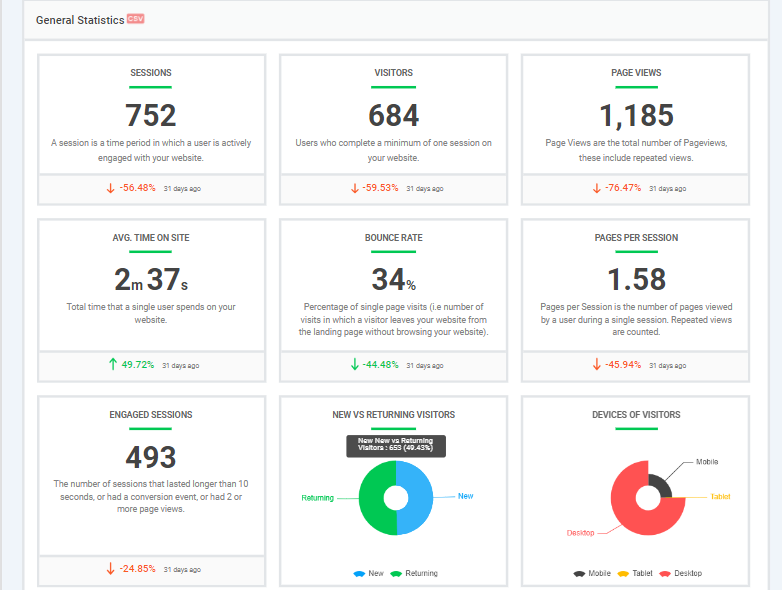
Read How to Install Analytify Pro to start tracking your WordPress analytics.
Key features for bloggers
- Page-Level Analytics: Understand how each blog post performs with detailed insights directly on your post editor page. Discover which posts captivate your audience, where you’re losing readers, and how to optimize content to keep them engaged.
- Custom Post Types Tracking: Not all content fits the same mold. Analytify’s versatility extends to tracking custom post types, ensuring every piece of content, from your standard posts to unique custom formats, is analyzed for its unique contribution to your site’s success.
- Real-Time Stats: Capture the pulse of your audience with real-time statistics. See immediate reactions to new content or updates, allowing for timely adjustments and engagements.
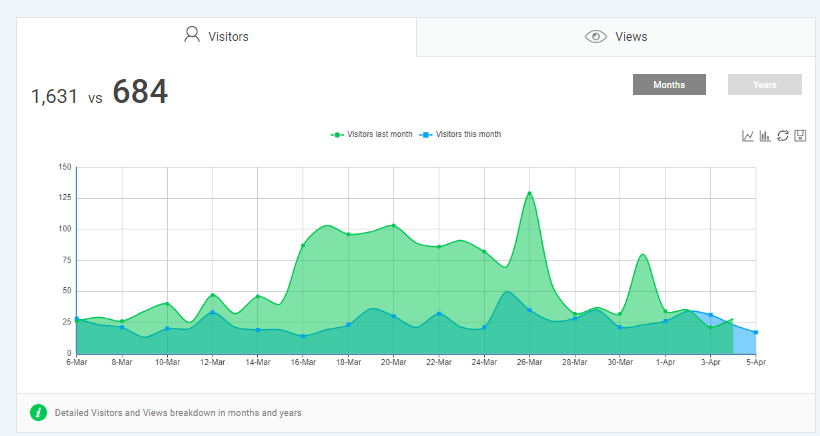
- Total Number of Visitors and Views: Check how many visitors come to your site each day accumulating towards the total number of visitors and views per month.
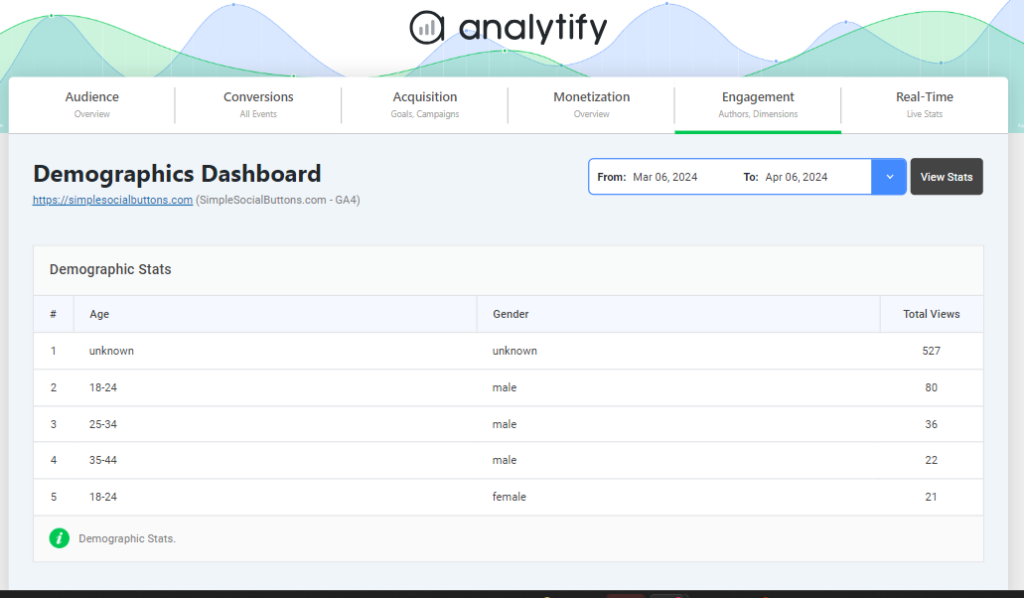
- Enhanced User Demographics: Dive deeper into who your readers are. With enhanced demographics, understand your audience’s geographical locations, interests, and behaviors, tailoring your content to match their preferences.
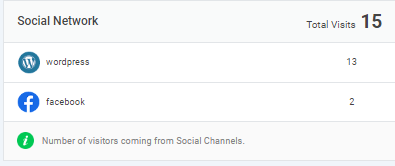
6. Social Media Insights: See how your content performs across social platforms, including which posts get shared most and where.
WordPress Blog Posting FAQs
1. How do I create a post in WordPress?
Log into your WordPress dashboard, then click Posts, then Add New in the left sidebar. Write your title and content, add images if needed, then click Publish to make it live.
2. Can I add a post directly to a specific page on my WordPress site?
Not directly. Posts appear in your blog section by default. To show them on a specific page, use a Posts widget, categorize them and link a category to your navigation menu, or use a plugin built for that.
3. What steps should I follow to post a blog post effectively on WordPress?
Choose the right category and tags, add a featured image, and preview your post before publishing. Consistent publishing is what actually builds an audience over time.
4. What’s the difference between a WordPress post and a WordPress page?
Posts are the dynamic, regularly updated part of your site: your blog. They’re time-stamped and listed in reverse chronological order. Pages are static content that doesn’t change often, like your About or Contact page.
5. What are the best practices for a new WordPress blog post?
Use a compelling headline, break text into short paragraphs, and add visuals. Use categories and tags for organization and SEO. An SEO plugin like Rank Math or Yoast SEO helps you optimize before you publish.
6. Why is my new WordPress blog post not showing up on my site?
Check that the post status says Published, not Draft or Pending Review. Confirm it isn’t excluded from your homepage by a category filter or a caching plugin serving an old version of the page. If it still won’t appear, clear your site cache and check the post’s visibility setting in the editor sidebar.
7. How do I know which old blog posts to update first?
Check Analytify’s page-level analytics for posts with declining views or a rising exit rate. Prioritize any post more than 13 weeks old that targets a keyword with real search volume. That’s the fastest way to recover lost rankings without writing new content.
Conclusion
You’ve successfully learned how to post a blog on WordPress: from planning your content to publishing and tracking results.
Your blog will keep evolving as you publish more, try new formats, and engage with your audience.
Publish fresh content on a consistent schedule. That consistency is what builds and keeps readers.
Engage with readers in the comments, join communities in your niche, and connect with other bloggers.
We hope this guide helped you learn how to add a blog post in WordPress.
Tell us: what’s your blog niche, how often do you post, and which plugins do you rely on?
Share your answer in the comments below.




Is wordpress better?
WordPress is popular because it’s easy to use and very flexible. You can build anything from a blog to an online store. It’s good for SEO, has lots of support, and gives you full control over your site. Whether you’re just starting or growing, WordPress is a great option.
Excellent tutorial! Your step-by-step guide on posting a blog on WordPress in 2024 is clear and easy to follow. It’s great to see detailed instructions on everything from drafting to publishing, including tips for optimizing posts for SEO. Perfect for beginners and a helpful refresher for experienced users. Thanks for sharing!
Thank you so much for your feedback! I’m glad you found the tutorial helpful and easy to follow. If you have any more questions or need further assistance with WordPress or anything else related to blogging, feel free to ask.
Thanks,
Saud