Authors Tracking add-on is a premium feature in Analytify Pro. It provides detailed analytics about the authors on your website. It allows you to track the performance of individual authors by showing you data such as pageviews, bounce rates, and more.
Tracking the performance of your blog author and content engagement can help you understand which posts are performing the best and which authors may need some help with their content.
In this knowledgebase article, we’ll show you how to enable Authors Tracking with Analytify.
Authors Tracking add-on in Analytify enables additional tracking of your author’s performances and analysis of user activity on your WordPress site, specifically focused on author-related metrics.
Multi-Author Blogging: If you run a multi-author blog, the Authors Addon is useful for tracking individual authors’ performance and their posts to improve your content strategy and engagement.
Note: We assume that you have already installed the Analytify Pro and add-ons. If not, check out our detailed guide on How to Install And Activate Analytify Pro?
First, download and install the Authors add-on to proceed with Authors Tracking in Analytify.
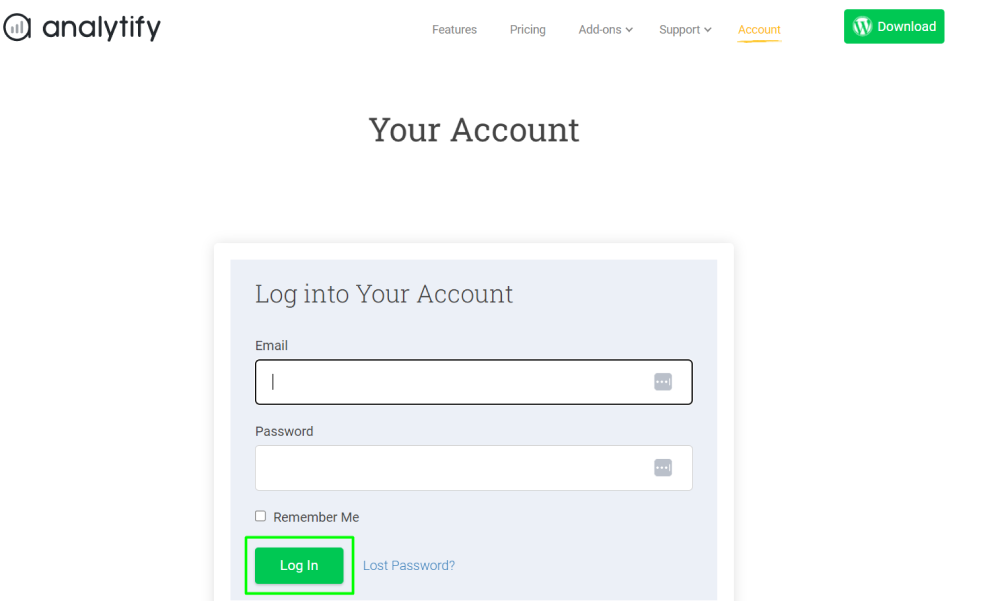
Log In to your Analytify Account using your Username and Password.
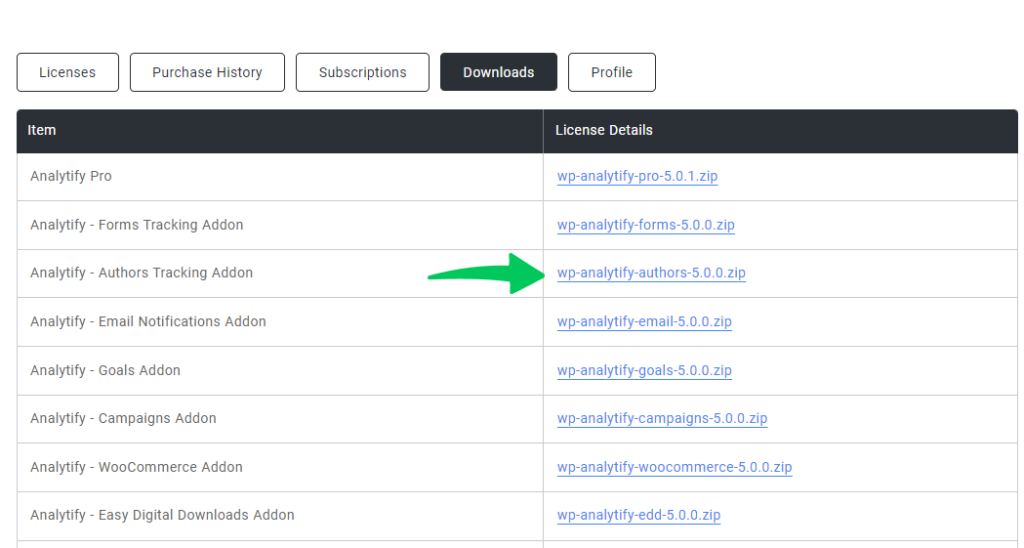
Next, navigate to the Downloads tab to download the .zip file of the Authors Tracking Addon.
Go to your WordPress admin dashboard, and navigate to the Plugins >> Add New. Next, click the Upload Plugin button at the top and Choose File. Then click to the Install Now button.

Once the installation is complete, click the Activate Plugin button.

On Activating, it appears in your Installed Plugins.

Now, you have successfully installed and activated Authors Tracking addon. It’s time to activate the license key.
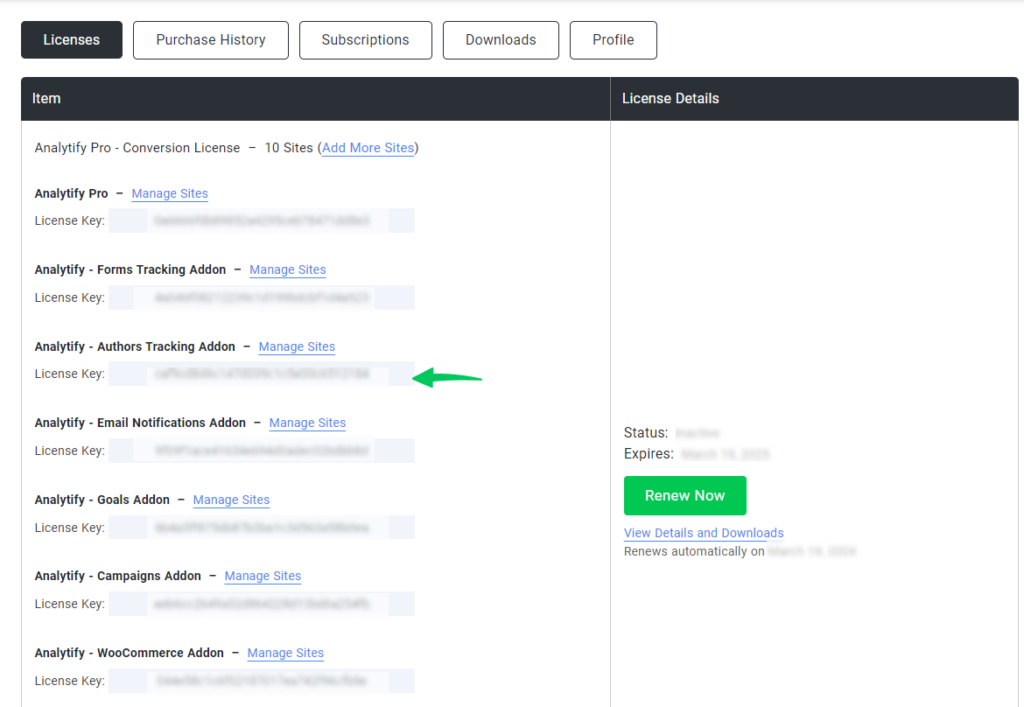
To activate the License key, go back to your Analytify Account and click on the Licenses Tab. Next, you need to copy the License key.
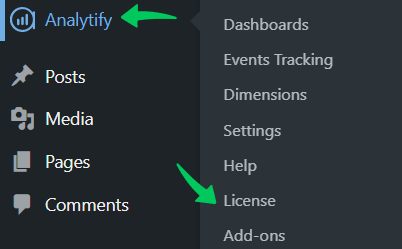
Now, navigate to Analytify >> License option inside your WordPress admin dashboard.
A new window will open with the License key field against Authors Tracking. All you need to do is paste the extracted License key from the Licenses Tab. After that, activate by clicking on the Activate License.

Once added, click on the Activate License button, and then you will get the success message.

Once the Authors Tracking add-on is installed and activated, it’s time to Set it up.
To setup Authors Dimension in Analytify, it is mandatory to activate the Custom Dimensions add-on. You can check our detailed guide on How to get started with Custom Dimensions.
To add the Authors Dimension in Analytify, navigate to Analytify >> Settings in your WordPress admin dashboard.
Then, head toward Tracking >> Custom Dimensions to Add Dimension in a new window.
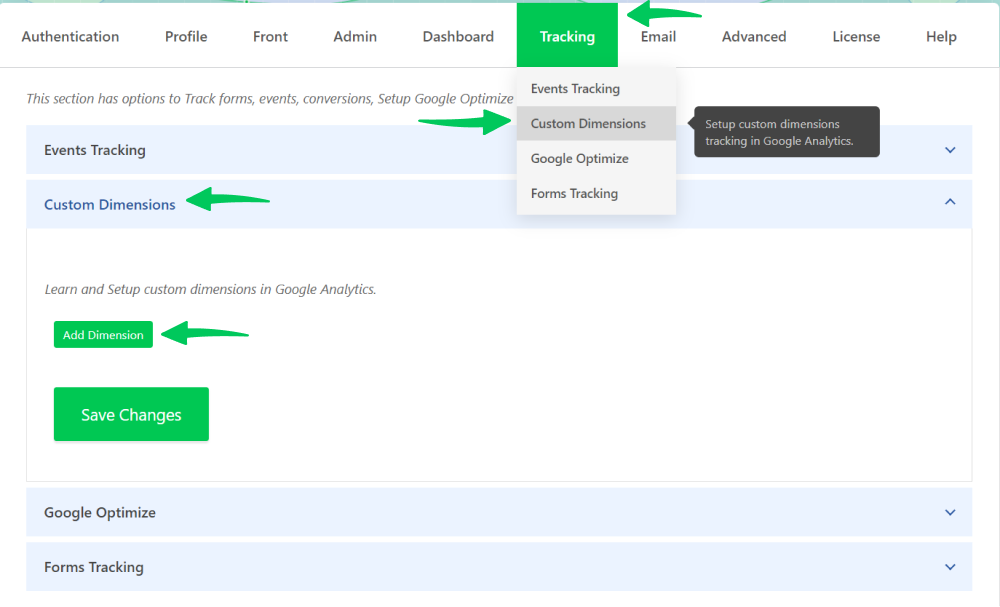
Once on this page, click Add Dimension to select the required Dimensions, such as Author. And then, Save Changes.
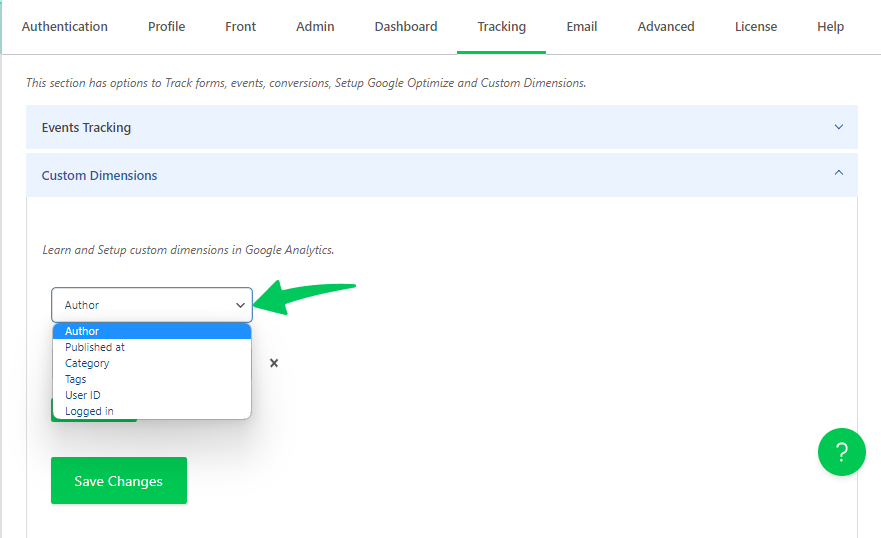
Dimensions are attributes of your data that can be used to segment and filter your analytics reports. By assigning dimension IDs to your data, you can organize it to make it easier to analyze and extract insights.
To add Dimensions ID (values), we must set them up in Google Analytics.
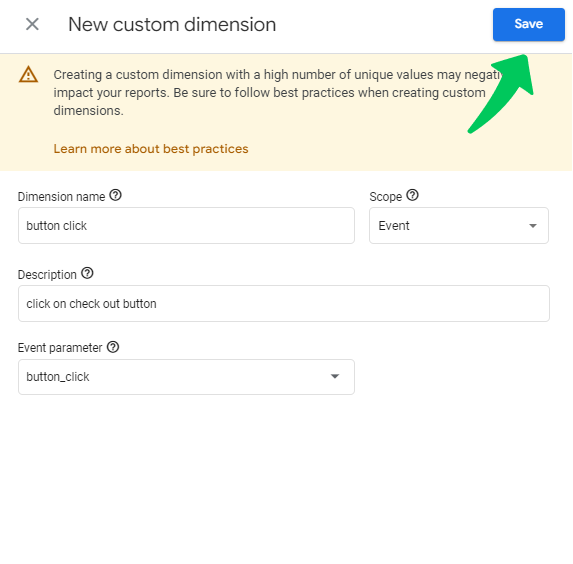
GA4 has a three-step process for setting up custom dimensions:
Note: Analytify comes with a number of pre-built custom dimensions, like Author, Form ID, Post Type, and Category, which you can turn on with one click. See the picture below.
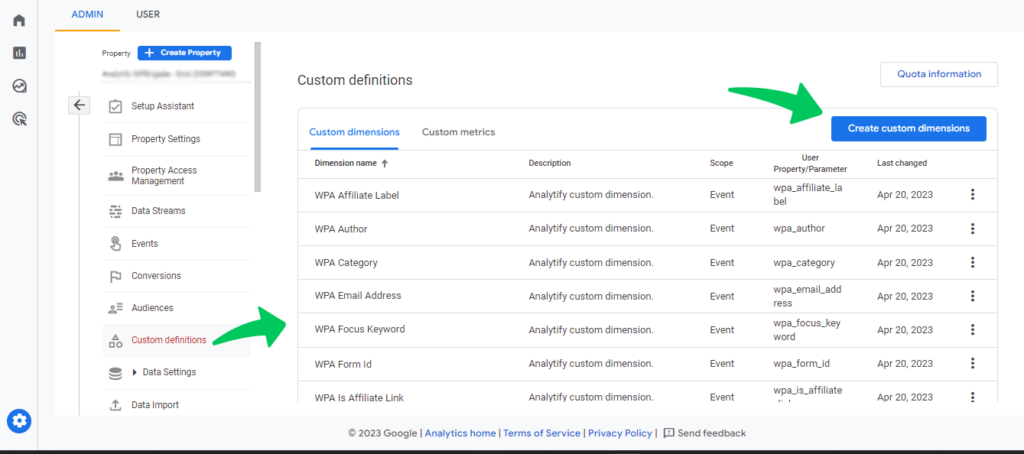
Otherwise, you can create a custom dimension yourself. By clicking on Create custom dimensions, you’ll be navigated to the new page to create dimensions.
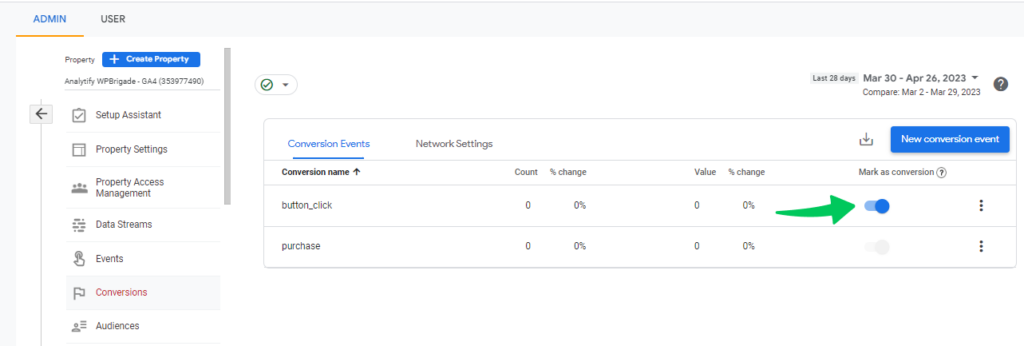
Keep in mind that it will take about 24 to 48 hours for this report to be set up and for data to start coming through. Once it’s set up, you’ll be able to see it on the Conversions page, where you can Mark it as a conversion, as shown in the picture below.
Note: When you set up a custom dimension to track the author of a content piece, the author information is included in the hit that is recorded when a user views that content.
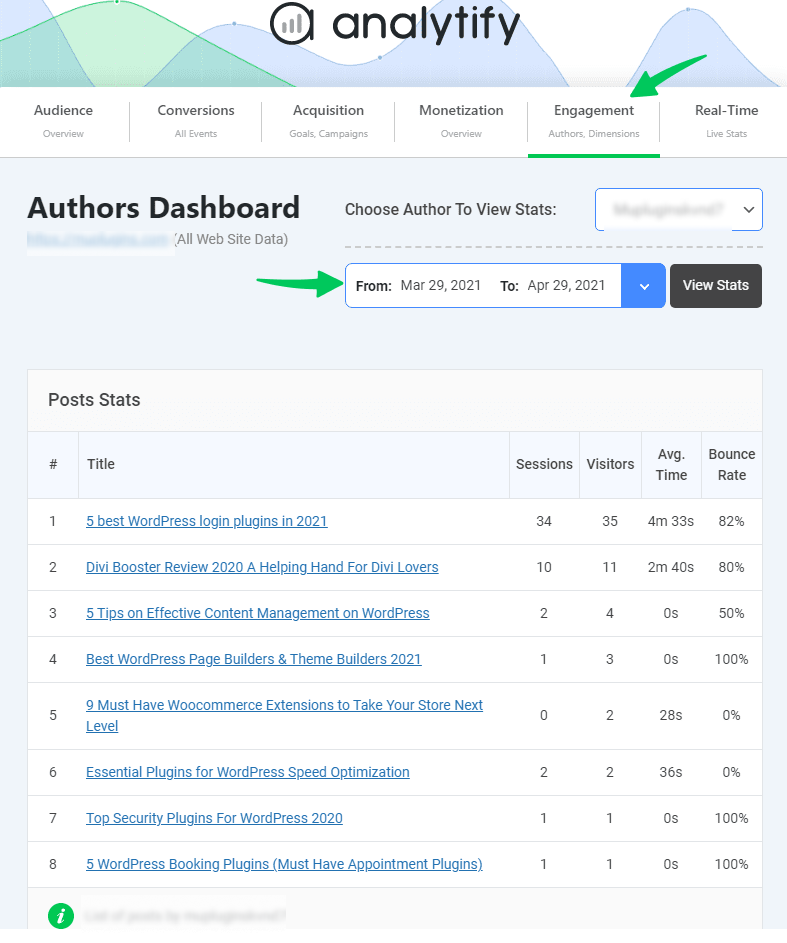
Once you have Installed and Activated the Authors Tracking addon, start tracking the performance of your authors. The data is displayed in an easy-to-read Authors Tracking Dashboard within the Analytify dashboard in two ways.
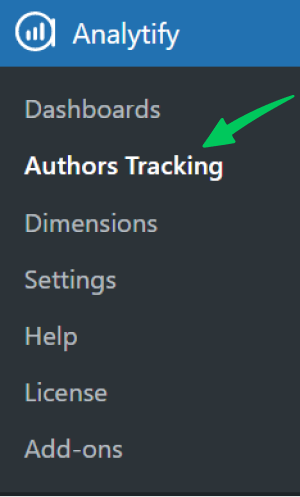
1- Hover to Analytify from the left side of the WordPress dashboard menu. And click Authors Tracking.
2- Navigate to Analytify >> Dashboards >> Engagement >> Authors
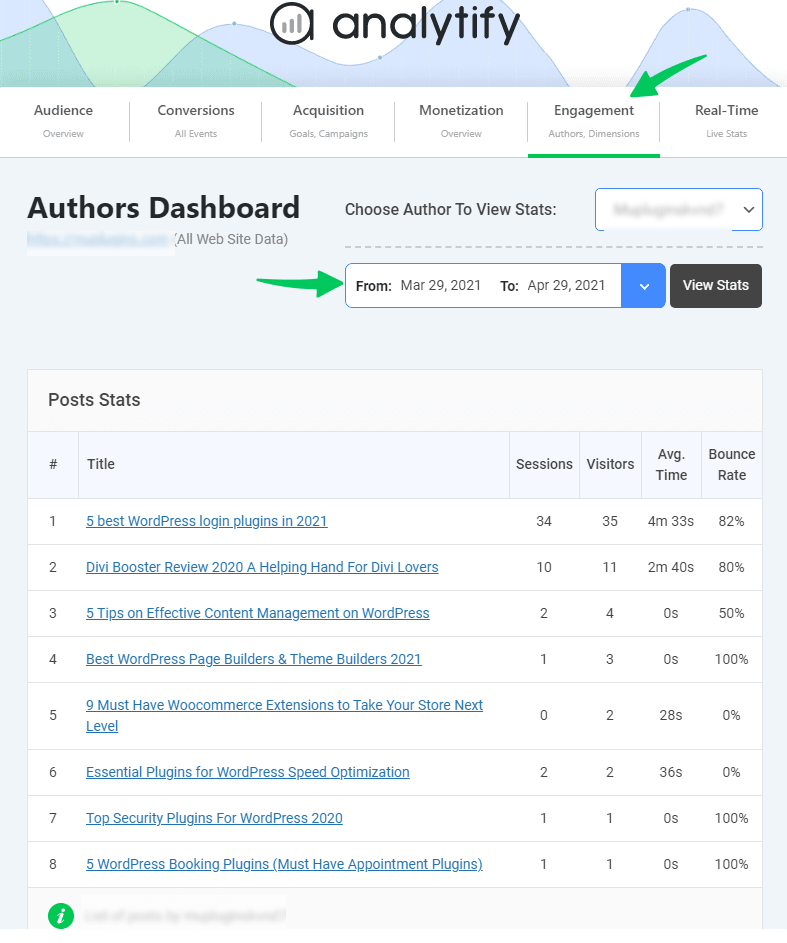
You can filter and sort the statistics in the Authors Dashboard to better understand how your authors perform in terms of stats. For example, use the date range in the top right area of the dashboard to filter data based on a certain date range.
You can get Authors’ performance insights from the Authors Tracking Add-on in GA4. You can find out how each author is doing on your website. This includes metrics like page views, average time on page, bounce rate, and conversions for each author’s content.
Use the information you’ve gathered to make smart choices about the content strategy for your website. For example, you can analyze which authors attract more traffic or maintain lower bounce rates. Consider promoting these authors or altering your content strategy to feature more high-traffic topics similar to theirs.
To sum up, the Authors Tracking Addon offers valuable insights into author performance and helps you make data-driven decisions to optimize your content strategy and engagement.
That’s all. You have successfully installed and enabled Authors Tracking in Analytify.
Are you interested in adjusting the Bounce Rate of your blog/website with Analytify? See our guide on How to Adjust the Bounce Rate with Analytify.
If you have any doubts or questions related to this matter, please don’t hesitate to contact our support team.